Lab Notes
(03/12/21)
This time the lab was solely focused on the last major piece of touring gear for the bike and modifying it to carry my tarp tent condo...
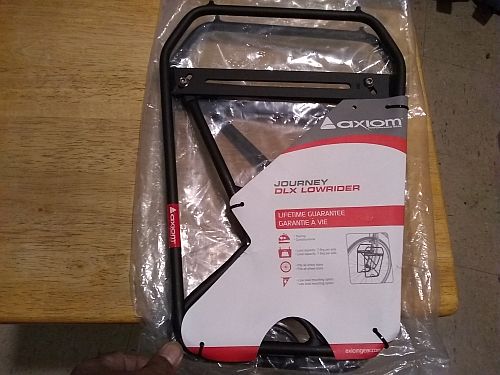
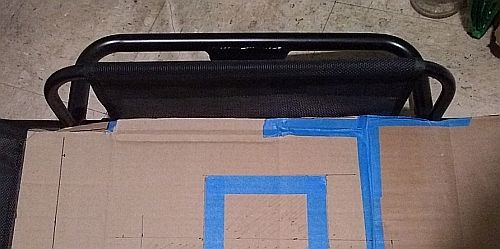
I went to the local Sports Basement store and found the only Axiom lowrider front rack in stock. Thumbs up: it was less than $30 with tax, much better than online price. Thumbs down: it was missing washers and one of the black oxide machine hex nuts...
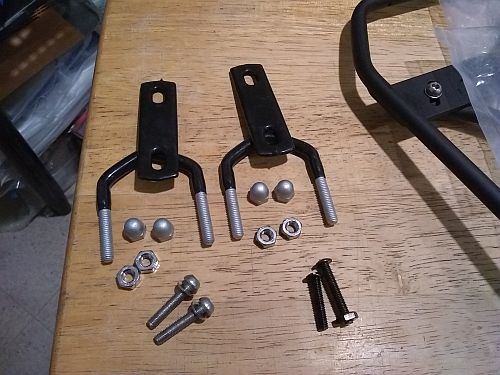
The missing hex nut goes with a 1" 10-32 Phillips head machine screw. The black oxide screw is a loose 10-32, the 4mm allen head screw is a tight 10-32. Luckily, they both screw into the front fork eyelet...
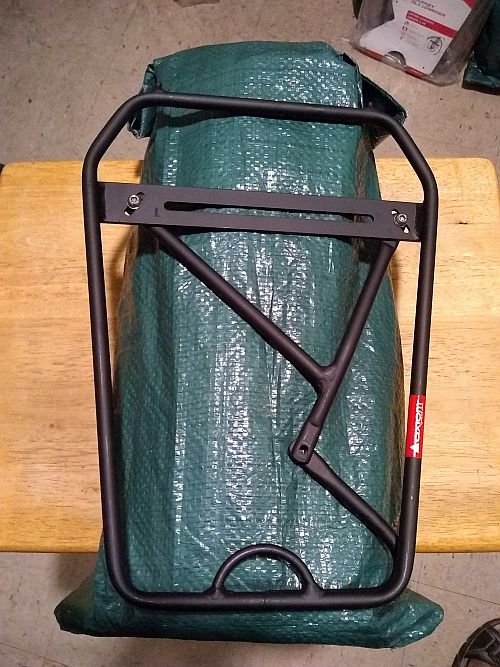
Sizing the rack and tarp bag...
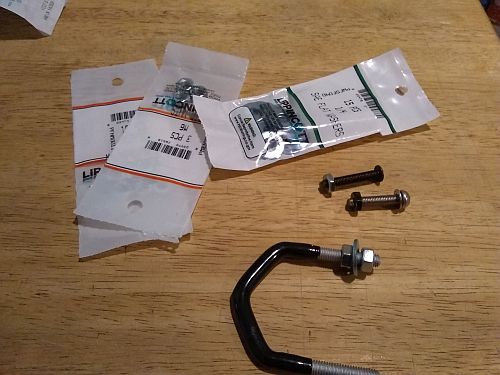
A Sat. trip to the local hardware store scored the 10-32 hex nuts, M6 nuts and 1/4 washers to ensure a snug fit for the rack on the forks...
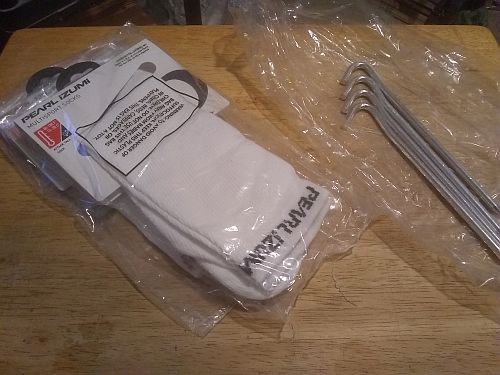
Meanwhile, my REI membership coupon allowed me to score extra tent stakes for use with my camp stove's windscreen, and some quick dry bike socks...
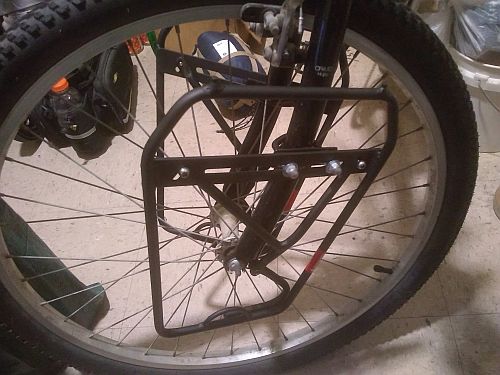
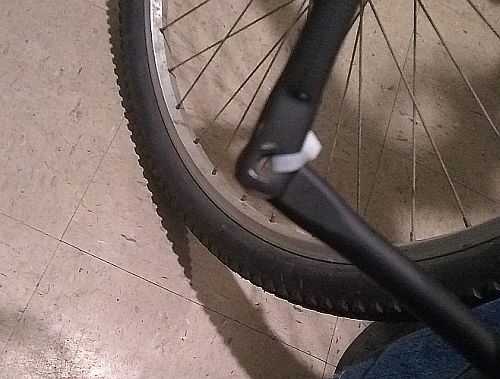
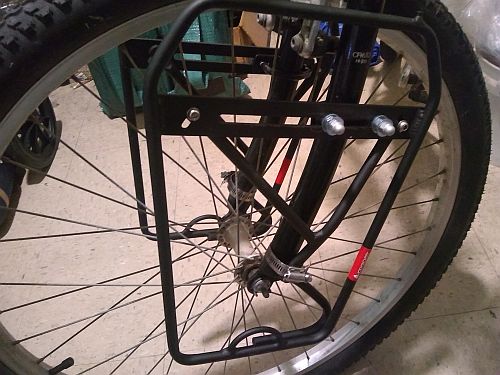
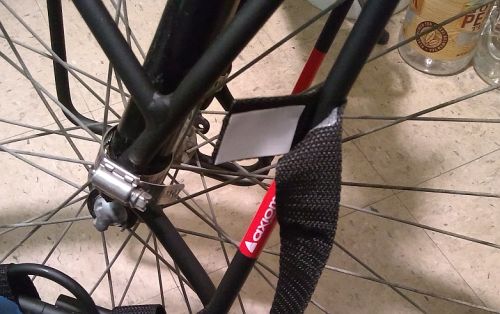
With much fiddling I managed to mount the racks onto the front fork, not easy because these particular legs don't taper...
I don't like the way the rack sides splay out, all because the bottom mount point screws into the fender eyelet. More modification is needed...
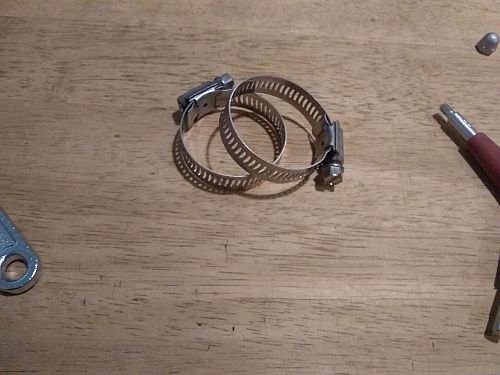
A Sun. hardware store run scored a pair of 1/2" wide 1 3/4" dia. hose clamps to firmly mount the racks to the fork legs...
The eyelet mounts are separate, so zip ties lock them together...
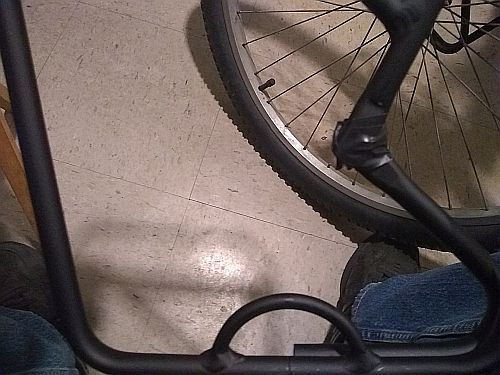
Electrical tape for padding...
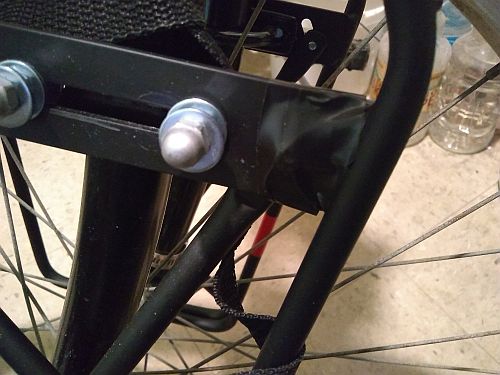
Once the hose clamp area is wrapped with more electrical tape, the top bracket is set, secured and bolted down. Extra M6 nuts and washers were still needed before the acorn nuts were added...

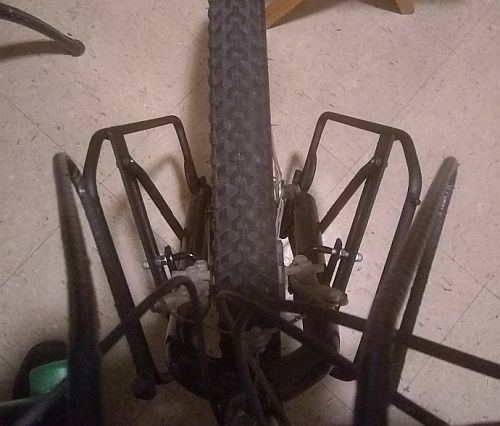
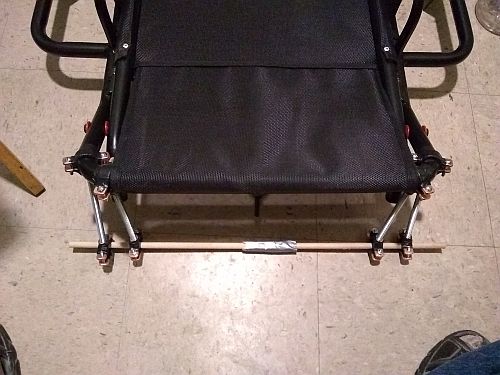
The rack placement is much better now from birds-eye view; the handlebar harness rack looks more askew than it actually is...
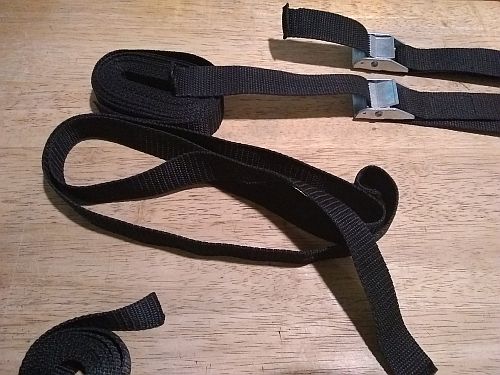
The leftover strap material for the rack baskets...

I finished reinforcing the carry straps for the camo tarp bags...
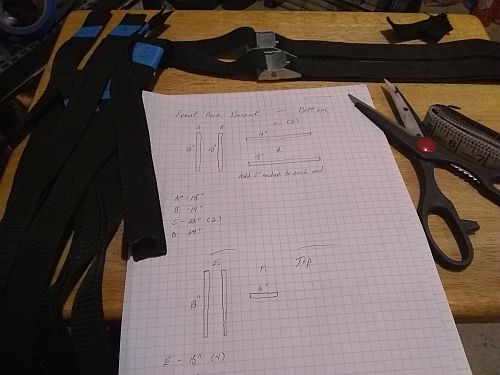
After measuring and cutting, there was just enough material for the two baskets with tie downs...
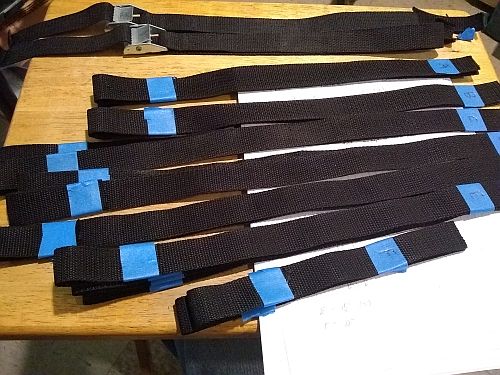
The different sections sorted and labeled...
Without heavy duty sewing gear, the carpet tape-Gorilla tape combo will do for now. Zip ties and more tape can always be added later...
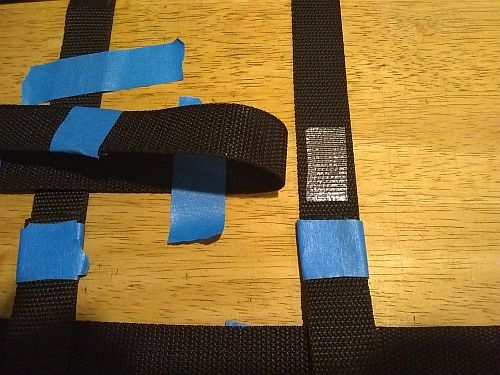
The left hand rack basket with the end loops dry fitted with painters tape, ready to go onto the rack...
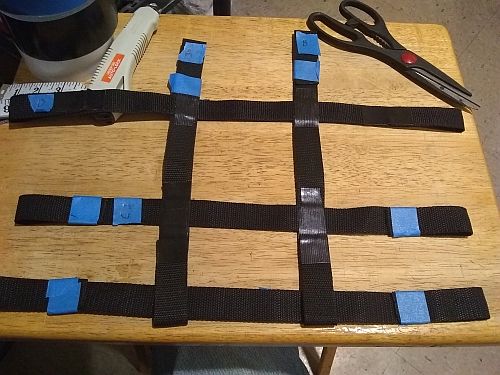
After a dry fit, permanent mounting starts with carpet taping the loops to give the basket structure...
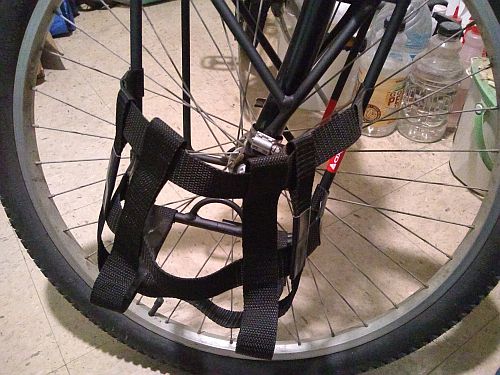
The outsides of the loops are reinforced with Gorilla tape, finishing one basket...
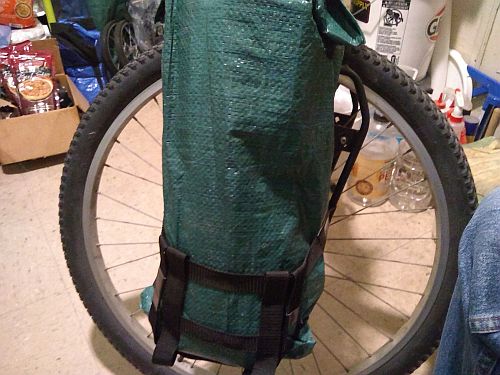
The tarp bag sits almost snug, but the planned top straps are too short to reach the basket...

With the lateral compression strap added, weight stress is taken off the basket, letting it function as a base...
The contact points for the lateral strap are wrapped with electrical tape, then the strap is zip tied...
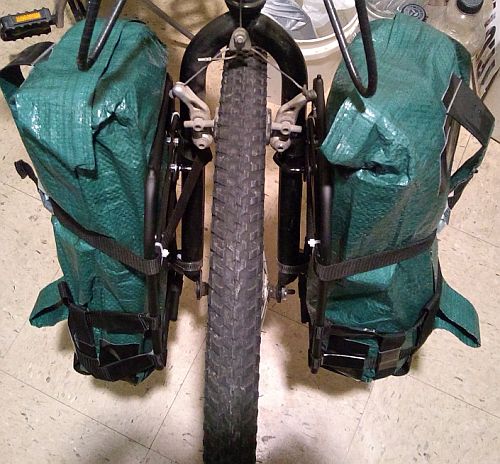
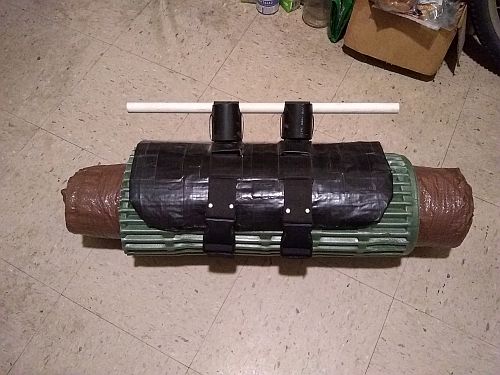
The front rack with tarp tent condo loaded. There's no noticeable effect on handling, but a shakedown road test with the bikepacking gear is next...
(03/29/21)
Following Pres. Biden's request to use my stack of patriotic mad money to help stimulate the economy, I damn near wrapped up my shopping list of essential cycling gear for going walkabout...
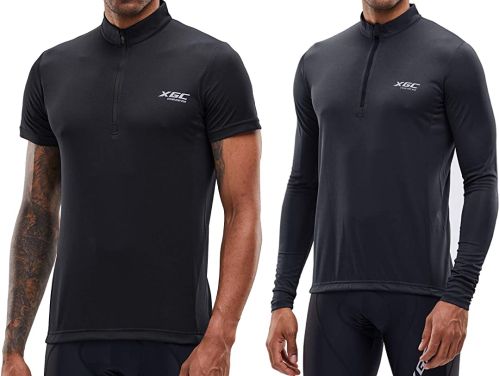
Matching long and short sleeved bike jerseys closes out my cycling clothes list...
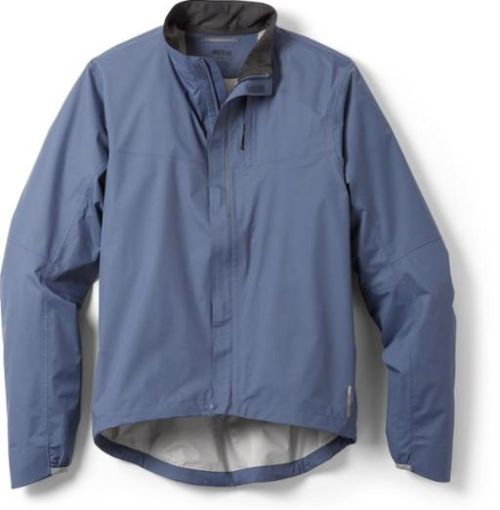
REI Cycling Rain Jacket...
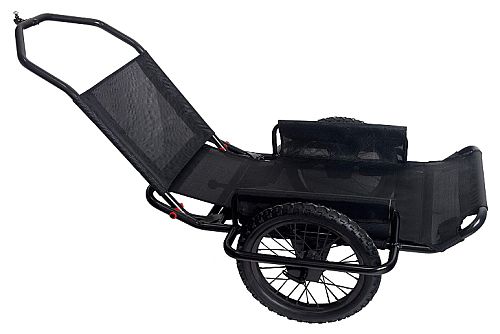
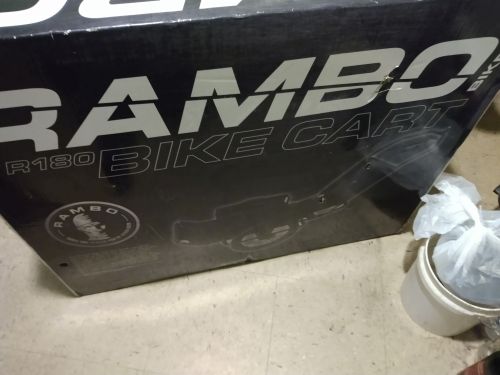
Rambo R180 Aluminum Bike/Hand Cart, so far my only luxury purchase. The hitch works with a rear rack, and the cargo area is big enough to carry everything on my relatively short cargo list, plus it doesn't scream 'homeless' like the shopping cart does...
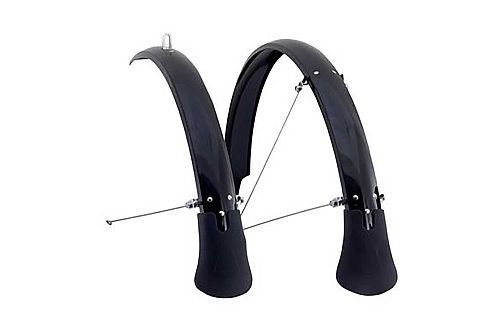
Found my fenders - Elmer 26, made for mountain bikes with 26" wheels. Half off, but they didn't include screws for the eyelets...
A windy, sunny Tue. road test of the loaded front rack, along with the installed fenders...
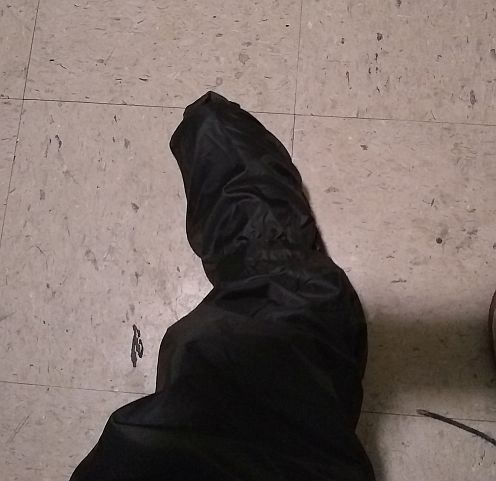
The cycling rain pants from the Decathlon store comes with shoe covers...
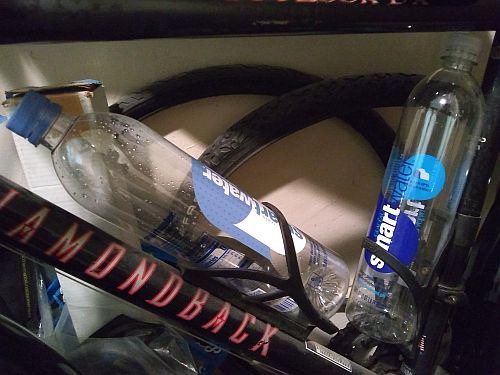
I swapped out the three 591 ml Gatorade bottles for 1 L SmartWater bottles, almost doubling my bike water capacity...

The all-important Nalgene pee bottle completes my camp toilet...
An aluminum pot holder closes out my cooking gear...
While changing the brake cables my regular wirecutters proved insufficient, so a second trip to Decathlon scored a proper cable and housing cutter and an extra front cable for almost half the cost of a bike store cutter...
While waiting for the new cargo trailer I made a handle/shoulder strap for the harness from leftover strap...
The rest of the cycling clothes, plus a sleeping bag liner, all packed down...
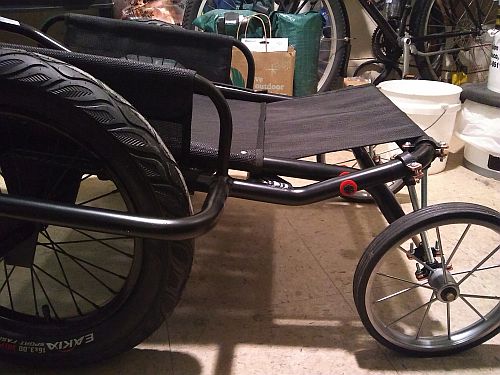
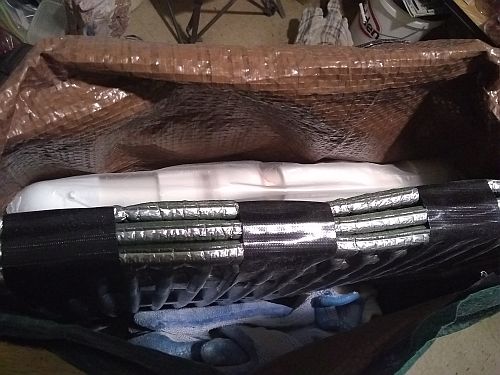
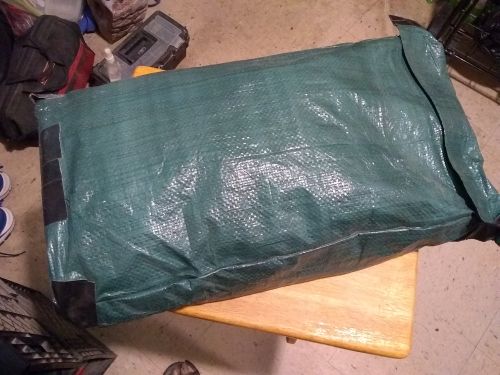
Many days late, the cargo trailer arrived. I immediately unboxed it, checking for anything bent, broken, or missing...
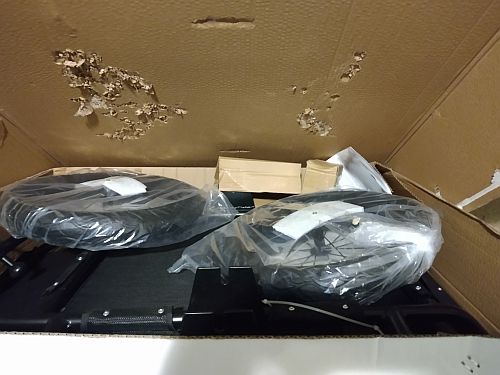
First glance...
The frame looks properly aligned...
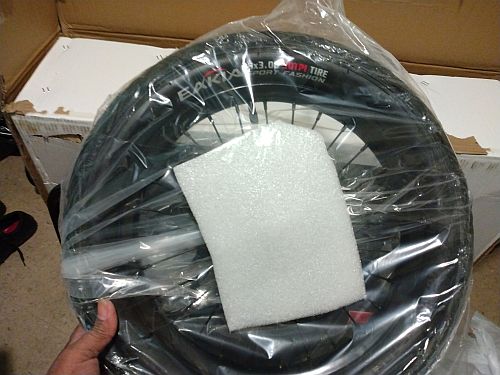
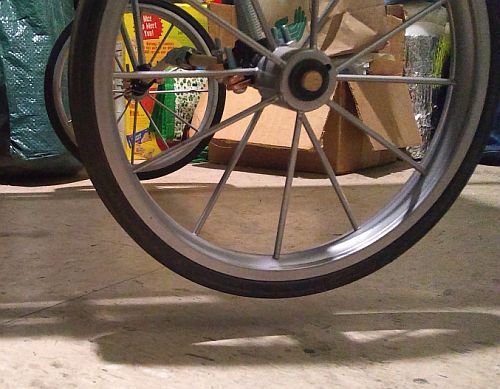
Just as other purchasers found, the tires aren't knobby like on the sales page, instead cheap city street tires that can be replaced with gravel/offroad models. The 16" wheels take 3" tires, enough clearance for frontcountry riding...
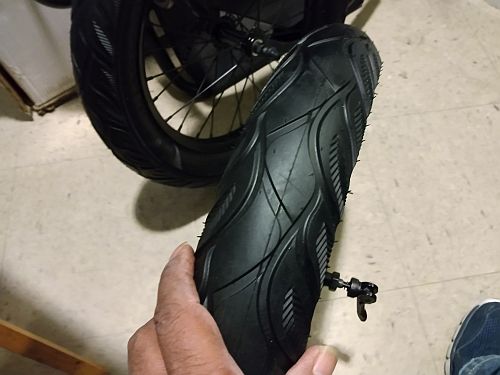
The tires barely function as spares, but the wheels are true...
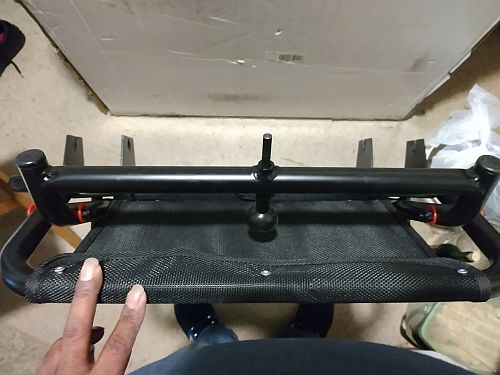
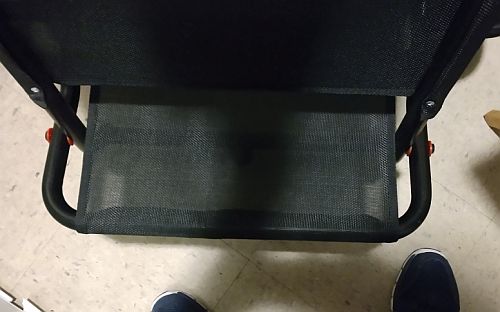
The cargo area is split between a foot of upper space and 3 feet lower space...
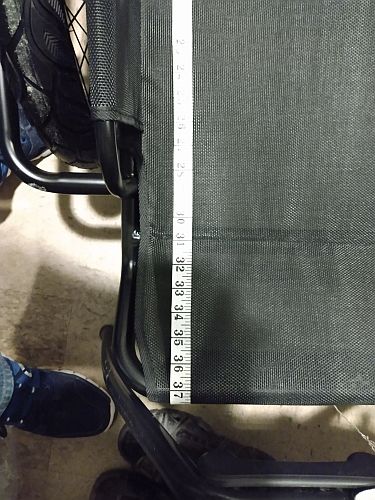
The back end is 6" tilted up..
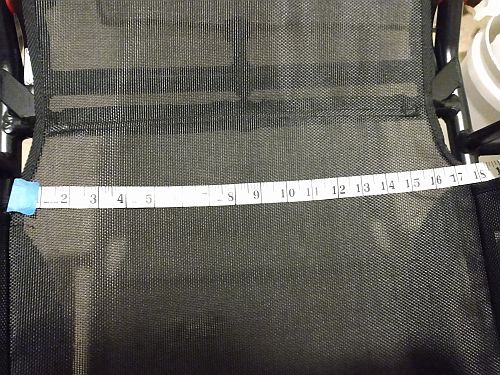
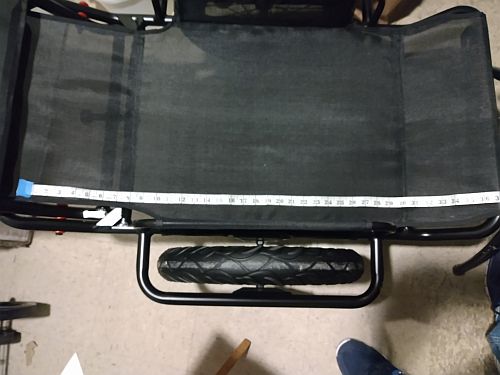
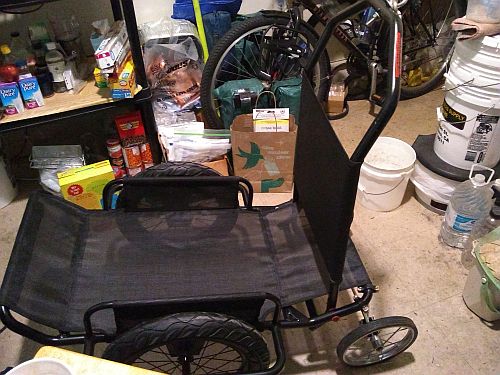
Almost 18" across. The owner's manual says the cart's capacity is 70 lbs. the cart itself says 300, and the ad copy says 150...
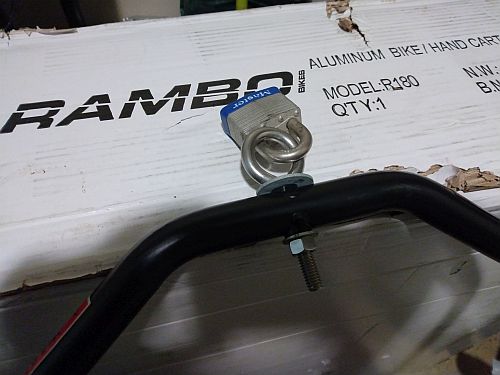
The hole for the hitch hardware is a perfect fit for my eye bolt. Now I can add threadlock, maybe a nylon locknut for overkill...
For hand cart use, I'm thinking of mountig the existing shopping cart axle and 10" wheels to the front end of the lower frame...
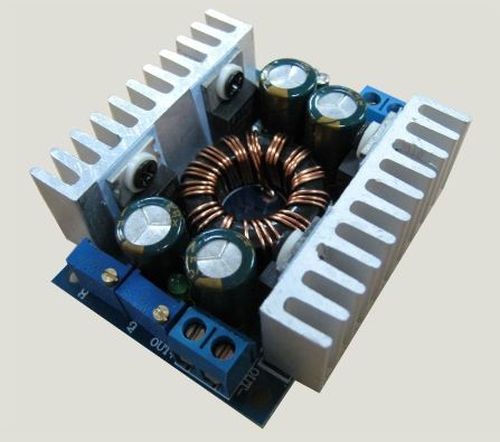
Finally found a backup 100W Boost-Buck Converter, but now they're only made and sold in China...
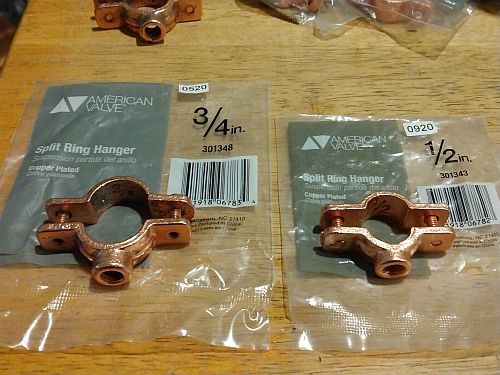
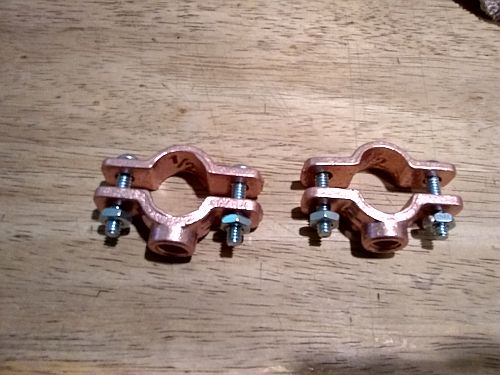
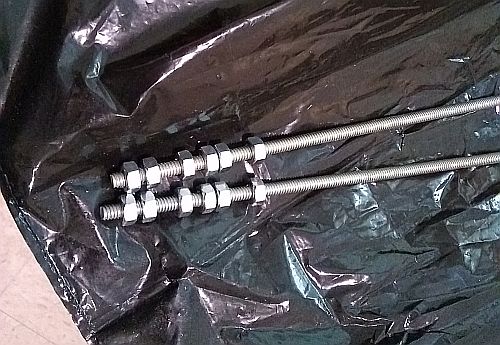
To mount the axle I settled on split ring pipe hangers - 2 pairs on the right, 2 on the left. The other components, 3/8 Inch threaded rods, have to be ordered because nobody sells 6 Inch parts, only 1 foot minimum...

A reference shot of a top bracket on the frame. The standoff screws could be a bit longer...
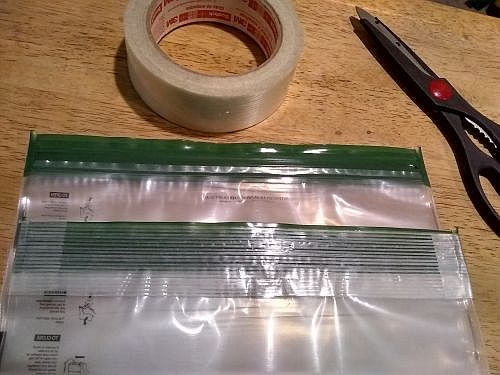
Following a backpacker tip, I reinforced the closures on my odor-proof OpSak bags with packing tape to prevent splitting...
I changed the pipe hanger standoff screws to 1" 10-24 machine screws with hex nuts. Checked to make sure there's no galvanic reaction between copper plating and stainless steel...
(04/17/21)
While monitoring my two week stretch as the COVID vaccine immunity kicked in, I continued the final stimulus-fueled acquisition of bikepacking gear. Only a few items remain, putting me much closer to pre-launch stage as I get in more hill climbing exercise on the bike...

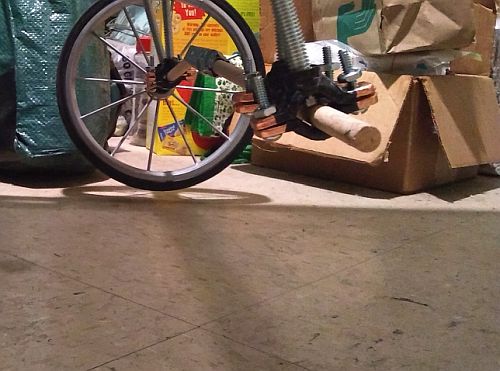
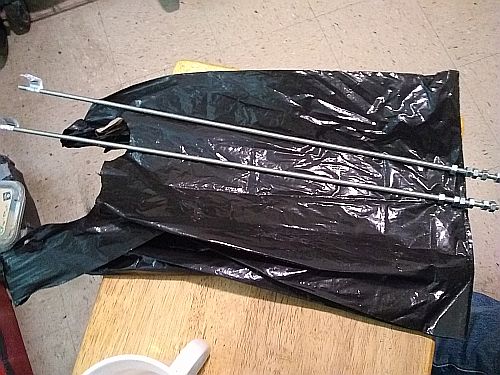
The 3/8" threaded rods and pipe hangers in an initial mockup axle mount using 3/8" dowel rods. Fine tuning will determine the best arrangement of parts, but this will work...
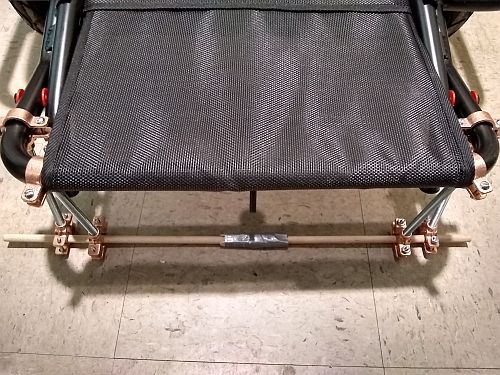
There is a chance of galvanic reaction between 6061 aluminum with the copper plating and stainless steel if they get wet, so electrical tape insulation around contact points (and to cover the pipe hangers and rods so they don't stick out so much) will be added when it's time to permanently mount the axle...

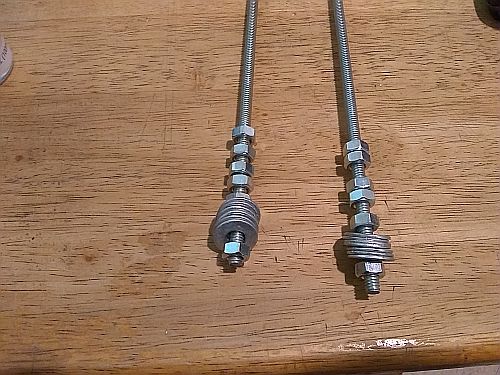
First fine tuning has the side axle mounts closer up to clear the upper frame in its normal deployed position...
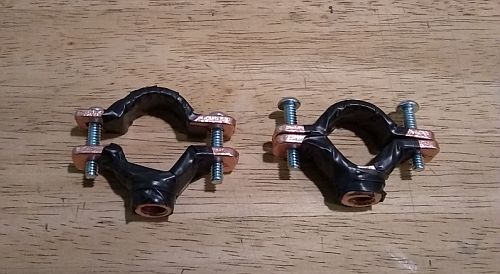
Ok, axle mounts taped...
The top mounts are set on the cart frame, less conspicuous now. The dowel rod mockup actually matches the steel axle length, which places the 10" wheels in line with the trailer wheels...
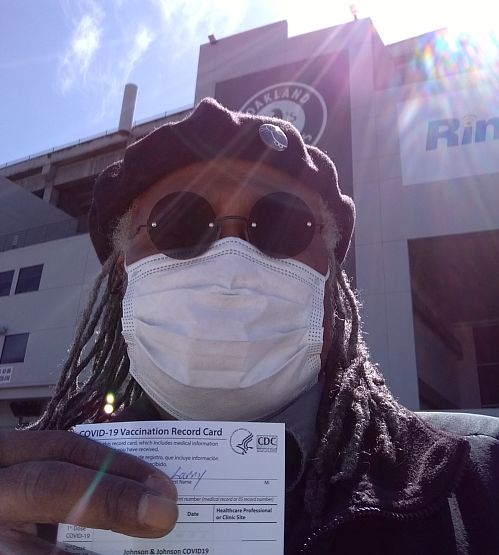
Got my J&J one and done vaccine shot on Good Friday...

The generic Tylenol I've been taking each day for the vaccine side effects...

Digital nomad gear - Moto G Play...
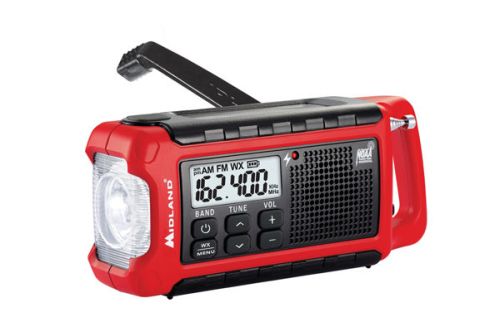
Digital nomad gear - Midland ER210 Emergency Weather Radio...
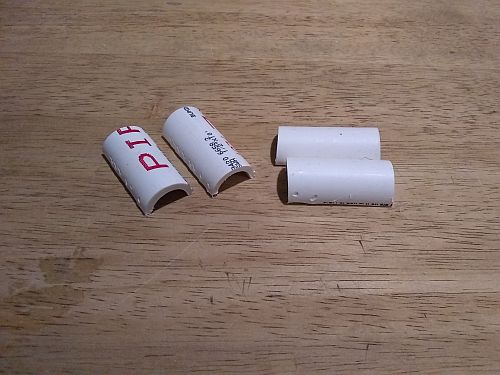
1.5" split sections of 0.5" pvc pipe for a top tube bag...
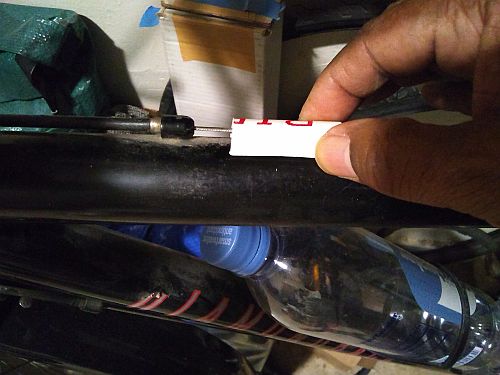
Just the size to protect the brake cable...
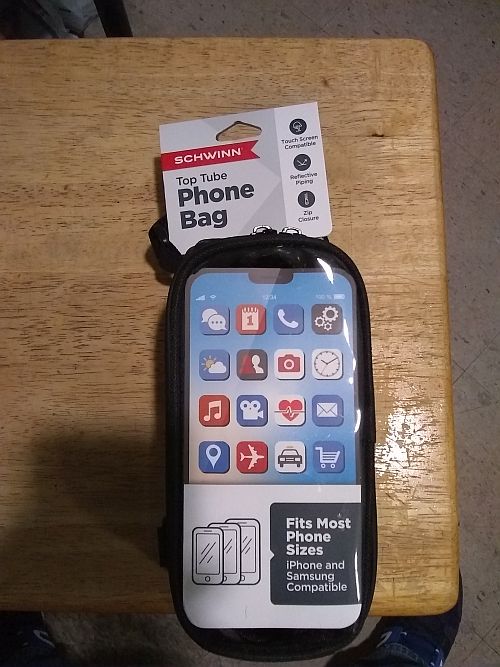
The just under $20 front phone bag from Target, just big enough for the new phone...
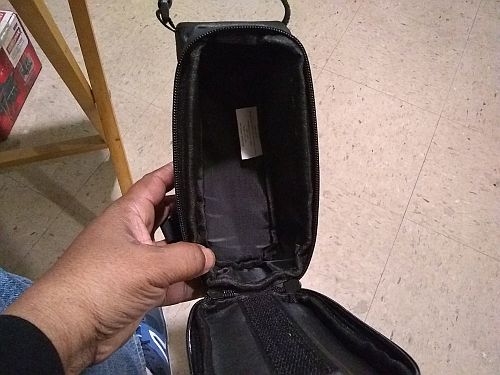
There's barely room for more than a few snacks along with wallet and keys...
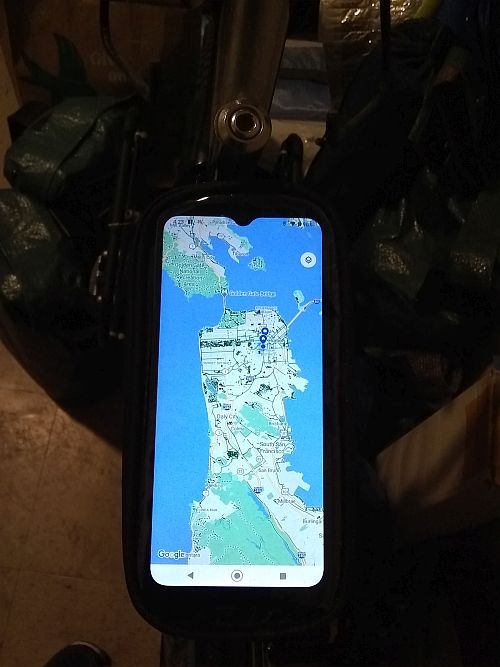
The phone pocket exactly fits the Moto G Play, and does allow touchscreen use...
A bit of velcro tape holds the cable brace in place...
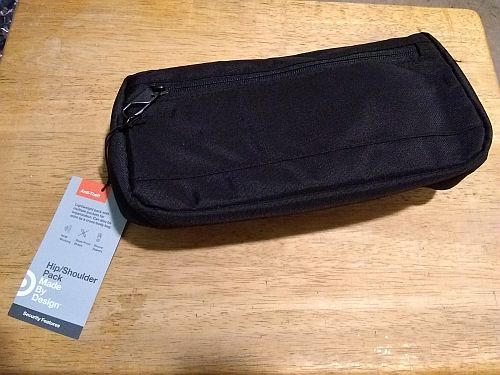
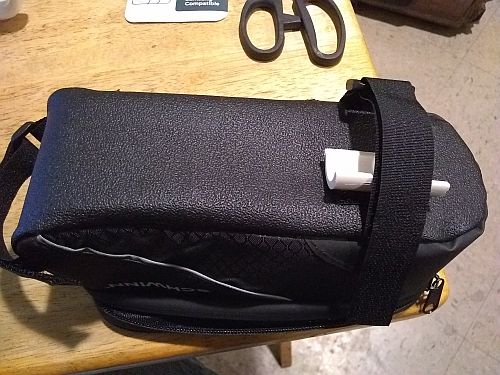
The hip bag for my patch kit tools...
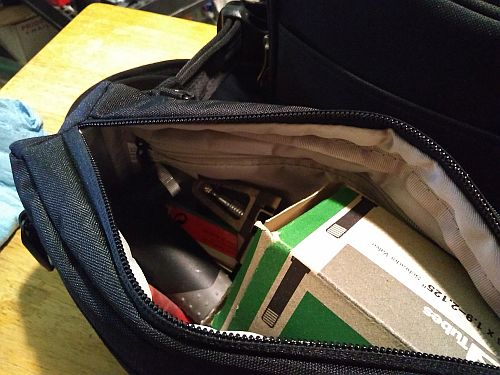
Yep, everything fits for fixing a flat on the road...
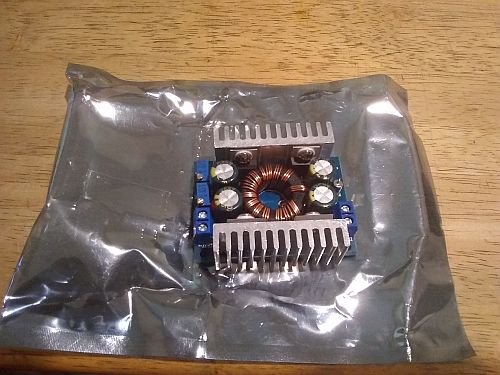
My backup 100W DC-DC Boost Buck Converter for the mobile power plant...
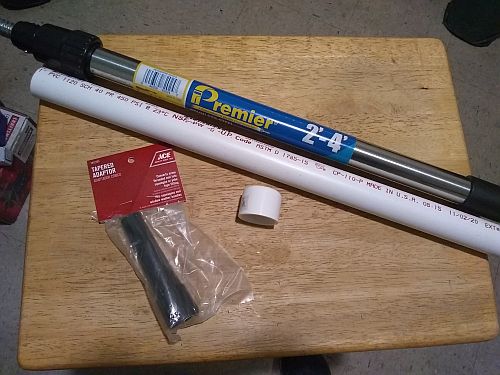
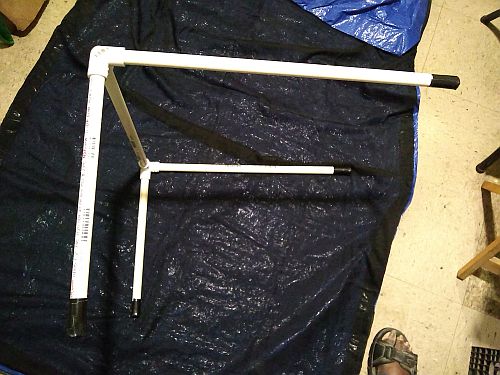
My non-trailer bikepacking-only tent pole components - 2-4 ft. extension pole, 2 ft. length of 1 in. pvc pipe, screw on adapter, 1 in. pvc slip cap...
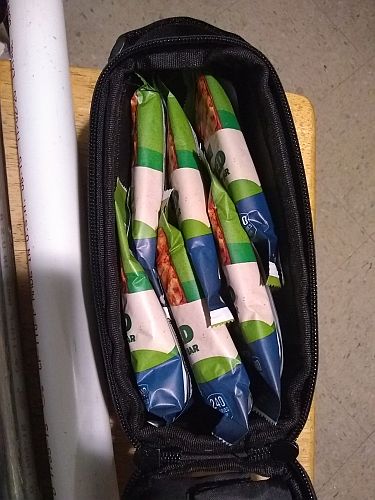
The top bag will hold 4-6 granola/energy bars, depending on type According to the bike touring rule of thumb (eat 20g of carbs for every 30 min riding), these bars are only good for 3 hrs of cycling...
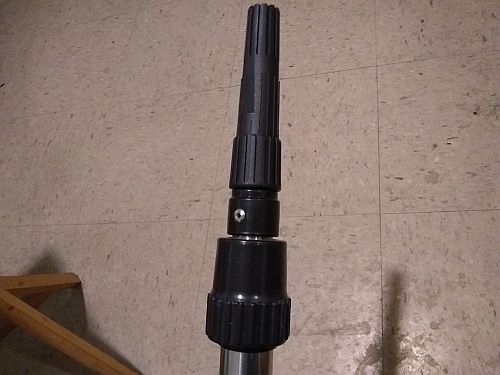
Adapter screwed in allows the pole to extend to 6 feet like the 3-6 ft. pole...
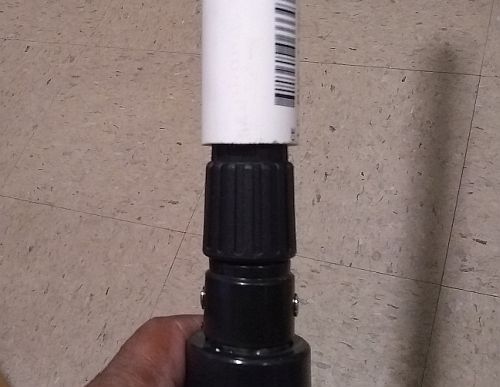
The pvc pipe dry fit to the adapter...
The broken down bikepacking-only pole will ride in the handlebar harness...
The pvc slip cap with a 1/4" bolt for the tarp tent pole...
The scrap of bivy tarp and a little velcro tape was enough to make a skinny bag for the bike-only pole...
A secured and waterproof pole bag for the harness...
(05/01/21)
With my mobile power grid situation in pretty good shape for walkabout, I'll still depend on the state's power infrastructure while touring, and in a few different ways the California grid is just as shaky as Texas when it's weak points are stressed, so I'm starting a short series on the challenges that could knock out internet, communications and navigation, no matter how charged my batteries are.
Meanwhile, I worked out the specs for a custom cargo box frame for the new cargo trailer...
I mounted the mockup axle and 9" granny cart wheels to the new cargo trailer for a rough view of the setup. The downward forward pitch is encouraging...
When hitched to the bike there's 1 to 2" of wheel clearance - no issue if I'm on level road or pavement, but even in rough ground, there would only be an issue if I rolled directly over an obstacle for the three wheel tracks...
With the front wheels off there's 6" of axle clearance - just seeing what that looks like...
The trailer in hand cart mode. The handle is waist-high, it's easy to lift the front end and pivot for sharp turns, and it's roughly the same size as a regular grocery store shopping cart, so no problem rolling through an aisle...
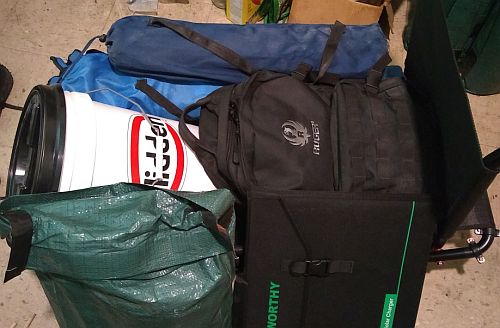
I piled on the camp table and chair, battery box, food canister and camp bag to see a rough placement of cargo...
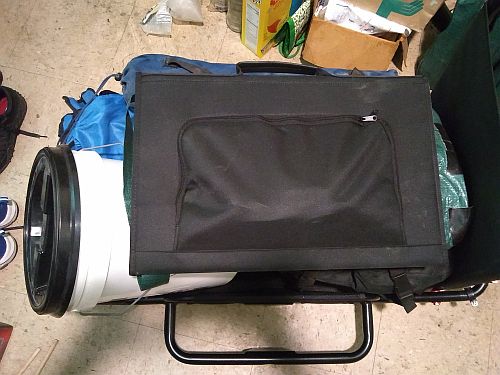
The studio bag and solar panel on top gives a rough idea of how high the cargo space should go...
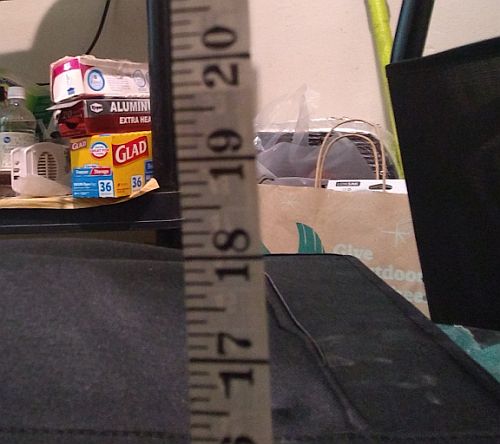
To accomodate the extra gear for the trailer (water, power plant, extra tools), a DIY cargo bag/box will need to be 20" high at minimum...
Digital nomad gear - Midland ER210 Emergency Weather Radio...
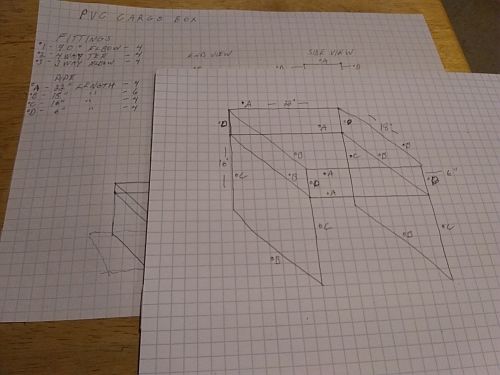
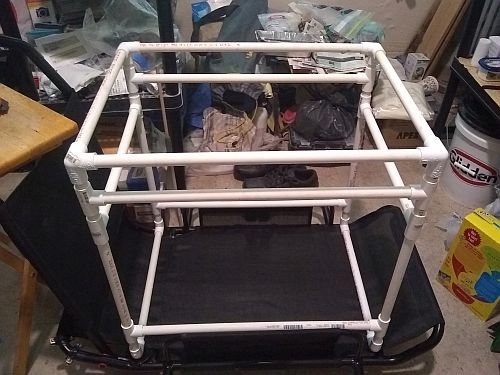
A rough schematic of the pvc frame for my custom cargo box. The overall dimensions are 24" L x 18" W x 26" H. The upper section is a rack with a 6" gap that can hold the camp table, chair and the big tent pole. The solar panel can be attached to the top rail...
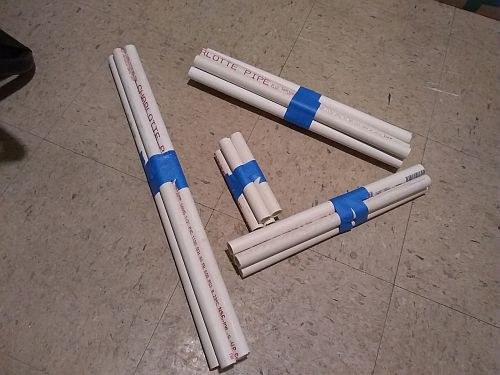
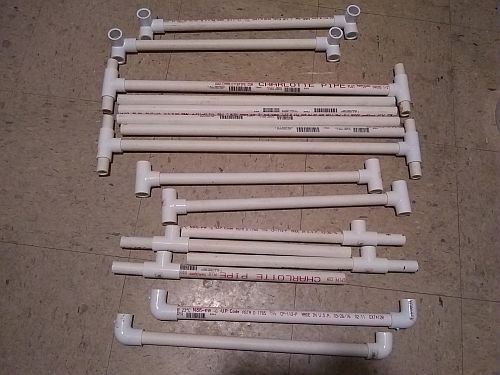
The last of the 1/2" pvc pipe from my 'Dexter Dust Room' is cut and only needs the pipe fittings to complete...
(05/16/21)
The Grid Theory segment took a quick look at the solar and wind sector of the California grid and the inherent weakpoint of the batteries that have to back up that part of the system.
Meanwhile in the lab, I've wrapped up for now the pvc cargo box frame. Minus a few other odds and ends - like solid tires for the trailer - I'm about done with major gear for my walkabout and can finally enter the pre-launch phase...
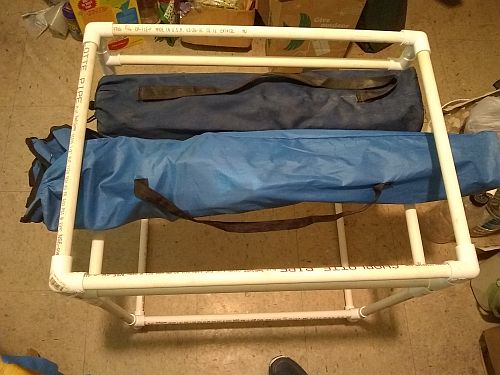
Checking the base of the cargo box frame confirms that the lower rails can be zip-tied to the cart side rails...
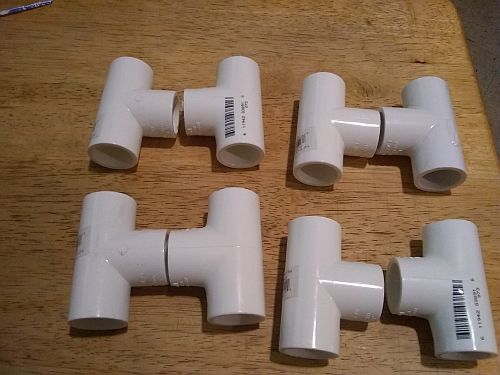
A run to two hardware stores scored the 8 additional regular tees to finish the frame...
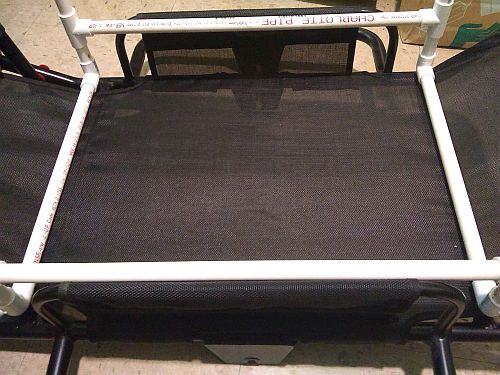
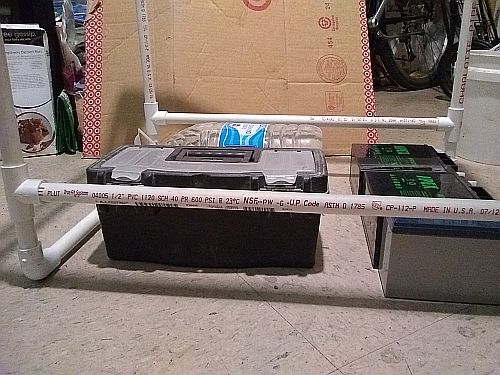
I dry-fit the pieces and checked the upper rack with the camp chair and a mockup camp table...
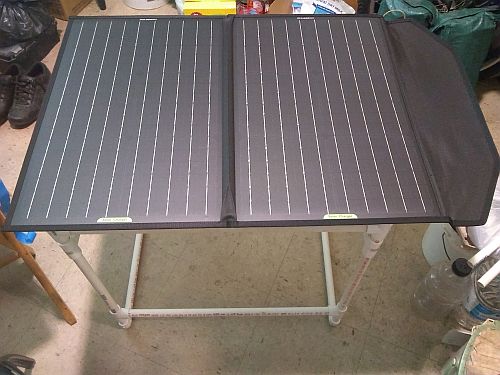
The solar panel easily rests on the top rails...
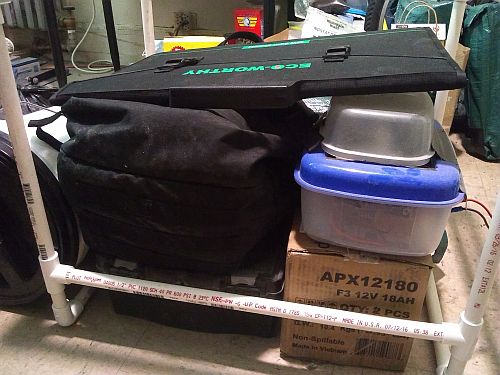
The hold accomodates the toolbox, batteries, power plant, camp bag, studio bag and closed solar panel, with the food canister attached to the back. I can drop the rack a couple inches and still have room...

Top down view of the hold shows the extra storage that can be trimmed...
The frame with the hold and the rack trimmed down still has lots of cargo space...
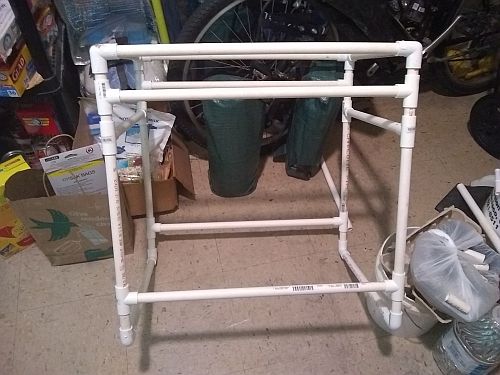
Side view. A coroplast panel under the bottom can take some strain off the cart's mesh base and serve as a splash guard, another panel across the rack makes it a storage shelf...
The frame pieces laid out with the preferred end fittings for mockup assembly and for when the ends are cemented...
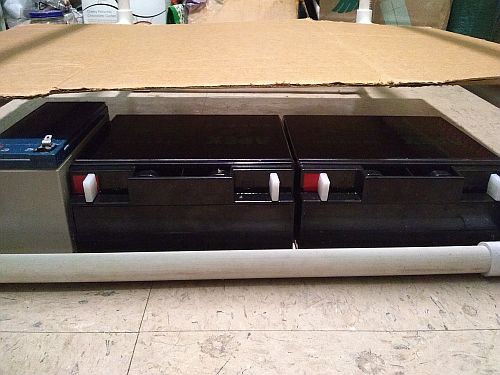
After uploading the show, I checked to see whether I could position the batteries in the hold without using a battery box. There's 5 1/2 " of space under the lower side rail, and there's enough room for all 3 batteries to evenly distribute the heaviest cargo items. A third shelf allows for more balanced distribution of gear...
(05/31/21)
The Grid Theory segment takes a final look at the California grid and who manages the last mile of power delivey to consumers - the utility companies, and the community choice aggregators looking to replace them...
Meanwhile in the lab, I finished the R&D on the cargo frame, taking it from a pvc mockup to a practical metal and wood design...
Another view with the addition of the toolbox and the gallon water bottle in the bottom space. Whatever I use as a shelf has to be strong enough not to sag. I plan to put the bottle in a 5 liter dry bag...

An example of a threaded rod shelf. Image - Easy DIY Scrap Wood Threaded Rod Table, YouTube...
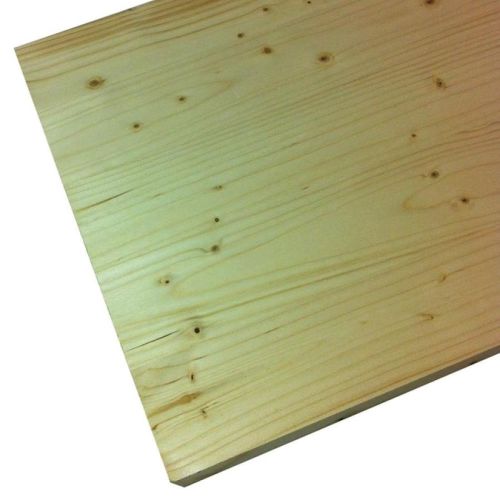
Instead of dealing with plywood, pre-cut hardwood shelves like this 1 inch spruce pine panel from Lowe's could handle whatever stone I'd want to carry...
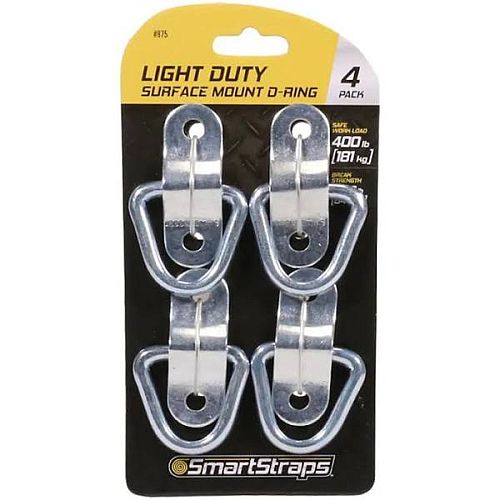
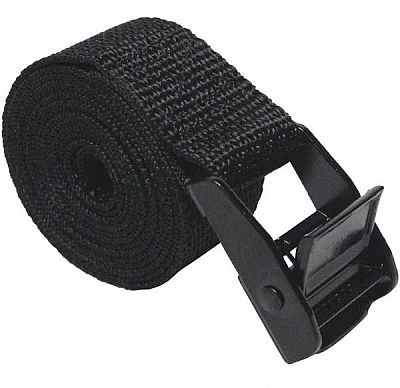
An example of cargo tie downs for a small to medium stone - Light Duty Strap Anchors from Lowe's can handle up to 400 lb loads...

Design detail for the cargo frame shelves with rod hole corner placement and middle shelf frame ties...

Design detail for middle shelf stone space (10x10x10 inches with strap anchor placement), and bottom shelf battery space (18x6 inches with strap anchor placement)...
(06/14/21)
This episode I ease into the Pre-Launch phase of my west coast walkabout by considering the eventual upgrade of my bike. If I had to, I could always get another vintage mountain bike, but for a new bike I won't be looking at Ebikes, for a few practical reasons...
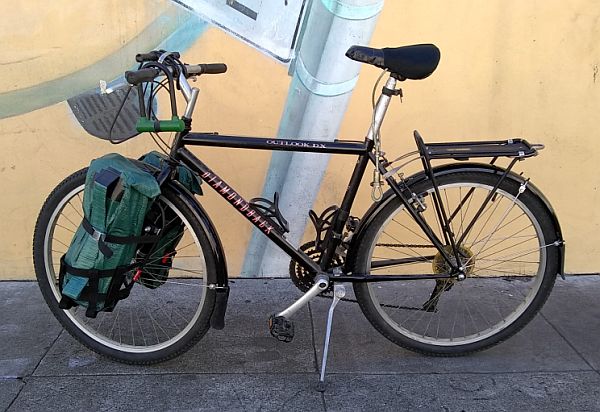
Another look at my current horse - a 1978-79 Diamondback Outlook, an early model mountain bike that actually serves as a good long distance touring bike, rebuilt in 2016 by the San Francisco Bike Coalition and donated to SRO residents...
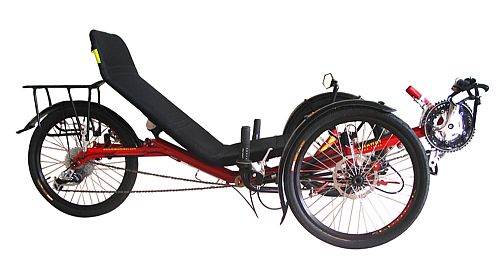
If my horse can hold out for a couple years, I'd like to try something something completely different - a recumbent, namely a tadpole trike, a model seemingly geared to touring seniors. Here's a short list of models under $2500 with available rear pannier racks (prices as of Spring 2021 listed on bike manufacturers websites):
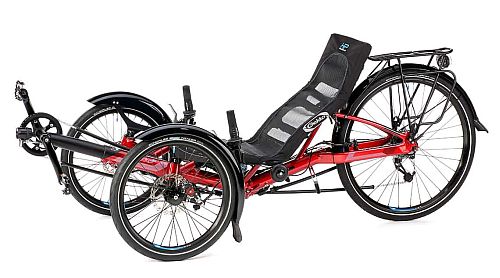
HP Velotechnik Gekko 26 Sport Trike - $1990...
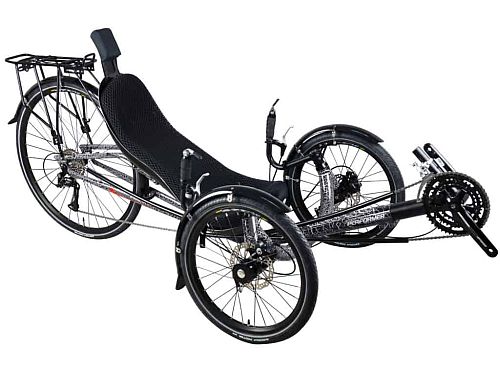
Performer JC-70 Recumbent Trike - $2175 (free headrest & rear rack)...
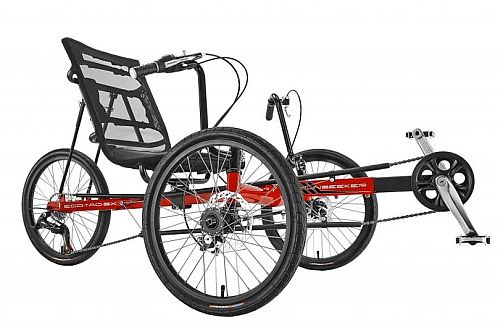
Sun Seeker Eco Tad SX - $1220; very similar build EZ-Tad SX 24 - $1700...
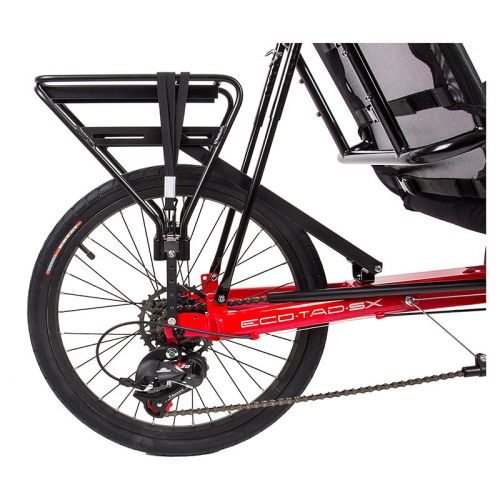
Both Sun Seeker models take this rear rack...
Trident Stowaway - $1700 (free Rear Rack, a full set of 3 Fenders, a Safety Flag, a Mirror, and a Rear Light)...
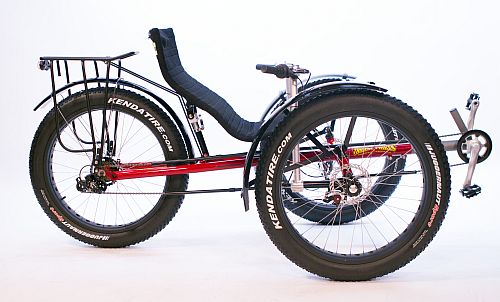
Trident Terrain Fat Trike - $1981 (with options: rear rack, mirror, heel slings, 26" wheels, fenders)...
Note: Many tadpole trikes can easily accomodate a rear-axle mount cargo trailer, but my trailer hitches to a rear rack precisely because I don't like axle mounting...
(06/28/21)
In my planned bike walkabout, my 60W solar panel is meant to recharge the batteries for my power plant, so for my phones, camera, etc., I'm looking at secondary power like bottle dynamos that I never liked, or my preferred choice - power banks. I took a look anyway at what dynamo systems are currently available...
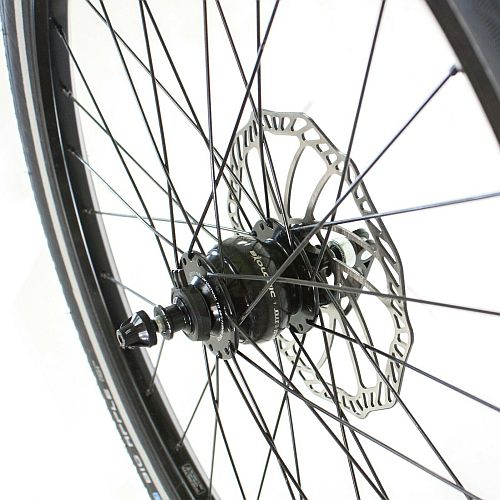
Biologic Joule 3 Dynamo 26" Front Disc Wheel. $200 on Ebay, generates 6V, 3W...
Bicycle Chain Charger to USB - Dynamo 1000mAh. $56. Must ride at least 15kph hour (9mph) to generate 250-300mAh, enough to charge electronic products...
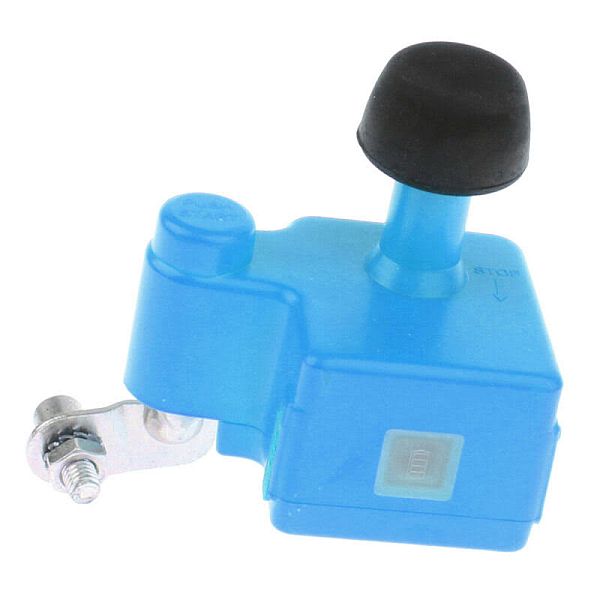
Example of a Electric Bicycle USB Bottle Dynamo. $30. Must ride at least 30kph hour (18mph) to generate 1A at 5V...
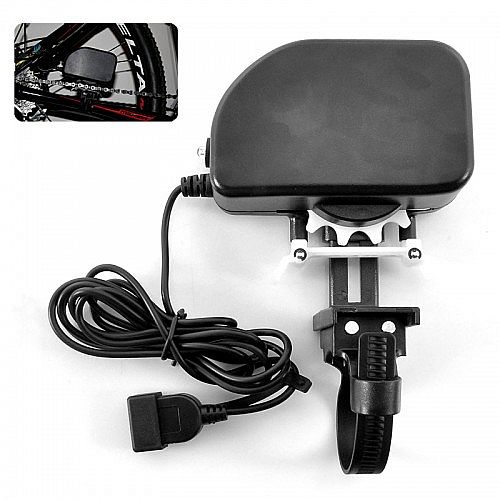
1Set Generator Bicycle Bike Dynamo W/USB & Stabilizer for Cellphone Charger. $50 on Ebay. Plastic, Made in China. 12V 6W (0.5A). No speed stats...
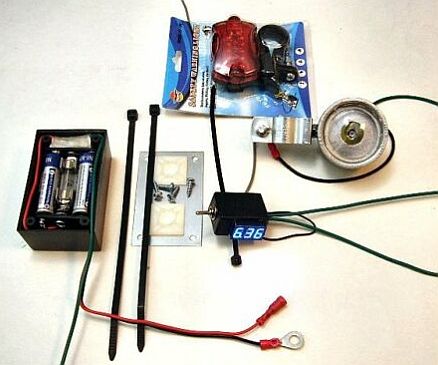
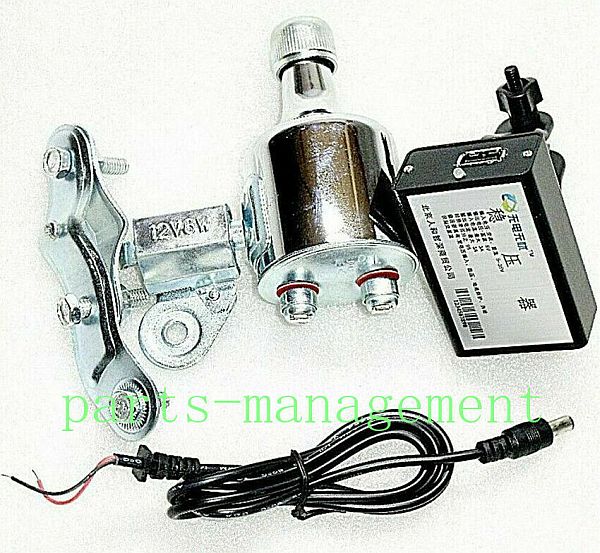
BICYCLE 6 VOLT BATTERY/CHARGER SYSTEM With Lights and Voltmeter for Bottle or Hub Dynamo (Bottle not included). $72 on Ebay...

VELOGICAL High End Rim-Dynamo. $180-200 (including power system, plus shipping). Mainly for lights...
For reasons I go into in the podzine, I'd much rather use a power bank to charge my phones, etc...
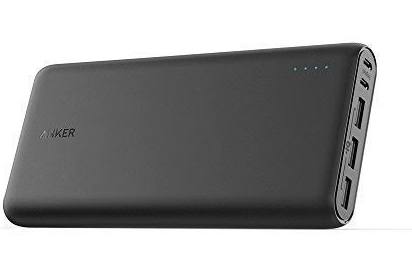
A non-solar AC external battery - 26800mAh Portable Charger with Dual Input Port and Double-Speed Recharging, $60...
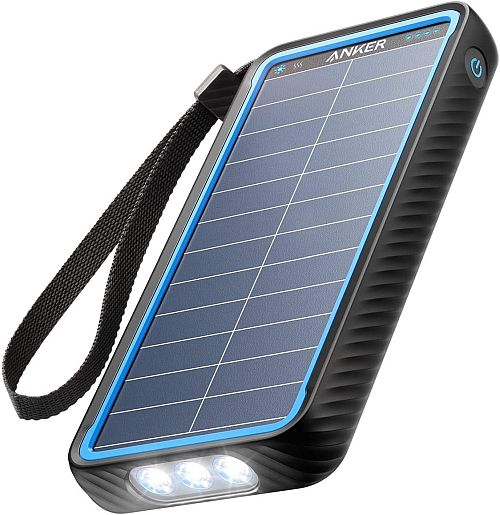
My preferred device - a solar power pack that can charge a phone as it's being charged. Avg price $40 for 10000mAh, $60 for 20000mAh...
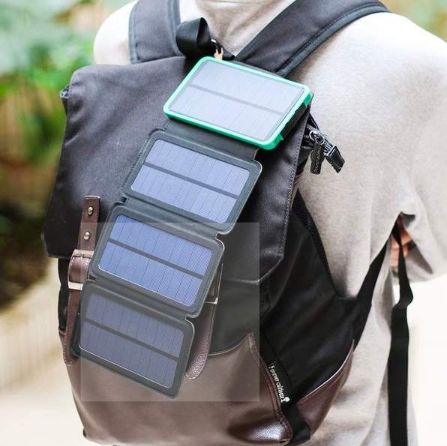
Another type of device geared to backpackers - Stealth Angel 4-Fold Solar Dual-USB Charger 10,000mAH and LED Light. $40...
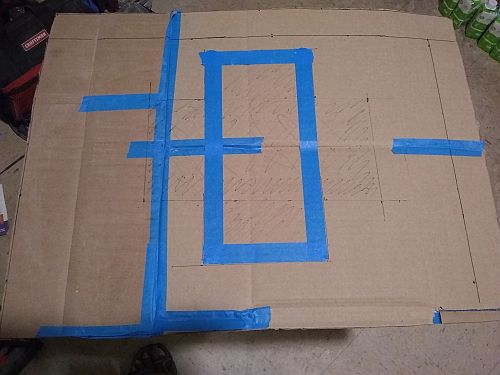
A mockup middle cargo shelf with a 12 x 6" space for a stone. Laid crossways it gives me two 9 x 18" areas for cargo, better than longways which gives a less practical 6" space all around...
(07/19/21)
I'm calling this report 'post stimulus' because I don't believe a fourth stimulus will ever manifest (now that the GQP and the Dixiecrats Manchin and Sinema are in full obstructing mode). Anyway, there are still a few items to buy, but the walkabout project is now in the final Pre Launch stage that could take the rest of the year as I tweak and adjust the existing gear...
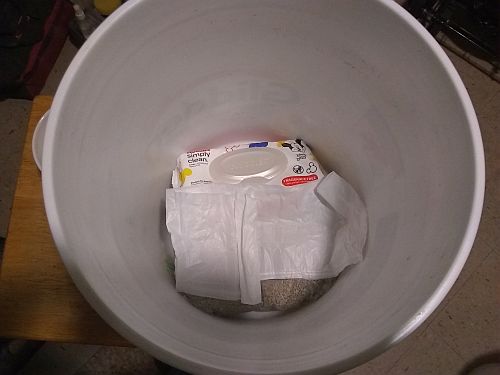
An almost full ziploc bag of kitty litter, a new pack of baby wipes and a small roll of plastic wastebasket bags fits in the space of a 5 gal. bucket when another bucket is nested on top. Now I have a full sized porta potty. Cool...

I trimmed the Therm-A-Rest sleeping pad down to 21" wide 42" long, just enough to cover my butt...
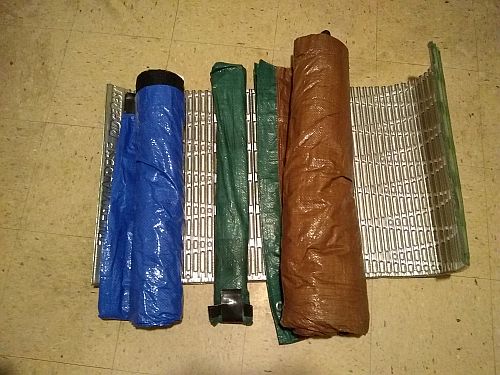
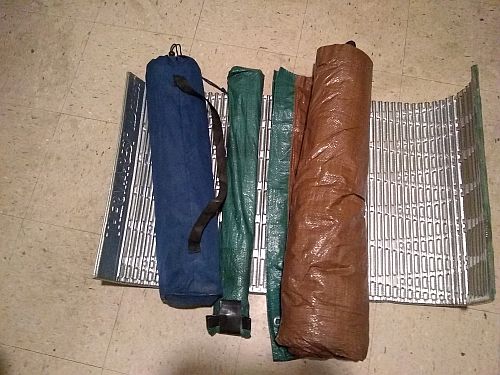
The complete bed setup - pad, bag bivy with sleeping bag and liner, compact tent pole, bug bivy with bivy poles...
The bug bivy inside its own stuff sack...
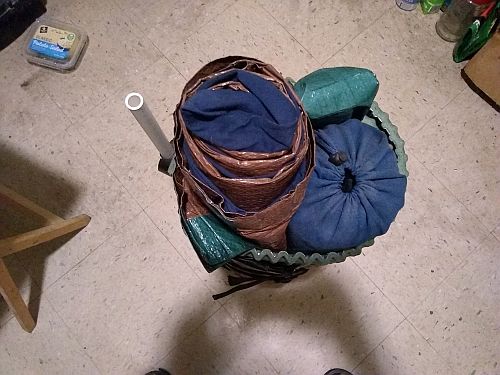
If I wanted to carry all the tent and bivy parts bikepacking style without the trailer, the handlebar harness could accomodate and only weigh a little over 10lbs., with an additional 5lbs. from the tarps on the front racks...
With the trailer, only the bag bivy and the pad goes in the harness, total weight 5lbs...
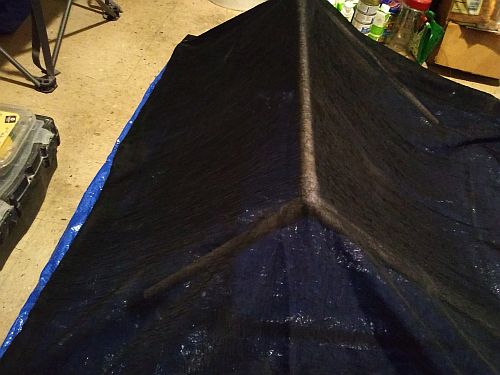
The bivy poles inside the bug bivy keeps the sheer curtain 'netting' off my face. Side view...
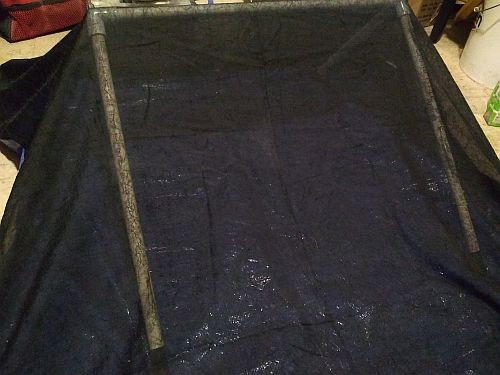
Front view...
The parts are re-purposed from the cargo frame mockup. Once I test it out I may keep or further trim the legs...
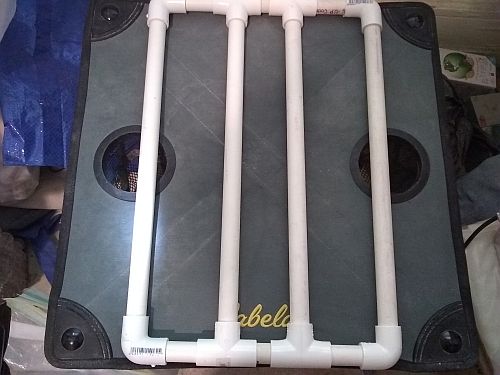
The new and improved studio bag starts with re-purposing pvc pipes and connectors into a level base for the camp table...
The base allows sandbags to support the stone without sagging the table. The plastic bag, ziplocs and throwway newspaper makes cleanup fast...
The leftover sleeping pad, a 36" piece I cut into thirds and duct taped into a kneepad that allows me to use a hammer & chisel on a stone on the camp table...
The base and sandbags...
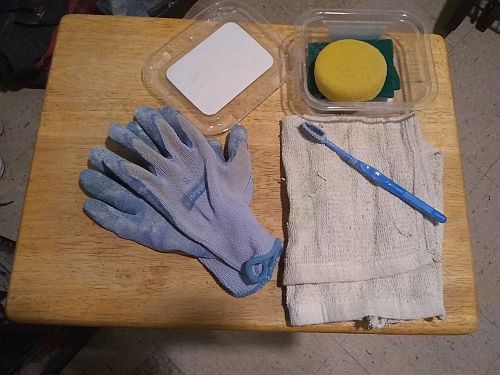
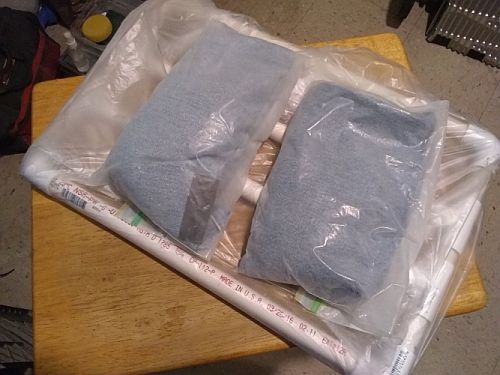
The remaining studio items - work gloves, one or more shop towels, a spare brush and container with small sponge and scrubby...
The new items all fit in the existing studio bag, with enough room for a studio pack of baby wipes. If I take a stone straight from chisels to rifflers I can keep the dremel bag in storage and extend the life of the tool...
The improved studio bag only weighs 5 lbs...
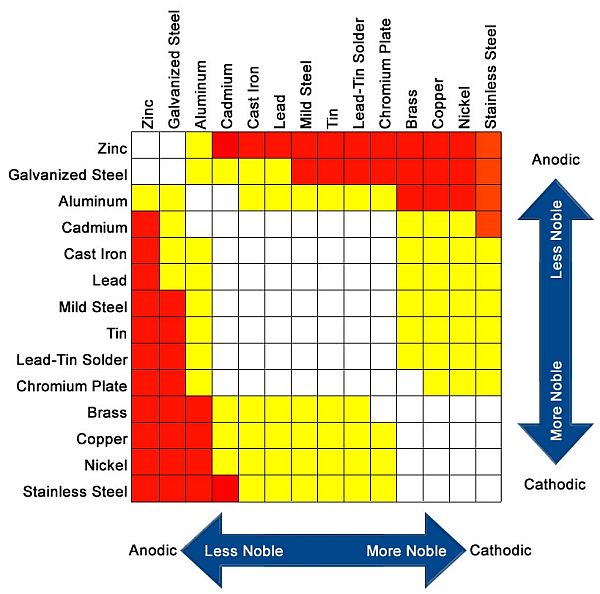
A chart of which metals have a safe or corrosive galvanic reaction when wet. Zinc and Galvanized Steel rods, nuts and washers are good, for ex...
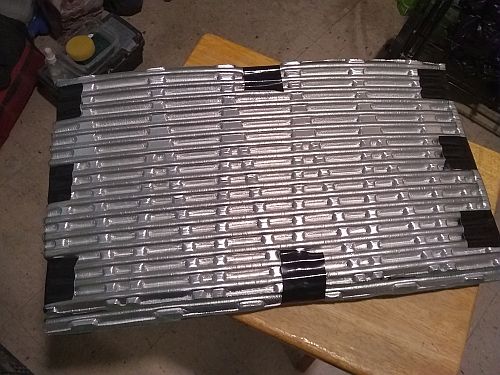
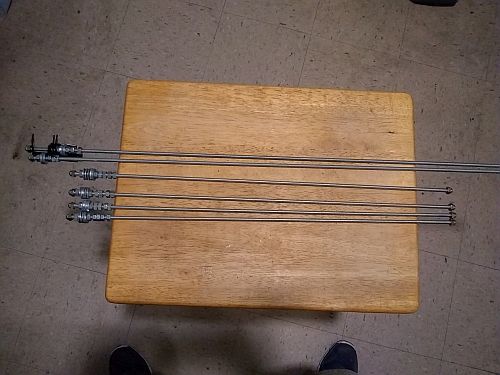
At the local home improvement store I looked for the first pieces of the cargo frame and didn't find floor/ceiling flanges or elbow fittings, just these zinc plated 1/4" threaded rods and zinc hex nuts - $6.40 for this much...
These are 24" rods, well within the weight limit for my needs...
To secure the 18 x 24" bottom board to the cart that is 17.5" wide, notches cut at the side rail base points can work better than having the rods too close to the board end to tie to the cart base rail. The middle board can be placed on top of the side rail with holes cut for hose clamps or heavy zip ties. That allows the cargo frame to be removed if/when I need to put it and the cart in storage for a day in town for business...
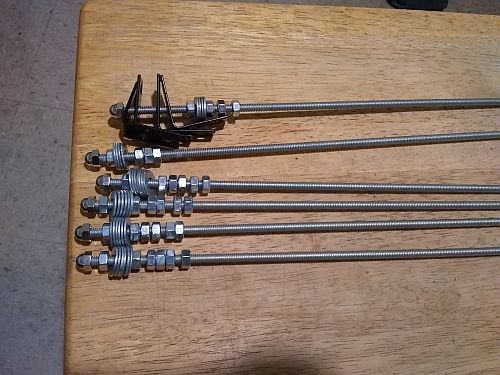
Back to the home improvememt store, I bought the last two 1/4 x 24" rods and hex nuts, and found the tray of 1/4" galvanized washers. I had enough to get 12 of them ($0.10 ea.). I looked for 1/4" acorn nuts to replace floor/ceiling flanges with no luck; those and 90 deg. elbow fittings remain...

I bought this vintage Tektronix TAS 465 Oscilloscope in the summer of 2018 to test my Bedini Motor, but I don't need it anymore, and rather than letting it sit in storage I decided months ago to sell it once I hit the Pre-Launch stage...

The Oscilloscope checking the function of it and the signal generator I bought in kit form from Al Lasher's in Berkeley. Unfortunately, the shop is no more, yet another victim of the COVID-19 Pandemic shutdown, so I can't sell it there, and screw Craigslist (I'm still blacklisted there), so who's interested in a fine piece of analog tech?
(08/27/21)
Another part of the Pre-Launch phase of the long bike tour - putting together a tour bible to supplement the maps for navigation. Meanwhile, I've procured about 95% of the metal parts for the cargo frame...
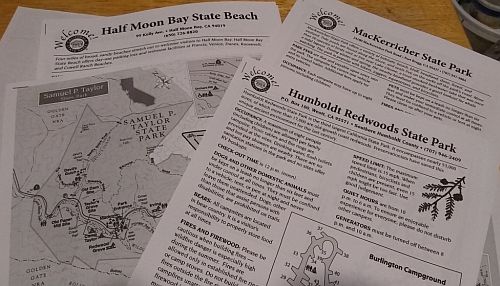
To start, I printed out all the state park brochures with hike & bike campground maps. I'm working on a list of bike shops along the coast...
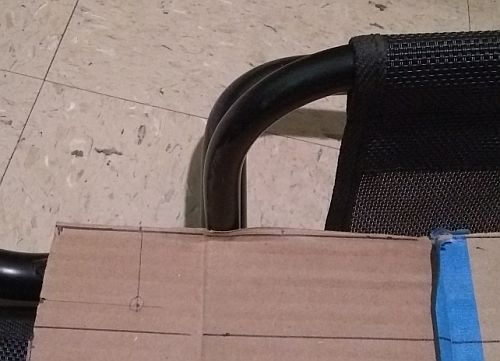
With the shelf mockup in bottom position, the best place to put a front cargo strap is just inside the side rail. The support rods are well placed (1.5 inches in and down)...
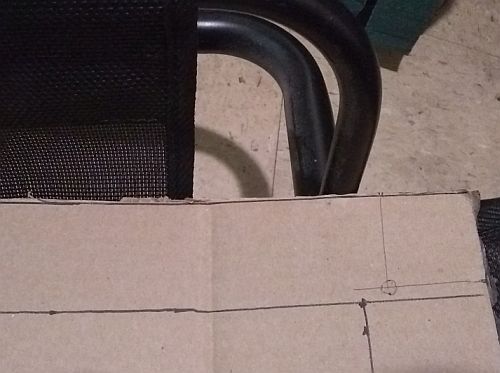
The rear cargo strap area placement. The 0.5 inch width of the side rail tubing wouldn't need much of a notch to hold the frame in place...
1 - 1.5 inch cargo straps would work well to tie down the frame's base...
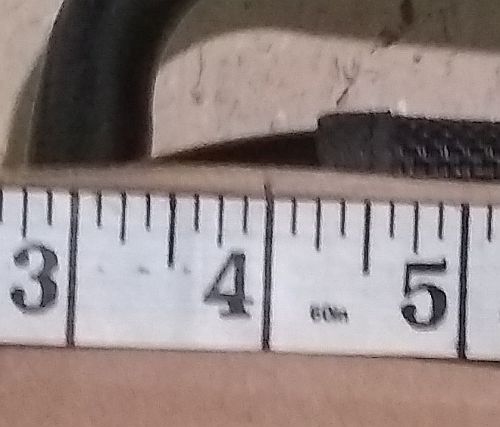
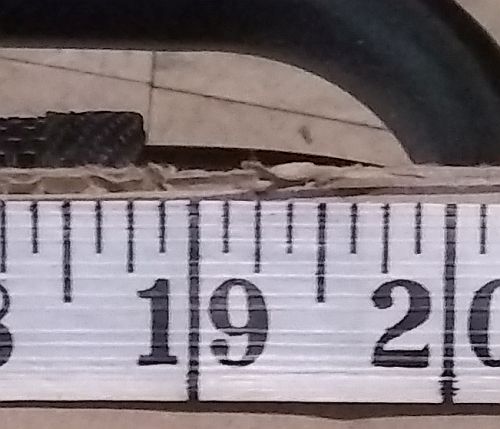
Side rail notches could be as shallow as 1/16 deep at roughly 3-4 and 21-22 inches...
View of the shelf mockup in middle position. The side rail mesh is velcrowed in place, making the side anchors easier to adjust...
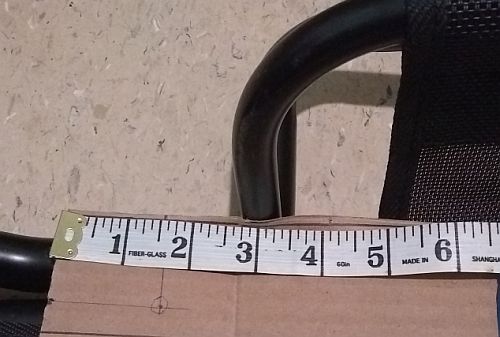
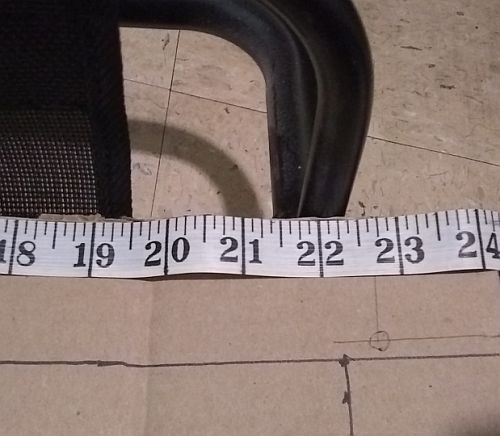
Roughly 0.5 an inch of space on the rail for a hose clamp or zip tie. The tape measure is 0.75 inches wide - minimum distance for a non weight bearing anchor slot...
A better view from the rear anchor placement...

0.25 inch hole zinc plated corner brackets, to mount 36 inch rods as top rails. Gotta duct tape those sharp edges...
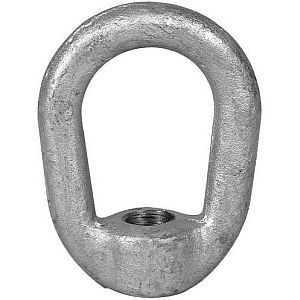
0.25 inch hole galvanized eye nuts, to tie the solar panel to the top rails...
One type of 1 x 48 inch cargo strap...

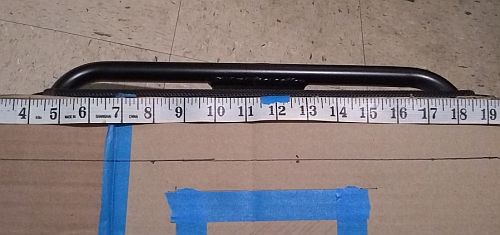
I measured the actual length of the folding solar panel from the two sets of tie points and it came to about 31-32 inches, requiring 36 inch rods..

The one-hole brackets were too tight to fit the acorn nuts, so two-hole brackets will do. The acorn nuts wound up being nickel, so just keep 'em from getting wet...
The 36 inch top rail threaded rods completes the metal part of the cargo frame - now time for the wood shelves...
That's 95% of the metal parts. The 1/4 inch 20 TPI eye nuts will have to be ordered...
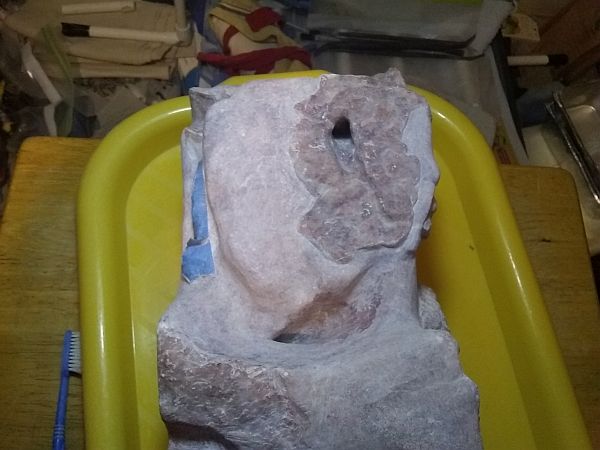
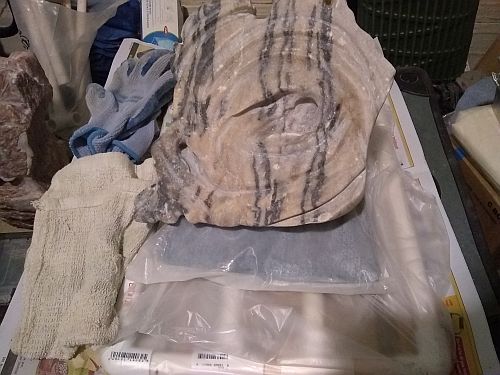
Meanwhile in the studio, I resumed work on the largest piece - Spelunker's Choice, a 30 lb. raspberry alabaster covered with a beautifully rough skin I didn't want to completely remove. That's what inspired me to make a piece about exploring caves...

A major feature is the numerous holes drilled into and through the stone for interior voids and passages. Most of this work was done using the dremel...
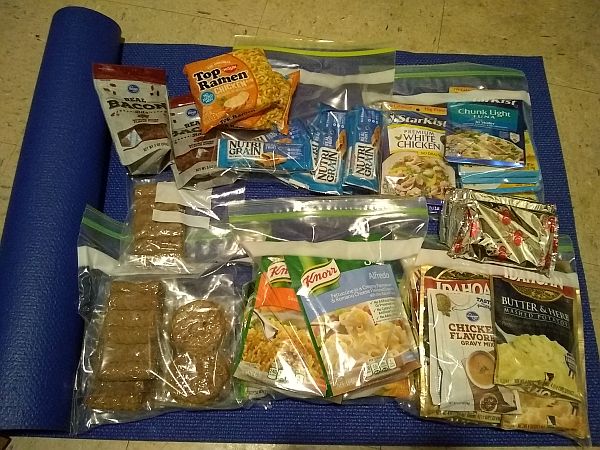
Also meanwhile, I've been slowly practicing stocking the food canister with grocery store breakfast/dinner items in the no-cook or add hot water categories...
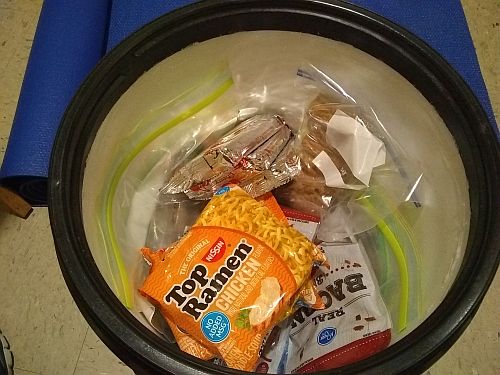
The items so far come to about 70% full at 12 lbs...

Three classic seasonings that will need their own little nalgene bottles...

A few days later, at the grocery store I saw these little $2 bottles of fruit/vegetable boost drinks. The drinks were nasty, but the bottles cost around the same as the little nalgene bottle I already had, so my small seasonings set is done...
Youtube channel for Lab Notes Vids 