Bike Shop 01
(01/10/22)
Ok, the new segment 'Itinerary' covers stuff before you mount up and ride: trip prep, sites to stop along the way, etc. Right now, though, I'm still in the middle of the Pre-Launch phase with many steps of prep ahead of me. Anyway, in the first episode I relate my history as a cyclist.
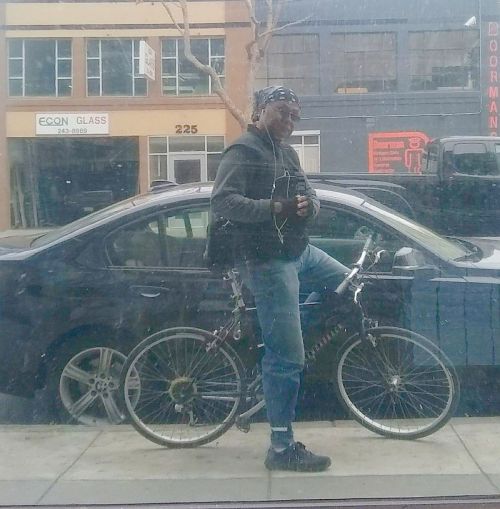
A bike selfie from 2018, somewhere on 5th St., downtown SF...
The second segment, 'Log', covers thoughts after a day's ride or issues in the bike shop. The first entry is about my efforts towards a cargo trailer battery box...
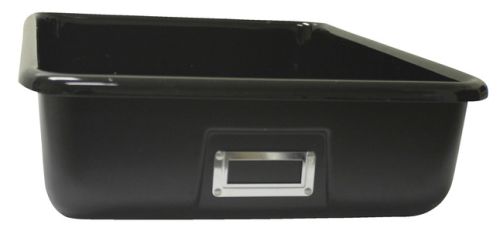
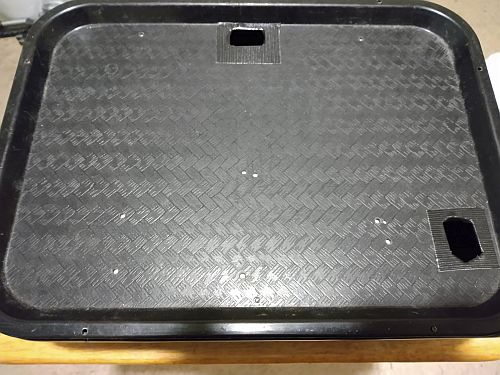
After weeks of searching online, I finally found a container that fit the dimensions for the three batteries - a school arts & crafts storage tray, 16x12x4 inches...
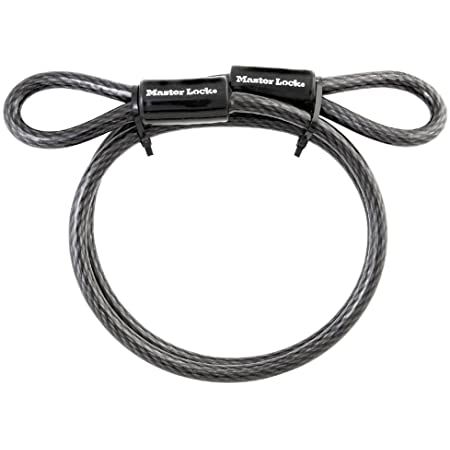
Example of a 4 foot security cable to wrap around the DIY battery box...
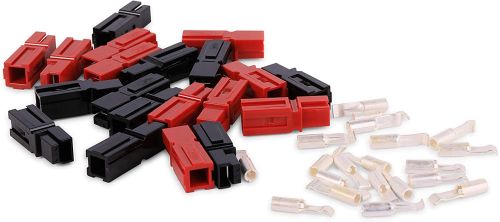
Anderson powerpole connectors, a rugged solution for battery cables...
(01/17/22)
When I entered the Pre-Launch stage of my planned walkabout, I considered the crucial rule of camping, 'leave no trace' and how it's doubly critical for me because I'm bound to use some stealth campsites more than once going up and down the coast and I really don't want to burn any bridges in that regard. With that in mind, I started looking at the many homeless encampments in my neighborhood and the city in general, which can't really be called camping - squatting on the sidewalk isn't camping.
Ok, disclaimers - homelesness is a chronic problem all over this country, but especially on the west coast. Only some of the homeless are cases of mental illness or drug abuse; many homeless are the working poor evicted/priced out of housing stock by greedy landlords/real estate speculators (many of those people live in their cars). The term 'homeless' really only applies to those who stay in a town or city, not people who are on the road making temporary camp.
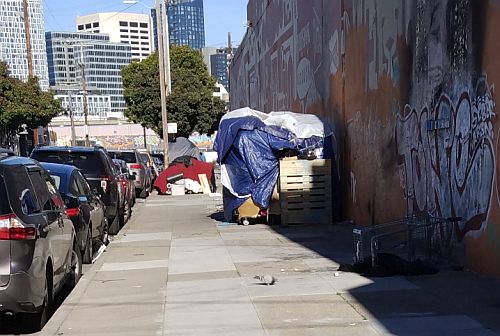
You'll find individual and group homeless tents all over the city, squatting for a few weeks or so until the person inside wears out their welcome with the residents, or gets raided by the cops, or burns themself out of the spot and leavs a smoky reminder...
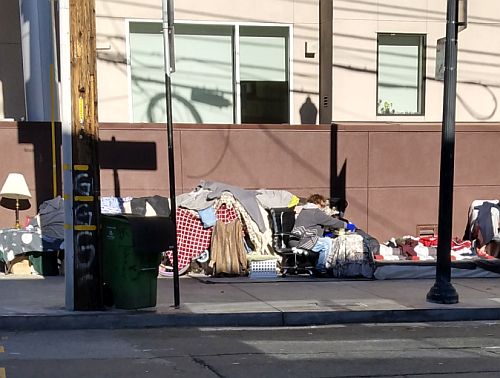
Most of these encampments are former apartment dwellers who would never be confused with a camper outside of a city...
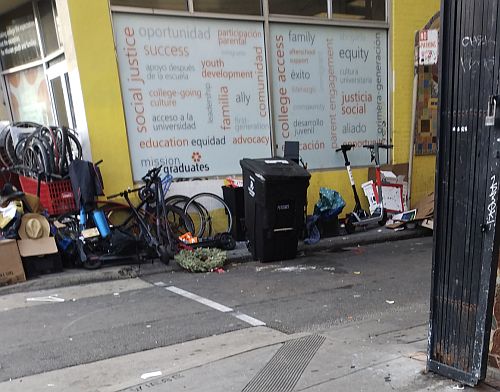
Surreptitious shot of what could be a floating bike chop shop between locations, usually found under the freeway or a secluded back alley...
One symptom of the housing crisis - older mixed-use apartment buildings standing in the way of gentrification via new market-rate condos and amenities attractive to yuppies. A suspected 2015 arson claimed the building at 22nd and Mission with at least 1 fatality, making many non-white working families homeless...
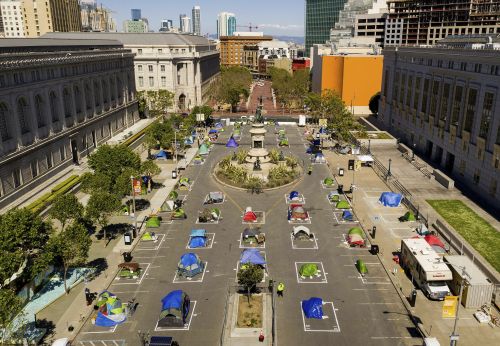
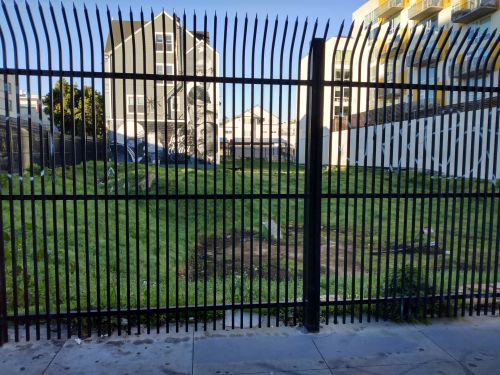
The city did make a change recently, making official secure spaces for encampments like this space near City Hall between the public library and the Asian Art Museum, supported by services, but that's a stopgap band-aid at best. The large tent camps aren't going away, and the Mayor is pushing through a plan to force some hardcore homeless into drug treatment or mental healthcare facilities, a plan I'm kinda half and half with...
Image - Noah Berger, AP.
(01/24/22)
This week I assess my basic cook kit and work out a few basic rules for when I will and won't break it out for a cup of morning joe before heading out in the morning, and whether or not to have a hot dinner/supper. For example, when I'm stealth camping I won't cook supper that night or bother with coffee before packing up and moving out...
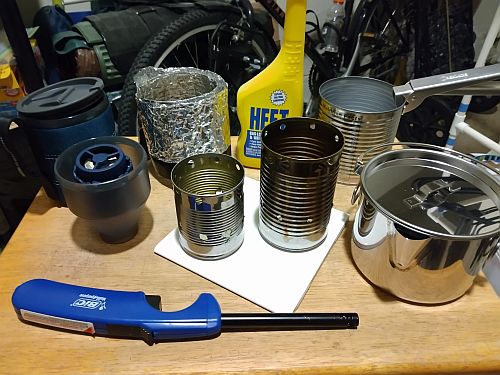
My basic cook kit (L to R) - travel mug, rocket ground coffe kit, windscreen, small double-flame alcohol stove. HEET cooking fuel, medium double-flame alcohol stove, fireproof tile cooking base, second steel cook pot with handle, Snow Peak aluminum 0.9 liter kettle. Barbecue lighter in front. Only things missing are vinegar spray bottle pot cleaner w/scrubby, paper towels, regular utensils (teaspoon, fork, butter knife) and wet wipes...
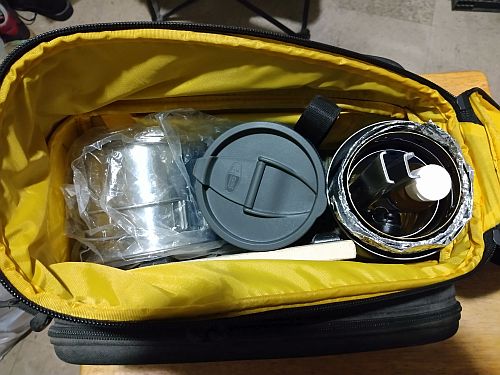
The basic cook kit packed into the trunk of the trunk bag, with a little extra room for extras. No sporks...
Ok, this week's Log has mostly been on the back burner with Pre-Launch tasks, but the least I could do is baby steps on the battery box...
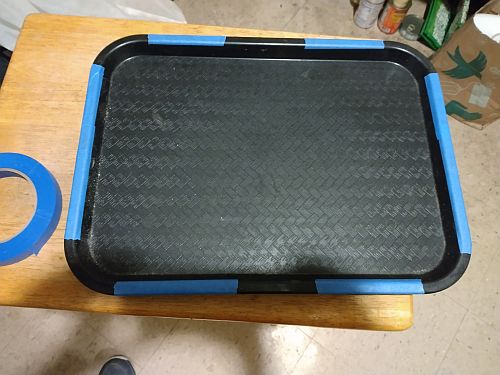
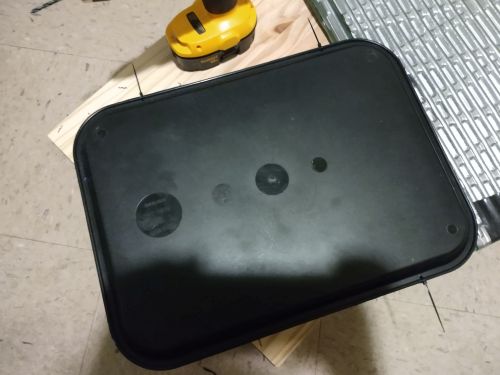
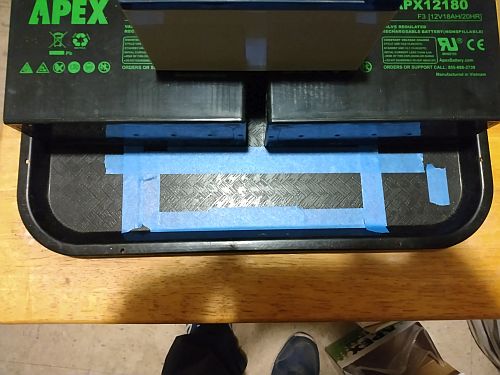
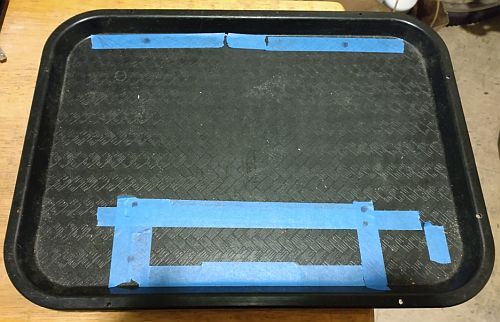
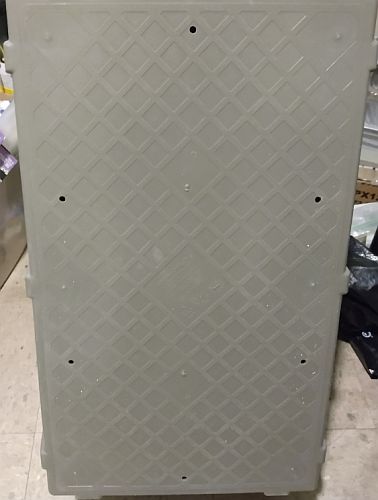
Painter's tape on the perimeter of the battery box base tray...
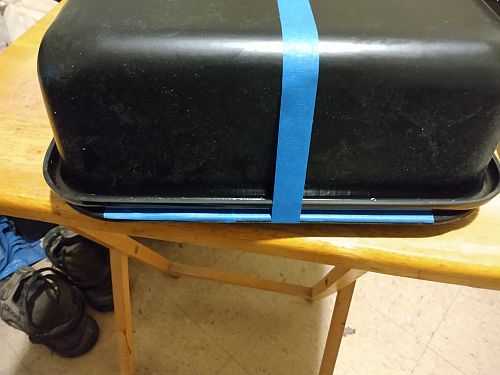
The tote tray is matched to the base as precisely as possible, then taped in place, then edges traced with a sharpie...
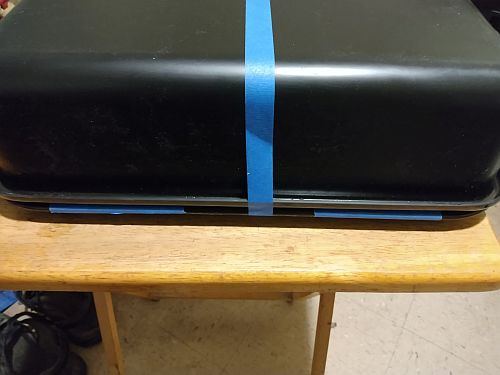
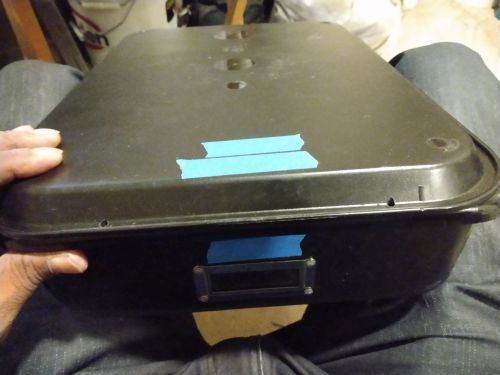
The tight sides are traced as well...
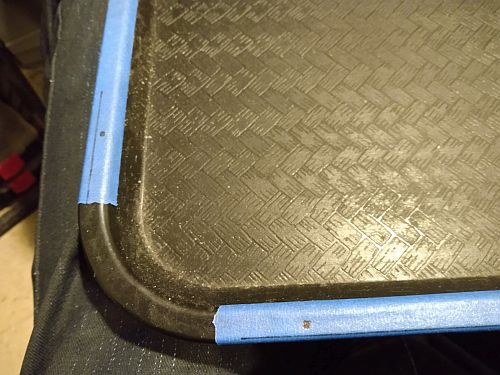
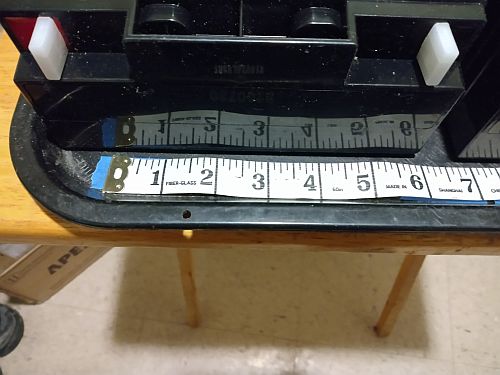
The perimeter marks on sides and ends match. Drill marks 1/8 inch inside all around...
(01/31/22)
Ok, this week I'm taking another ground rules approach to the itinerary, what I'm calling Flight Planning, both at the beginning of my walkabout and during the trek in the morning before a day's ride. Much of my speculation is based on bike forum and tour articles I've skimmed through from Warmshowers, Adventure Cycling Assn., Tom's Bike Trip, REI articles, etc., and they boil down to a checklist of gear, clothes, navigation tools, researching the entire route, tuning up the bike, training, etc. I've done most of this checklist stuff over the past year or so through buying or building gear, like my custom bike trailer and cargo frame. The segment also delves into my imagined day to day flight plan starting on day 3...
This week's Log segment covers progress in the bike shop on the DIY battery box and the inevitable drivetrain overhaul sparked by an offhand comment in a bike blog
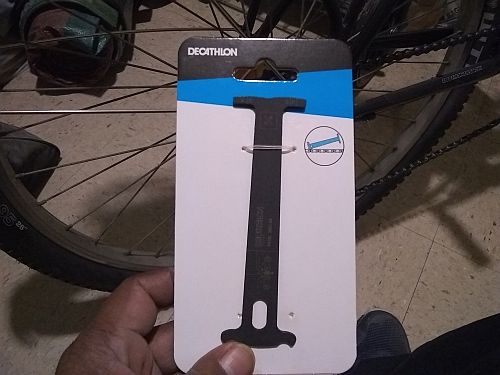
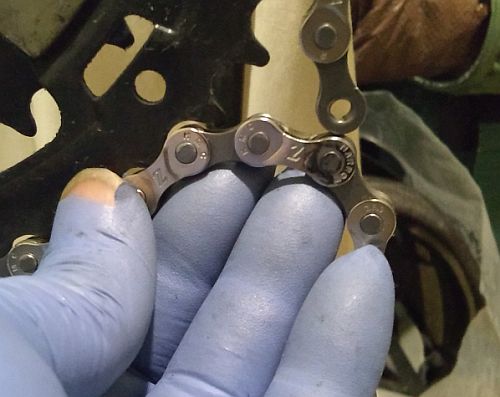
A cyclist mentioned the need for a chain checker 'just in case,' so during the weekend before show no. 3, I went to the Decathlon store for a pair of cheap MTB shorts to test out. They're not for sale instore, but this chain checker was a few bucks and why not - I can always use another tool...
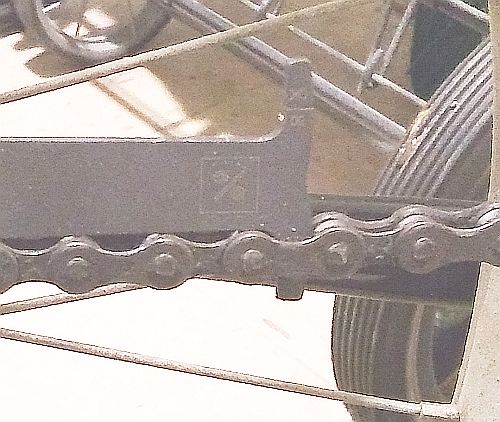
Back home, big surprise - the tool said not only was the chain stretched out to the max...
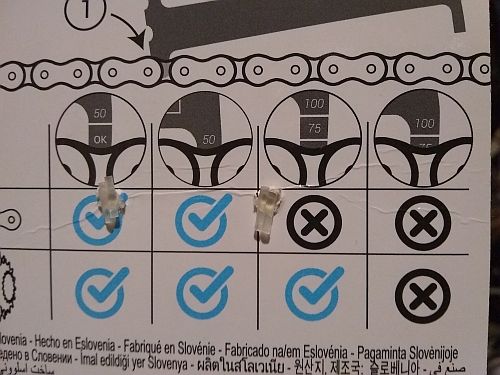
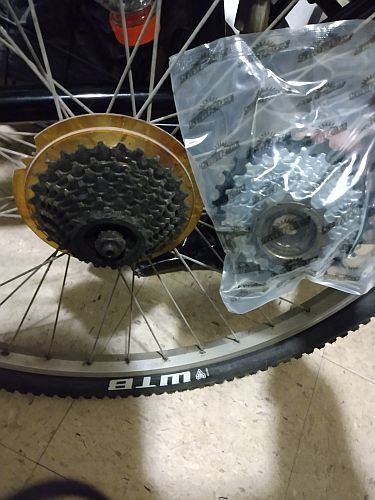
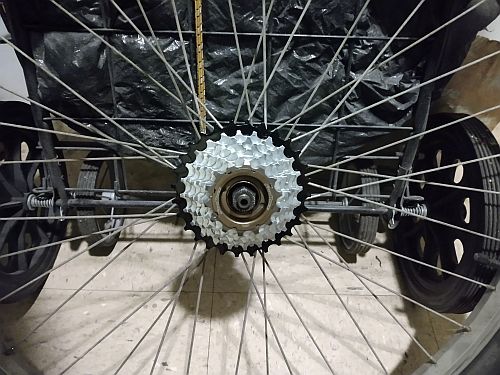
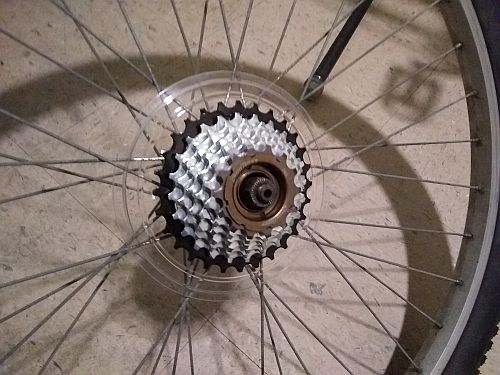
...the indicator guide said that the 7-speed freewheel was also shot...
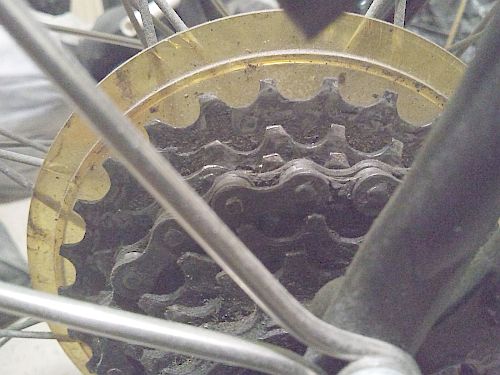
The refurbished chain and sprocket set were probably in fair condition to begin with, and 5 years of moderate riding pushed the drivetrain past its limits, so no way would it take the strain of a long bike tour. Time to replace both...
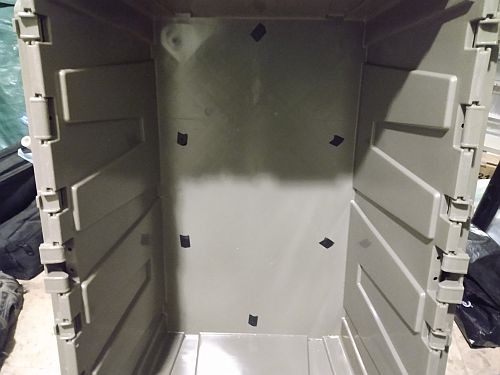
Meanwhile, after a long hassle charging the very old weak drill batteries I drilled holes in the bottom tray perimeter, then lined up and marked the holes on the top tray...
I drilled a few top tray holes and used zip ties to hold them in place to drill the rest...
Afterwards, I marked the orientation for the two halves...
The next day I managed to find the replacement 7-speed freewheel at the second bike shop I walked to...
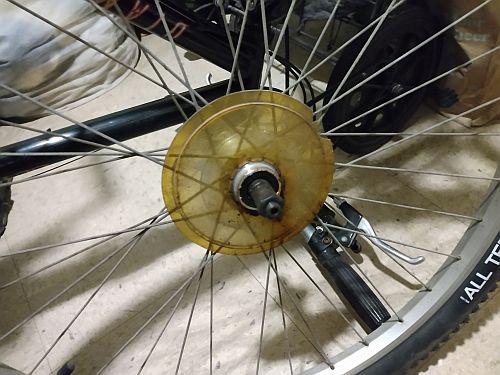
The old gears were hard stuck and I didn't have a cheater bar for leverage, so I went back to the local shop for service. I wanted a replacement sprocket protector, but they didn't have any...
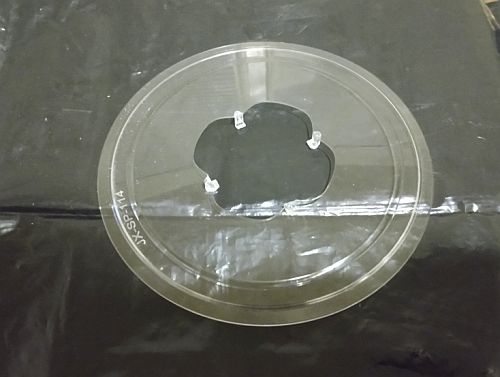
I tried to remove the disc for cleaning, but it cracked. I installed the new freewheel for now and will add a new disc later. I couldn't care less that they're called 'dork discs'; this cheap plastic part can potentially save an expensive rear wheel and a long walk to a bike store, let alone a possible high speed wipeout...
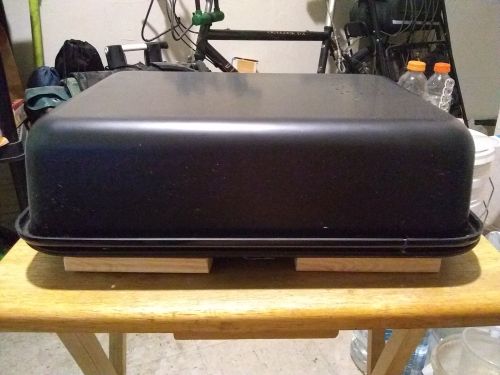
On Thur., I picked up a 1x2 furring strip that's actually 0.5x1.5 inches, cut into two 4 foot pieces...
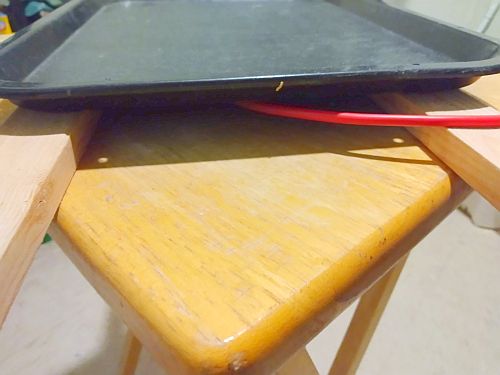
A quick check with my 10-12 gauge battery cable shows ample elbow room to run the cables underneath, meaning I don't need extra ventilation holes if I make three 0.5x1 inch cable ports in the bottom tray...
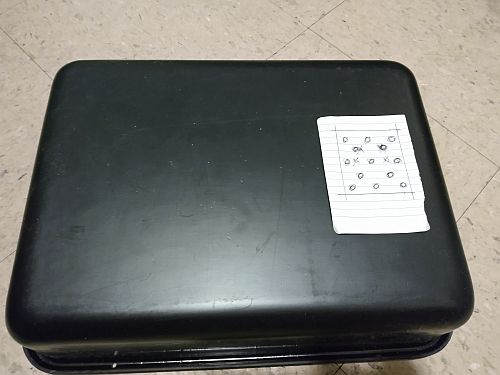
A baker's dozen grid of small holes within a 2.5x2.25 inch area should be more than enough venting for the top of the battery box...
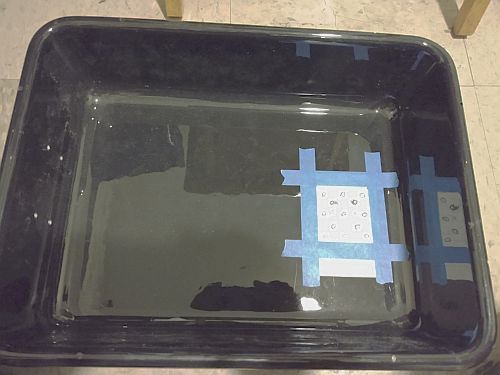
The grid pattern taped inside and drilled using the scrap shelf board. The drill batteries had to be re-recharged to get this done...

The finished top tray vent...
(02/07/22)
Ok, this week I'm looking at the mail situation that anybody going the vanlife (in my case, bike walkabout) route on the road will deal with. In the podcast episode I cover the different methods available, but to cut to the chase, I picked the virtual mailbox option that usually comes with mail scanning, shredding, and forwarding. I put this step in the Pre-Launch stage as a sort of definitive move marking a countdown before embarking on the road. With dental and vision season causing a slight hitch. I still plan to pick a particular service before Spring officially arrives...
Meanwhile, the Log segment covers the battery box build and a side project for the bike shop so I can get on with the drivetrain overhaul...

Half inch x one inch acces port jigs for the bottom tray...
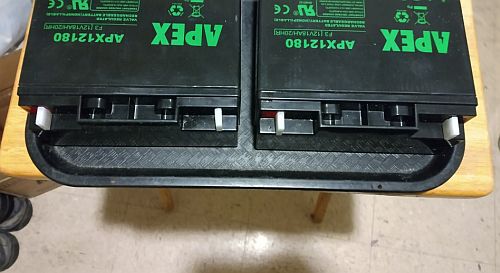
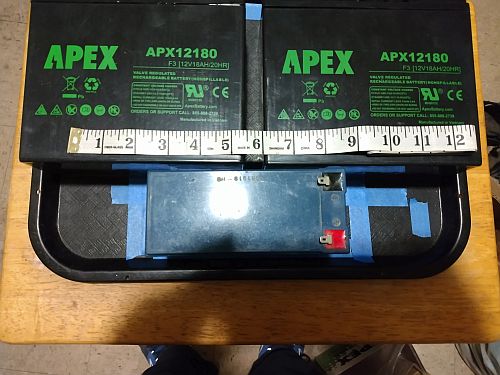
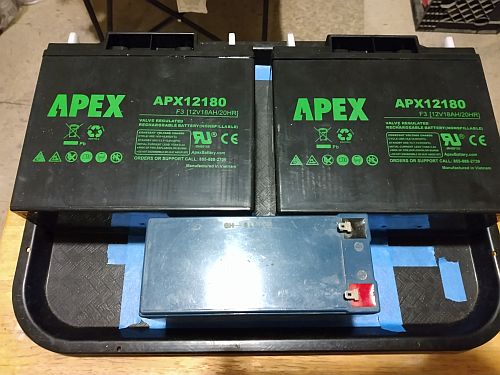
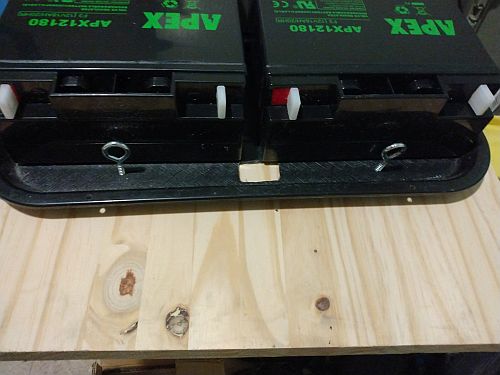
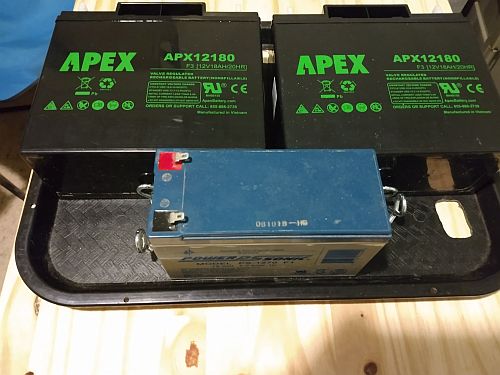
Got the batteries placed, making sure there's space for the access ports...
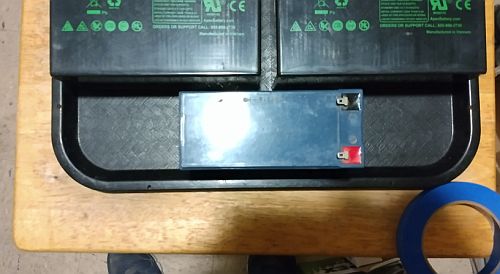
Space for the float battery and mountings for the tie downs is tight, but doable. I'll re-orient the smaller battery for the terminals...
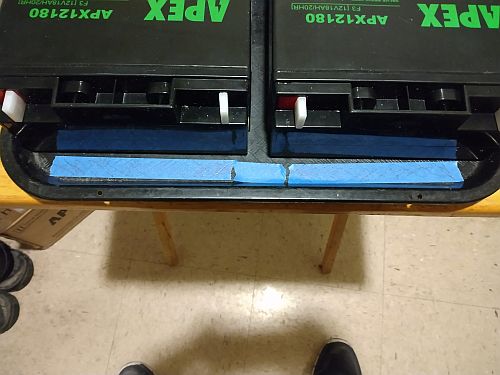
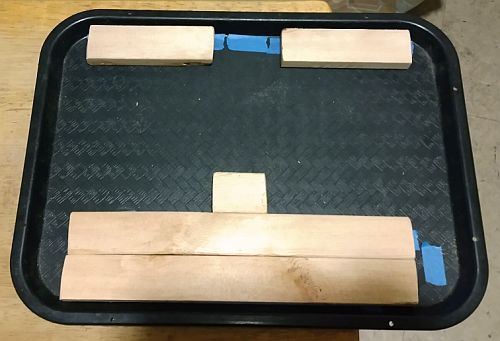
After fiddling with one center furring mount and two ports, I switched to two mounts and one center port, even if it has to be a bit wider...
For the back, two long mounts side by side will accomodate all three batteries...
A 10 inch furring mount cut in half for the front batteries...
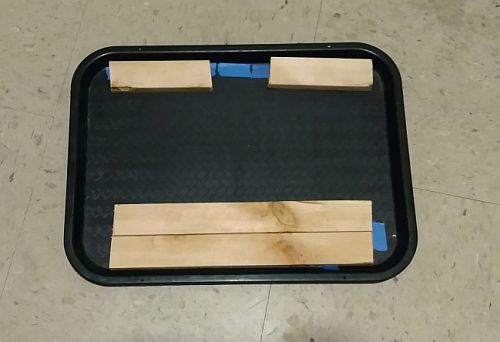
Two 12 inch furring mounts to handle the back...
Two furring mounts underneath is wider than the tape outline in the back...
A new spoke protector I got for free from Bike Connection because every other new bike purchaser gets rid of them...
The rough cut furring strip zip tie anchor bases where they'll be glued underneath after some squaing off, and after guide holes for the eye screws...
The furring strip supports squared off and an extra anchor base added for the float battery...
Drill holes marked for the zip tie anchors...
Meanwhile, during the weekend while producing the last episode I considered the engine job and how much hassle it'll be to do the usual and flip the bike over to work on it. I didn't want to pay $150 for the local bike shop to do it, or pay more than that for a halfway decent bike workstand, let alone a portable one, so I decided to DIY my own portable workstand I could use on the road
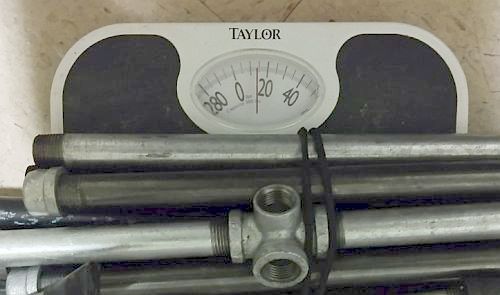
I liked one particular 1/2" galvanized steel pipe stand (a 2007 Instructable from Mr. Bologna), for its simplicity and decided to slightly modify it for more stability.
Parts List for the DIY workstand:
1/2" galvanized nipple 3 ft long (1)
1/2" galvanized nipple 1 1/2 ft long (3)
1/2" galvanized nipple 1 ft long (6)
1/2" galvanized pipe 90 deg. elbow (1)
1/2" galvanized pipe tee fittings (2)
1/2" galvanized pipe 4 way side outlet tee fittings (1)
1/2" galvanized pipe straight coupling (1)
1/2" galvanized end caps (5)
2" pony clamp (1)
2" hose clamps (2)

The base uses the tees for optional 1 foot back legs for stability in case of wind. The 4 way tee and middle front leg eliminates rotational stress...
The straight coupling and 1-1/2 inch pipe for the deluxe version...
The pony clamp with gorilla tape padding to protect the bike's top tube...
The clamp installed on the bike mount...
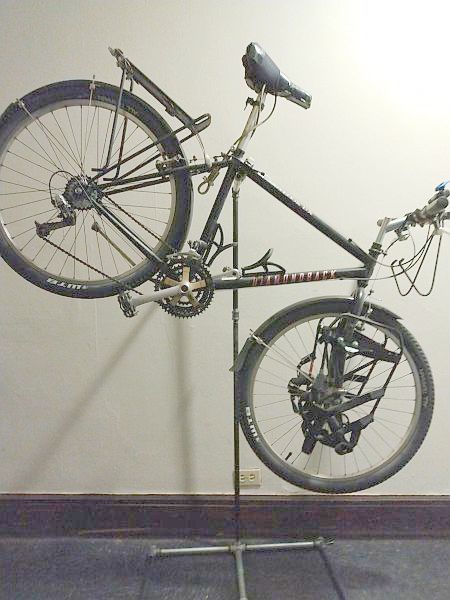
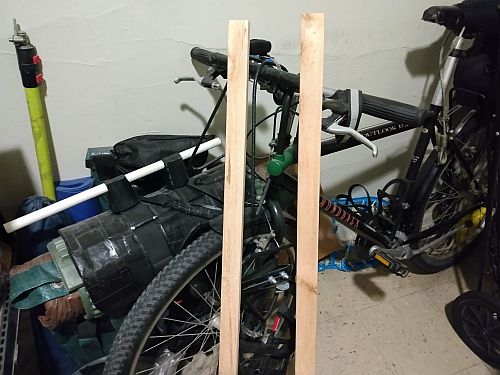
The bike mounted on the deluxe version for stand up service on both wheels. I had to move it to the hallway to take this shot...
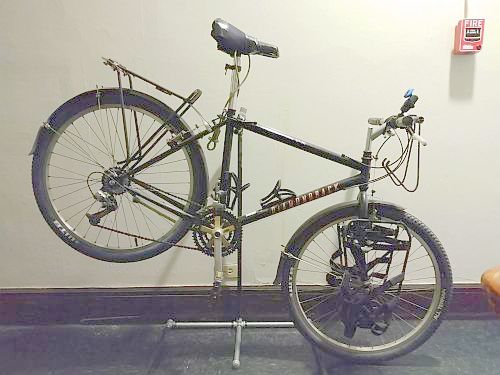
The bike mounted on the basic shorty version for sit down service...
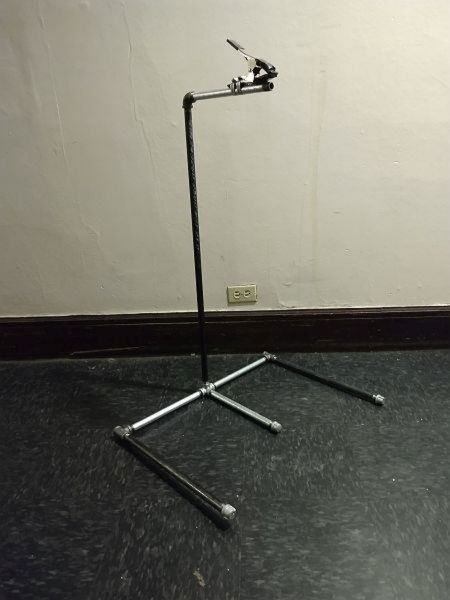
The basic shorty workstand will run you between $80 - 100 depending on where you shop in the Bay Area...
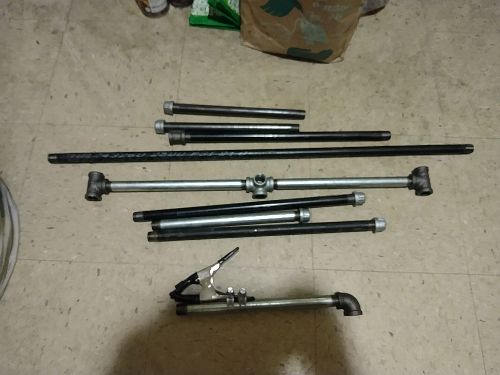
The workstand broken down into convenient segments - time for another tarp bag...
Suprisingly, it only weighs about 14 - 15lbs...
(02/07/22)
Ok, this week the Itinerary returns to the camp cooking topic and my attempt to switch over to camp cooking...
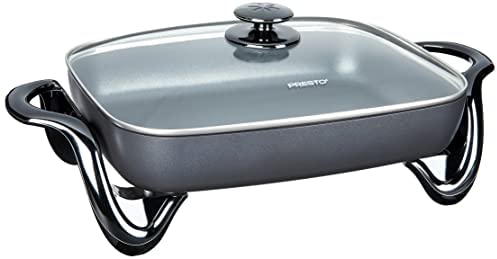
Not ready to give up ham and eggs breakfasts using my 16 inch skillet...
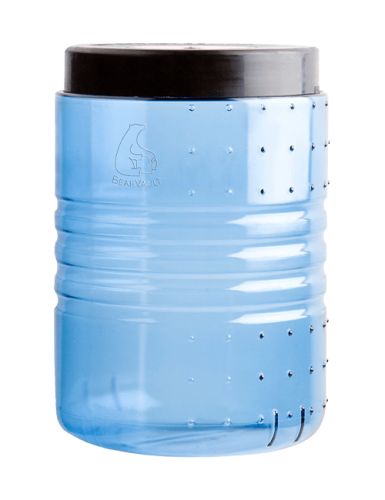
The rather pricey Bear Vault BV500 canister will fit inside a 5 gal. bucket for added food security...
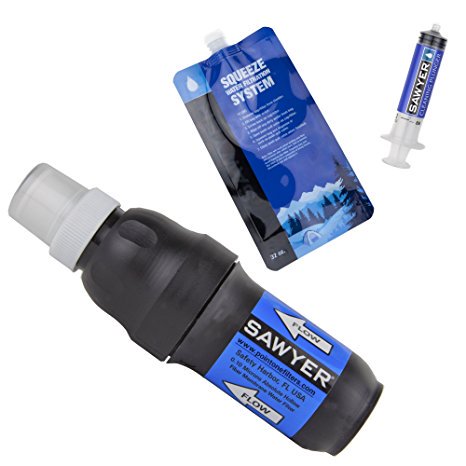
The Sawyer Squeeze water filter system, under consideration as a backup to my Lifestraw emergency water tool...
Meanwhile, the Log segment covers the finished battery box build...
With a fresh tiny bottle of super glue the furring strip rear anchor supports are prepped...
Guide holes for the zip tie anchors are done...
Rough guides for the cable access ports. I may just use the dremel to finish the ports...
The dremel made for larger ports after evening the sides out...
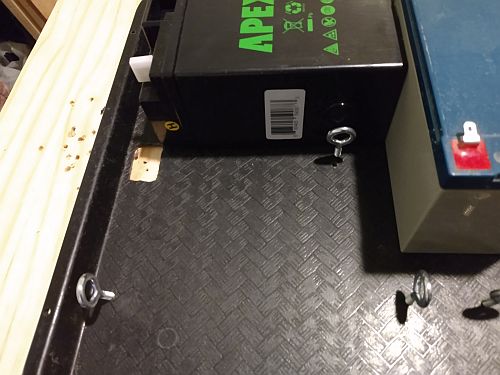
A second check of the anchors with the batteries in the front...
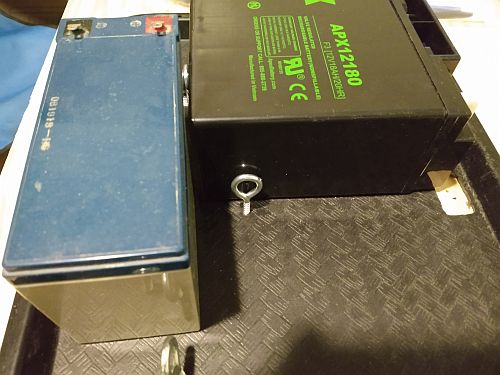
The rear check showed a problem with the float battery anchors...

That anchor hole has to shift...
The shifted anchor fits one side of the front batteries...
...And fits the other side. The other float battery anchor is much closer to the inside edge of the tray, but it works. The furring strip support will have to stick out a bit...

With the bottom of the support shifted down, the center part needed an extension. The tiny bottle of super glue was just enough to finish the job...
The finishing touch on the battery box for now is a gorilla tape patch to cover the edges on the cable access ports. Final assembly can wait until the cargo frame is built and time to load up the trailer for hitting the road...
The battery box is finished for now, ready to install...
(02/07/22)
Ok, this week the Itinerary covers a more or less minor issue cycling-wise, but for some folks a big deal - tight-ass bike shorts. Aside from the environmental impact of recyclable spandex filling up landfills as 'fast fashion', I cover the disadvantages inherent in wearing spandex constantly and my aversion to going commando-style in public with a saddle-shaped diaper...
Meanwhile, the Log segment covers the drivetrain overhaul...
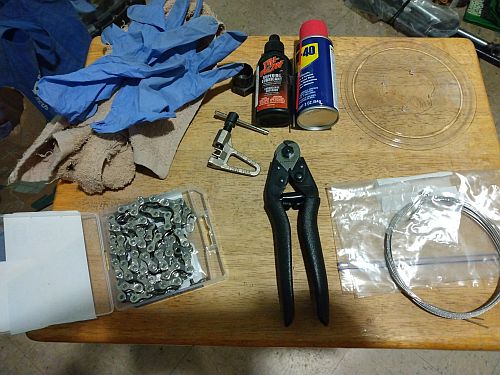
A starting list of parts and tools for the drivetrain overhaul, not including a wrench for the freewheel tool and a Phillips screwdriver and allen key for the derailleur adjustments...
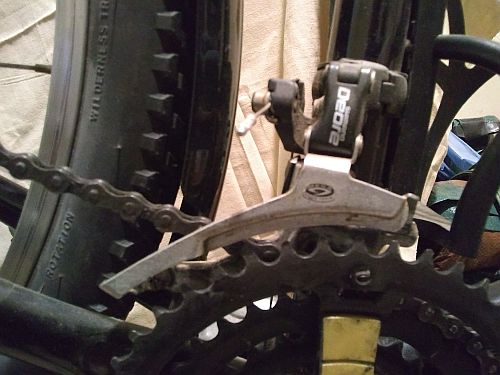
Vintage Shimano Deore front derailleur - a reference pic before starting, that didn't help me find a specific service document...
The spoke protector didn't snap on easily so it's not exactly centered, but it works...
Sizing the new chain using the Park Tools 'easy way' that bypasses the derailleurs...

The easy way to install the new derailleur cables is to just remove the index shifters to thread the cable without fraying the ends...
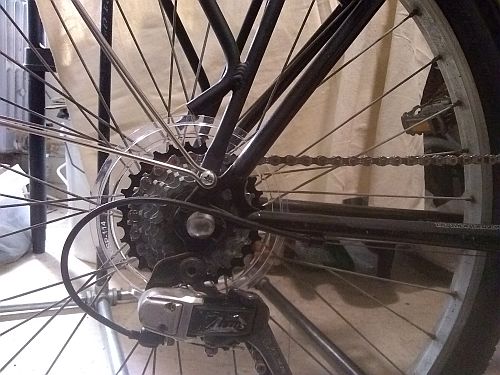
The drivetrain with new chain, rear cable and protector. The rear derailleur didn't need to be adjusted...
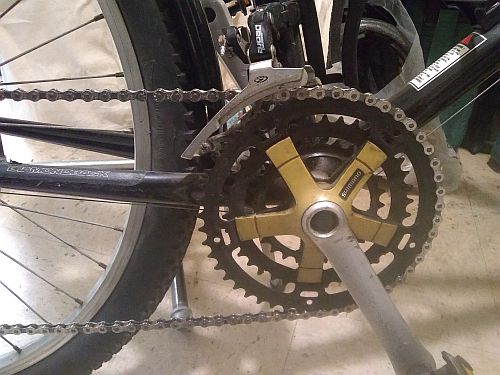
The front derailleur still needs a bit of fine tuning - the limit screws didn't do anything, even though the cage isn't pushing the chain off the chainring...
(02/28/22)

Ok, this week the Itinerary takes an updated check on the subject of bike computers, specifically android bike computer apps for touring. Last year I picked Komoot, Maps.Me, Google Maps and Avenza Maps for route planning and navigation. For accommodations I picked Warmshowers, which is geared specifically to bike travelers. I'm considering iOverlander, an app and website aimed more at motorists and vanlifers...
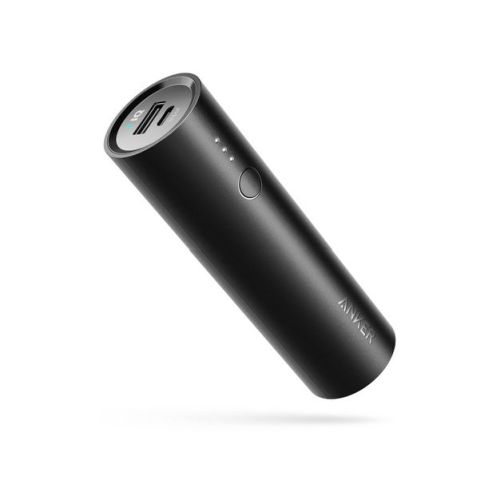
The one advantage that bike computers have over smartphone apps is long battery life, but the navigation app I picked can be run offline with the phone in airplane mode. In addition, I can plug the phone into my Anker solar powerbank or use a smaller unit like this Anker Lipstick 5000mAh USB battery...
Meanwhile in the Log, the bike shop is on pause after the big engine job. I'm waiting for the monthly turnover to prep the unit for waterproofing the wood shelves which will take a couple days with the unit in Dexter mode...
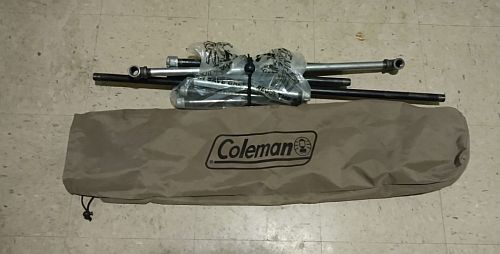
Among the items in the SRO I'll throw out is my 8 year old old camp cot that has gotten raggedy and can't be saved with a replacemeent canvas, but the carry bag can be repurposed into a carry case for the DIY bike shop workstand......
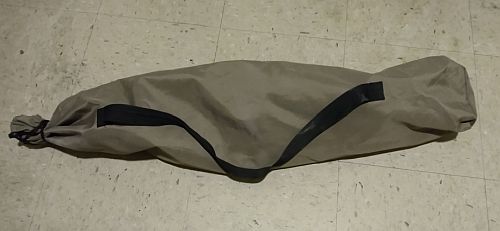
The parts all fit inside with room to spare. An extra velcro strap or bungee cord will keep the pipes from rattling during travel...
(03/11/22)
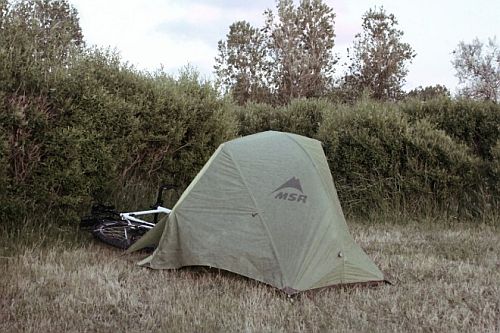
Ok, the Itinerary this week goes back over the issue of camping to sort out best practices - since I'll still be generally based in the Bay Area, at times I'll need to camp out near the city for business - an entirely different scenario than leisurely touring. It still means stealth camping, but there are different ways to do it near the city vs downstate
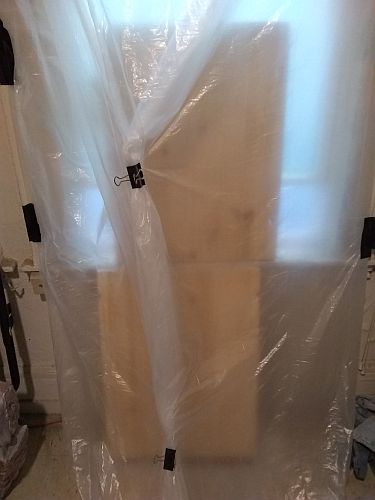
Last week was rather hectic and delayed show production, but the weekend saw my Mini-Dexter spray booth envelope set up for the spar urethane semi-gloss clear coat...
The envelope opened up during a spray session...
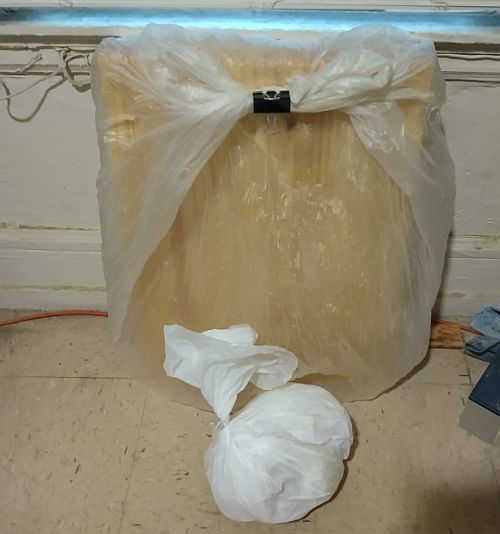
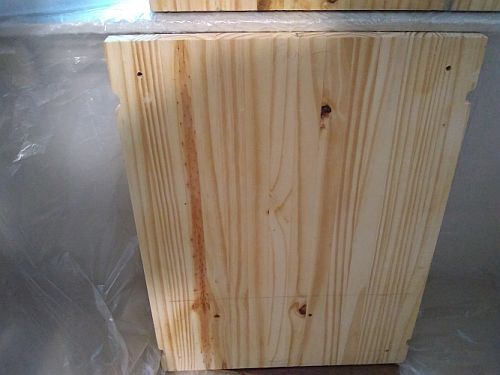
After spending Sunday night in the envelope, I moved the shelves to a bag to cure. The drop cloth is the only thing to be discarded, in time for plumbing work to continue in the unit. It's still not done by the show's release date...
(03/18/22)
Ok, the Itinerary this week drills down to how to stealth camp, but cutting past the other flavors of stealth camping (RV's, vans, motorcycles and on foot) to focus on bike camping.

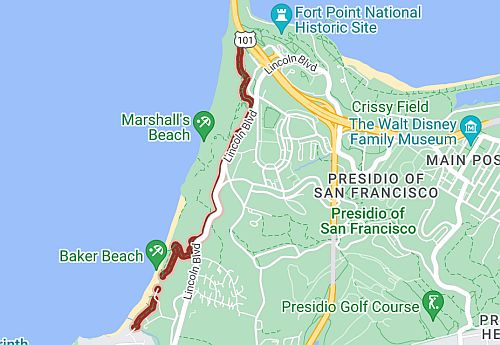
The semi-urban Bay Area negates many of these rules because there is less available landscape to hide in, especially with a bike and trailer. The California Coastal trail runs down the entire state just like the coastal bike route. Outside the city, there are very restrictive rules for reserving a dispersed campsite, but in the city it runs through The Presidio and reservations aside from official campgrounds aren't possible. Stealth camping is a big gamble...
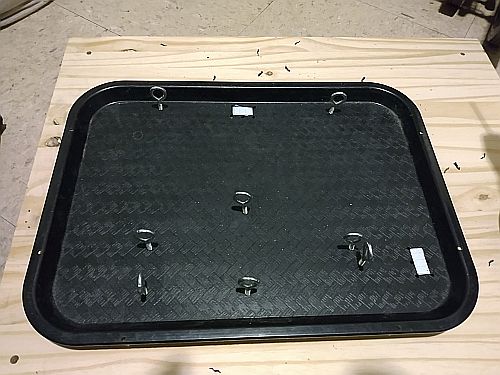
Meanwhile, the Log had me considering the best way to attach the cargo container to the wood shelf that's secure but removable, better than merely wrapping an expensive ass security chain around the middle section. I decided to use bolts instead of glue...

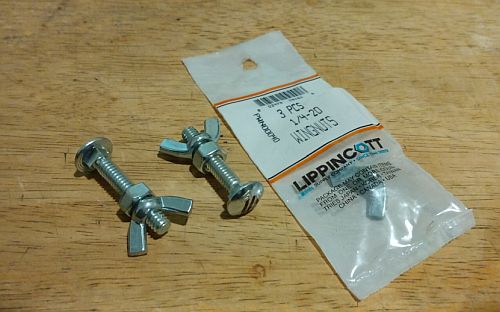
1/4 inch 1-1/2 inch carriage bolts to attach the cargo container to the middle shelf...

1/4 inch round hole fender washers. I'll glue these onto the inside of the container...
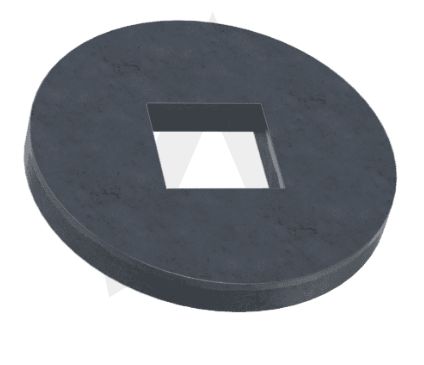
1/4 inch square hole fender washers for the wood side of the mounting...

1/4 inch wing nuts for when I'm going to the storage locker...
The home improvement store had no square hole washers and the other washers sold in packs of 50 or 100. This much hardware was $2 and change...
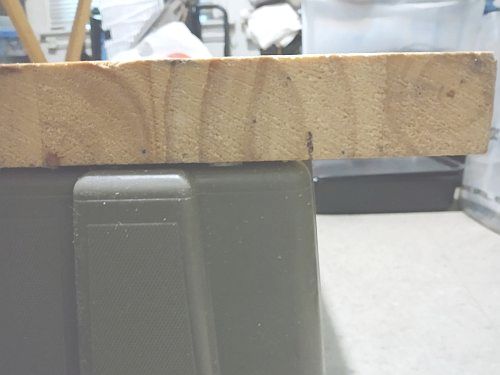
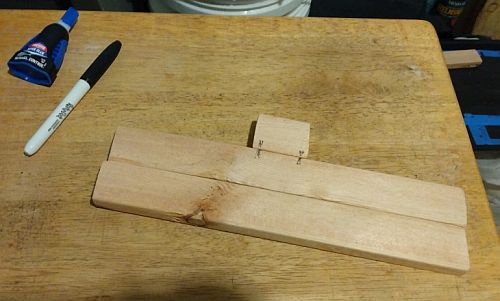
The 24 inch long middle shelf is about even with the bottom length of the cargo container, and the width is close enough to 14 inches to mark off a 2 inch margin for the 18 inch wide shelf...
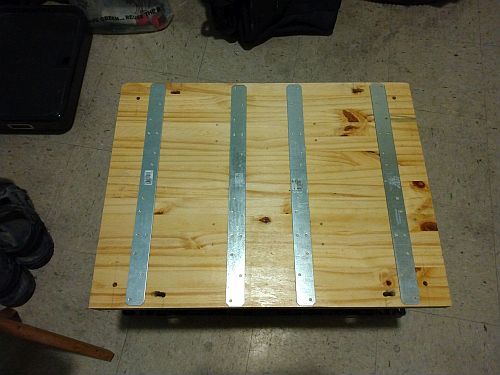
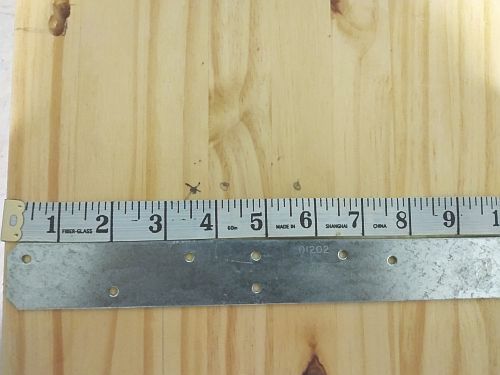
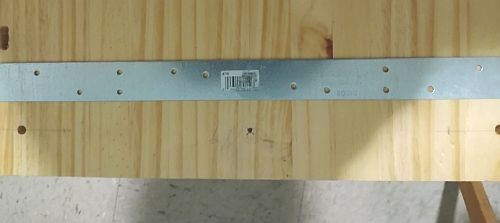
The support ties placed to reinforce the threaded rod holes and side rail holes at the ends and underneath the center area for a stone. Each tie should take 8 - 10 3/4 inch deck screws - $5 for 50 will do...
The carriage bolt holes are placed 1-1/1 inches in, two on each side around the stone space...
The end carriage bolt holes are at 9 inches across and 1-1/2 inches in, in line with the threaded rod holes...
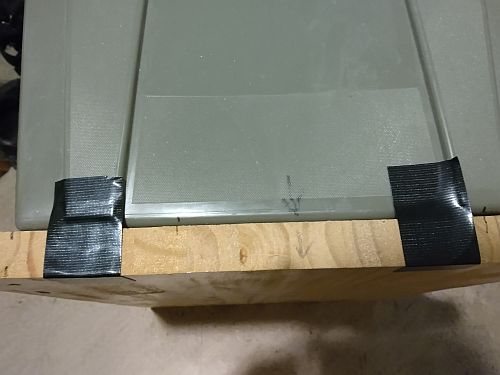
After charging the old ass drill batteries over night and the next morning, I lined up the shelf with the container and set it with gorilla tape. The arrows mark the orientation...
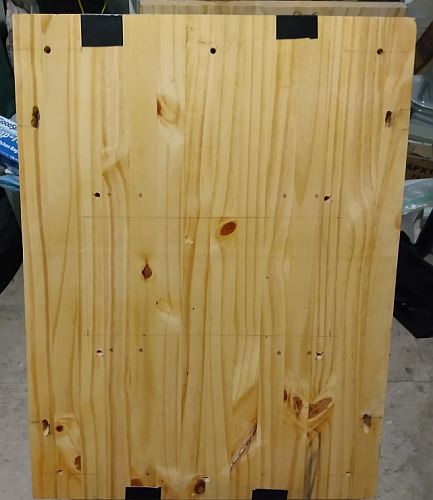
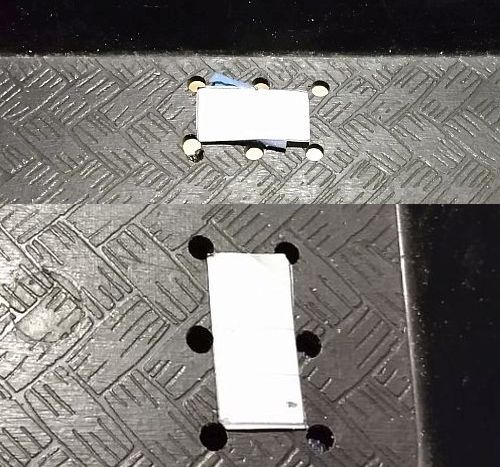
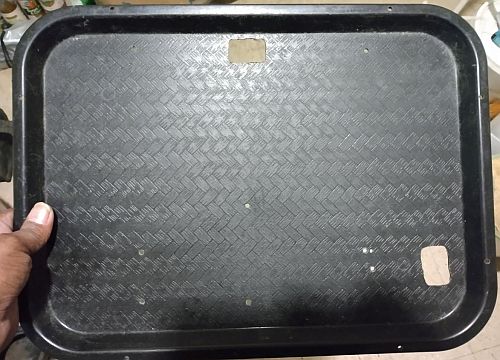
I drilled the mount holes before taping the shelf in place...
Six neat mount holes...
A little electrical tape seals the holes until time to put everything together...
Now, that would be the end of the segments, but later on Tuesday I got a surprise in the mail...
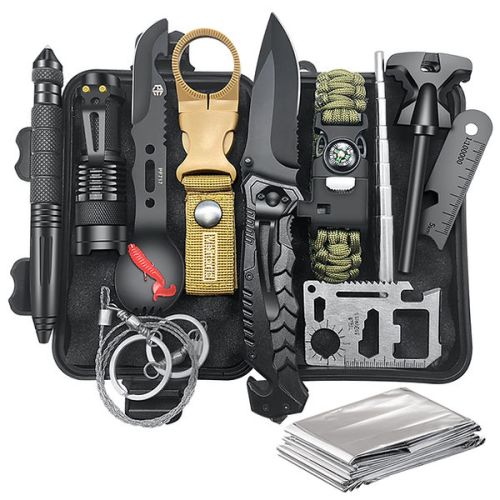
Somebody sent me a 12 in 1 Survival Kit by Veitorld. I never heard of them, but apparently it's a highly rated and popular kit for casual or beginning campers. There was no sender's address on the Amazon packaging, no info inside or email announcing it, so I don't know if the company sent it for me to review, or it's an anonymous gift from a listener (why anonymous?).
Anyway, while I'm still waiting for bldg. management to finish work in my unit, I'll do a product review next episode...
Youtube channel for Bike Shop and Travel Vids 