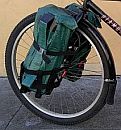
Bike Shop
(01/05/24)
Ok, for the last Itinerary, I'm noting the official end of the walkabout Pre-Launch phase. I have all the gear I need for taking day long Scout trips up to 50 miles from the city, and only a few remaining items for Tourpacking and full Trailer Camping (stronger head and tail lights, the butane stove, and the collapsible roller bag for the worst-case scenario - I can take my time getting those). I'm keeping my SRO unit as a basecamp, so I can do without the virtual mailbox, and that about does it. It feels good to be at the other end of all those baby steps. Which leads to the end of the show.
Thing is, I was done with podcasting in 2016 before the Treason Party stole the Election and I changed my mind because I wanted to have my own independent energy and free speech platform. I'd been producing Sundown Lounge since 2005 in the spirit of prolonging my time as a pirate radio DJ. Many of the issues I had 7 years ago are even more prevalent now - it's much harder to curate a wide range of free music from indie bands and free samples from established artists due to music directories fading, more and more bands running their own websites, and frankly, I could only score a small number of record labels and bands willing to send me promos, and I don't play songs where I'm unsure if I'd be violating their rights. I used to run a lot of bands wanted ads on Craigslist in cities across the country, until somebody dropped a dime on me in 2020, and my presence on FB was always hit or miss...
Funny story - I only used FB to post episodes, and hardly ever used the Messenger. Well, I discovered that an artist tried to contact me, but only used the message box, and no other method to reach me, and I didn't find out till at least a few years later, by then it was too late. It was Erykah Badu, BTW, and I'd have gladly played her songs, but that was my screw up. Anyway, over the years more and more great music became less and less available. The other issue was that my global audience was never more than 3 to 4 figures, and the show was never intended to make money. That was cool for a long time, but it's not worth the time and effort to be a hobby anymore..
I'd rather spend that time doing other things - more cycling and getting out and exploring the state up and down the coast; I have a 5-7 year backlog of sculptures I want to finish and display; I have a first novel that never got proper exposure, and a second novel and several short stories I want to write, and I have my own music I want to get out. There's no guarantee that any of these other projects are more than hobbies, but they need room to breathe...
So, I'm done with producing audio podcasts after this episode. From here on it's cycling, the art projects and the new video joint.
-----------Ok, lets go over the rough metadata for the new video joint...
I'm still checking out other bike blogs to compare and contrast, but if I had to describe my particular POV: I'm a black solo traveler, retired from day jobs, after a ton of preparation finally getting to ride the west coast and take in the scenery, looking to explore the state outside of LA and SF, personal diary style...
I'll focus on stealth camping, sometimes pitching my tarp tent in an official campground, trying to see if California is still the Wild West or even the Happy Hippie Granola Left Coast, and wondering just how safe am I on the road compared to when I hitchhiked back in the late 70s, and other misc. impressions at the end of the day...
Technically I'm not producing fancy action-packed videos, just where I'm going or where I've been. They won't be long either - 15 to 30 minutes at most. I've never used Photoshop, Premiere Pro, or anything fancier than Windows Movie Maker, so basic edits will be it. I have a couple previous model smartphones as my action cameras, an old Nikon Coolpix in great condition for outdoor shots, a mini tripod and the Quad Lock handlebar mount to round out my photo gear. Oh yeah, I do want a few more SD cards and a new lavalier mic so I can blog on the phone at camp and while riding...
I still don't give a damn about monetizing, though I do have a Patreon I've never used; maybe I'll make a shop page...
I intend to feature some of my own music, and maybe, if an artist sends me a music video or a piece for backgrounds, and I like it, I'll play it, but I won't be doing music sets anymore, just two or three pieces as music breaks...
The Scouting and Tourpacking videos will obviously be different because one ends at home and the other at camp, and that's as far as I can speculate for now, but that's enough to start with. I don't even have a title for the blog yet cause so many have already been taken, but I have until Spring to work it out...
Youtube channel for Bike Shop and Travel Vids 