Bike Shop
(07/15/22)
This time out the dental delay is ongoing by show date as I wait for more gear and test run the training routes. Meanwhile I make a little progress on wiring the battery box...
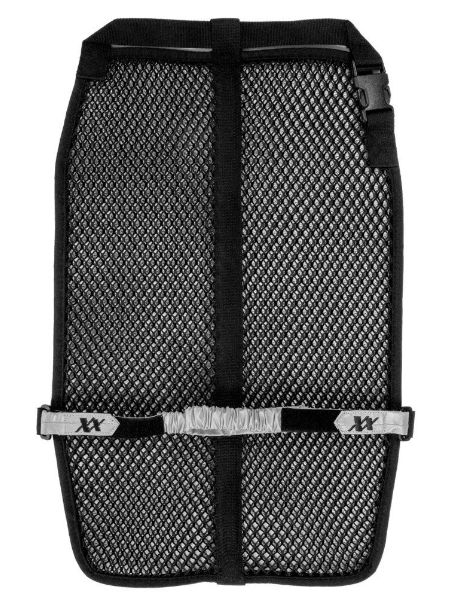
The first thing I ordered, a tactical-style backpack spacer to reduce the amount of sweat you get while riding. Two weeks later it still hasn't shipped..
The 8-Mile Crissy Field Run, a bike training route on the least hilly streets from the SFMTA Recommended Routes map, although Polk St. is almost all hill...
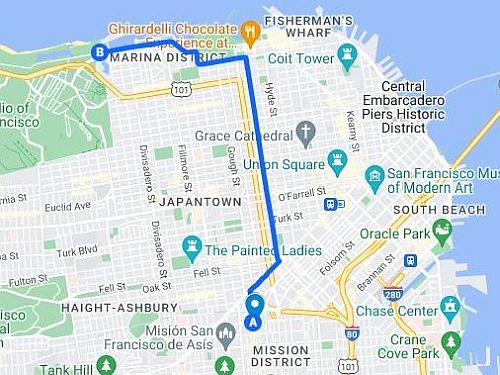
The 10-mile Embarcadero Loop training route only has one obvious uphill section, from 3rd St. to 2nd St. up Folsom...
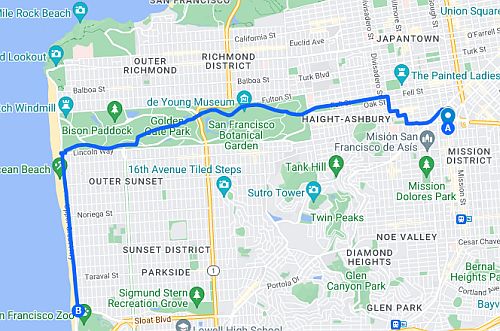
The 15-Mile Park-Highway Run has moderate uphills to and through the park...
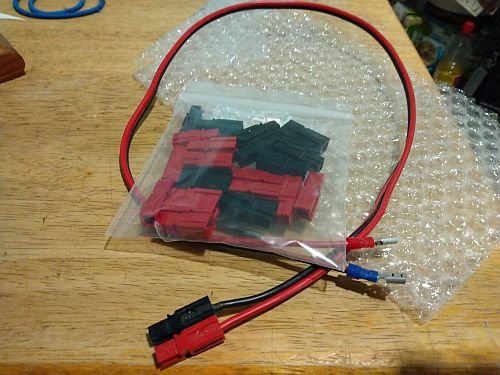
More PowerPole connectors for the battery box...
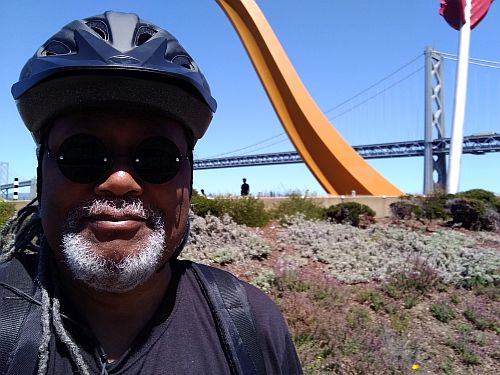
On Sun. the 10th I rode the Embarcadero Loop. The loop part is down Howard St. to 11th, over to Folsom St. and back up. The big 'Cupid's Bow' sculpture marks the halfway point...
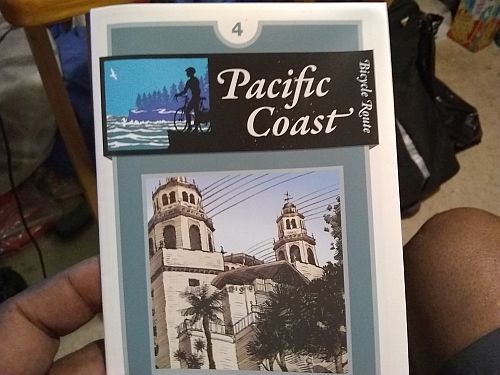
The Pacific Coast Bike Route section 4 map arrived with tons of info to pore through...
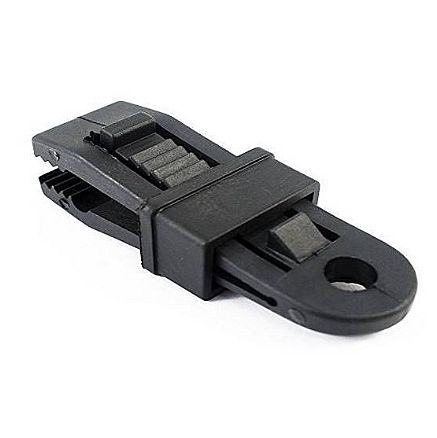
The alternative to adding grommets to one of the camo tarps is to use tarp clips like this alligator style...
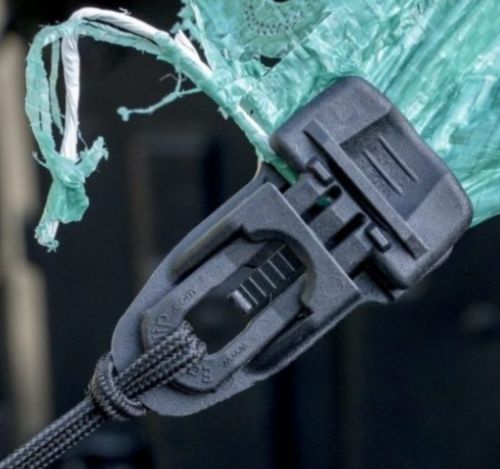
EasyKlip Tarp Clips, Midi size, made in Sweden, designed to grip harder under load...
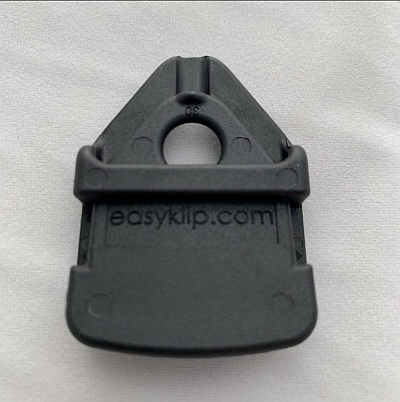
Easyklip Mini size. I bought a pack of these hoping to have less hassle rollig up the back to back camo tarps...
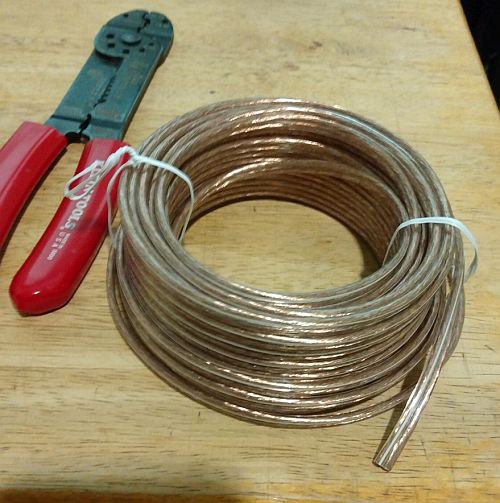
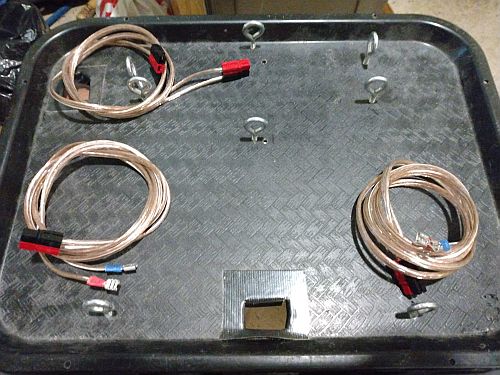
Instead of ordering and waiting for red and black zipcord, I got 16 gauge speaker wire for the battery box...
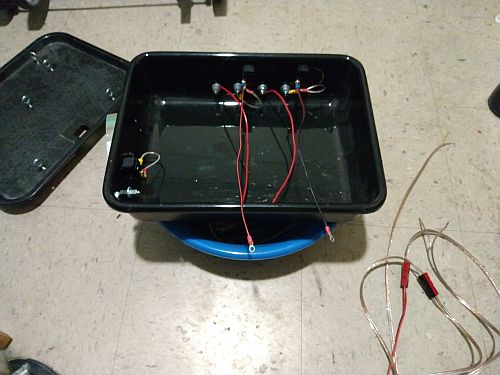
First round of wire prep for the battery box...
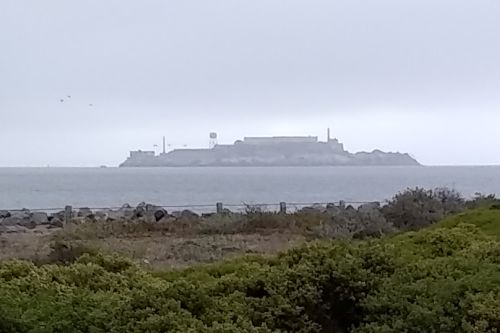
Alcatraz Island seen from Crissy Field on a cool foggy morning. The Crissy Field Run has a long gentle rise up Polk St. till it crosses Washington, then it's a sharp downhill to the Marina, meaning a hike back up on the return..
(07/25/22)
As dental season draws to a hopeful close, I expect vision season to stretch to Thanksgiving at the latest. Using that as a base date, I've reset my formal walkabout launch date to my birthday in October next year at the latest, giving me more than enough time to get in long touring shape, square away all my gear and get plenty of overnight and 2-3 day camping experiences under my belt...
Meanwhile, the bike shop was jam packed with almost daily activity...
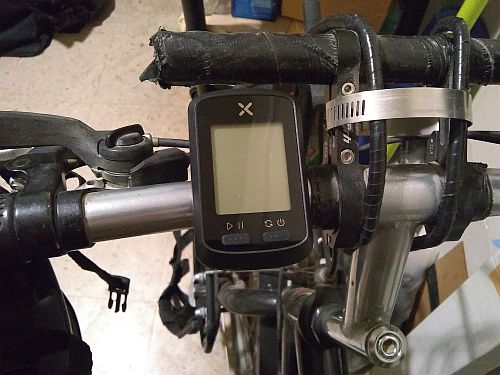
The Xoss G GPS head unit arrived on the 15th, as expected. After setting it up and giving it a full charge, I mounted it to the handlebars...
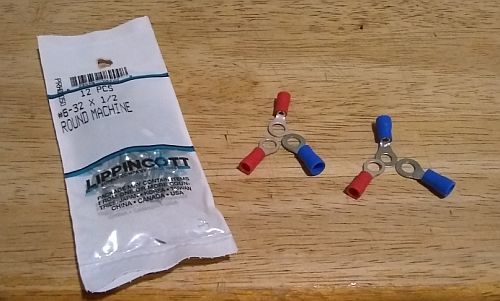
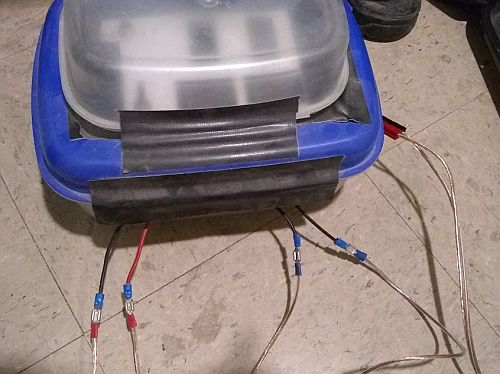
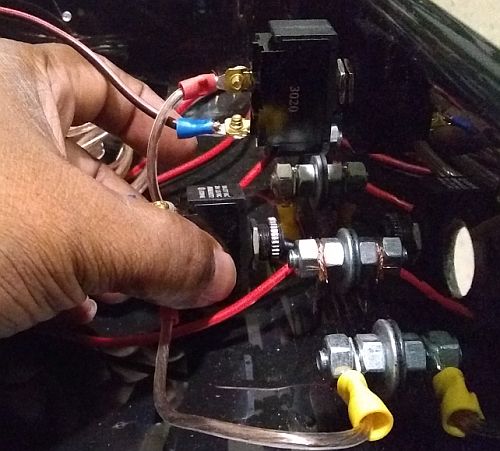
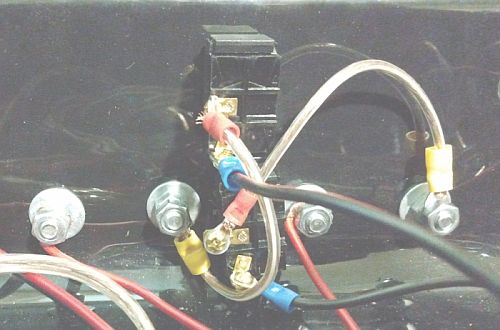
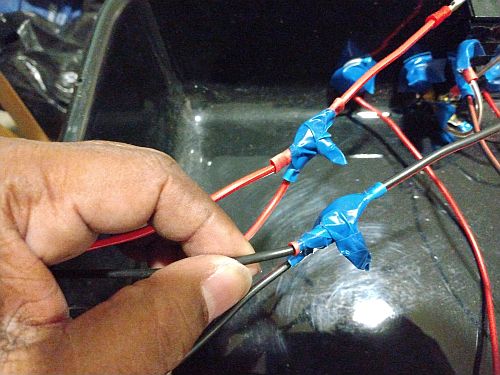
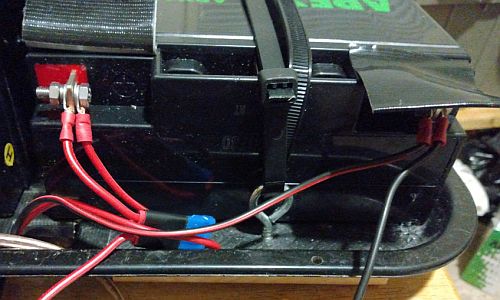
For the second round of battery box wiring, the smaller float bettery has F1 blade terminals, making it difficult to connect the two sets of cables it needs. I found a clean non-soldering non-splicing solution using 16 gauge ring terminals, machine screws and nuts...
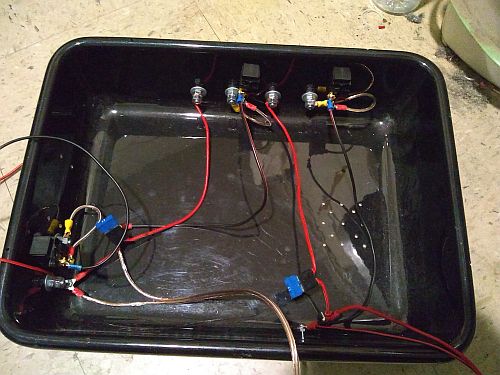
It took a couple hours, but the battery box wiring is done. The two house and one float batteries have input and output cables and relay cables to the control panel...
The relay cable connections to the control panel will get labels to make hook ups idiot-proof. Later on I'll double check everything and do a basic run test...
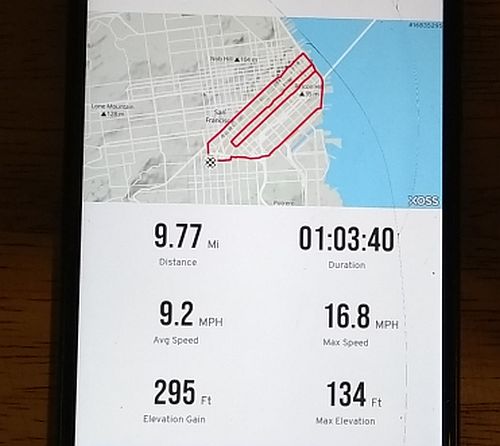
On the next Sunday I took a shakeout test of the head unit riding the Embarcardero Loop. The unit's app summarized the ride thusly...
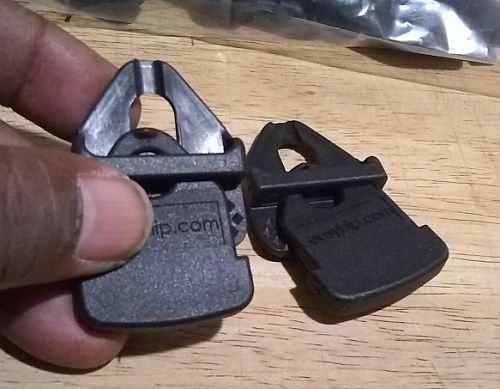
The Easyklips Mini Tarp Clips came in and look great...
On a slightly overcast early Friday morning I went to Duboce Pk. to do the camo tarps...
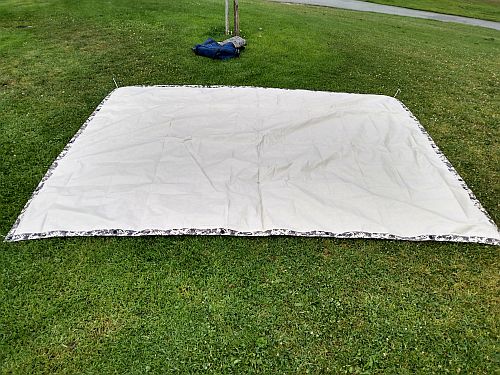
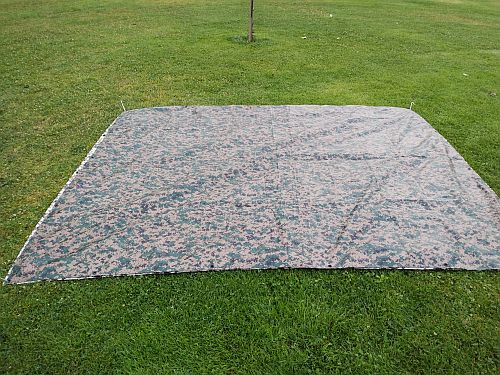
The desert camo tarp pinned face down on the dewy grass...
The woodland camo tarp laid down face up. Yes I smoothed it out after taking the pic...
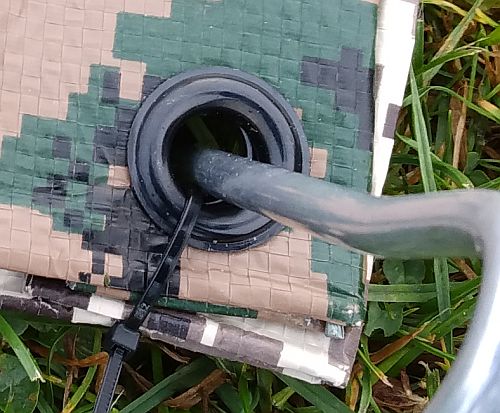
The corners zip tied. A second tie is obscured by the tent stake...

I brought one of the tarp clips but decided not to use it yet. The midpoint of the tarp's 10 ft. side didn't have grommets so folding was easier...
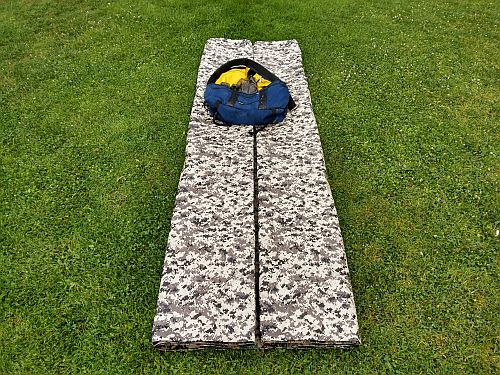
Second fold...
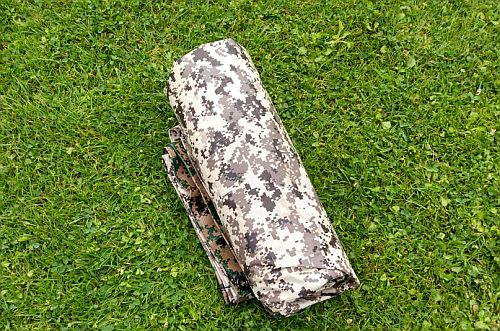
The finished roll was thicker than a single tarp condo roll, but it should still fit the front rack basket; if not, I gotta re-modify. This first time took about 20 minutes, so eventually rolling the double camo shouldn't take more than 10...
(08/04/22)
This time I have an actual Itinerary item to consider before or during a long bike tour - the weather, which includes the additional California seasons: Fire, Flood, Earthquakes and Drought. Here I'm looking at the one-two punch of Drought and Fire...
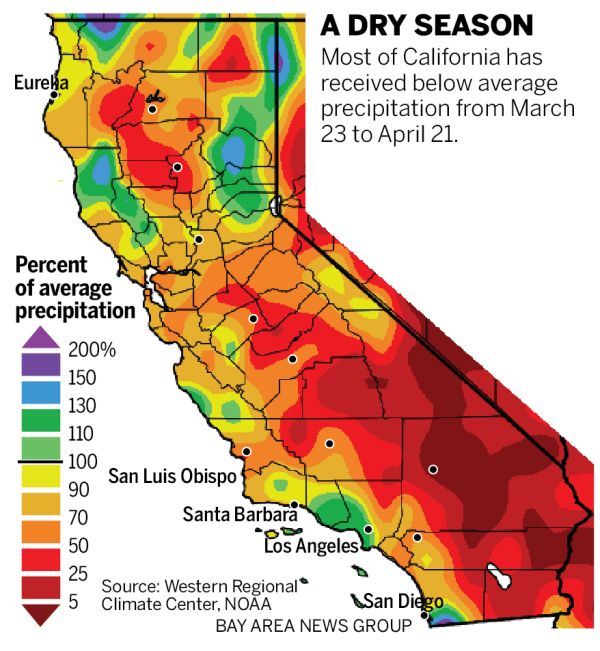
California 2022 spring precipitation map. Image: Western Regional Climate Center, NOAA, Bay Area News Group...
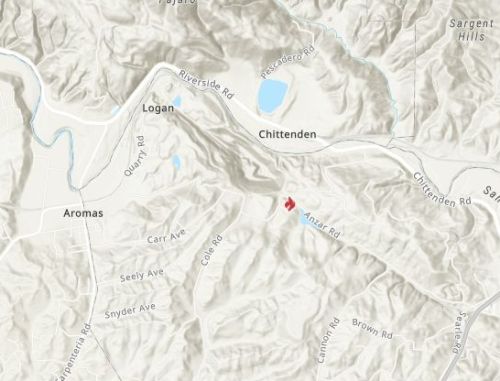
The closest wildfire to the Pacific Coast Bike Trail is the Anzar Fire, located E of Aromas in the Monterey Bay area. Image: Cal Fire...
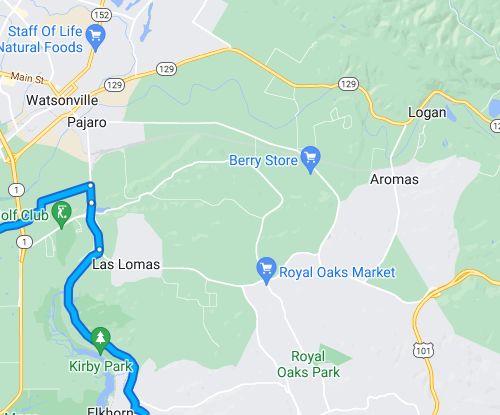
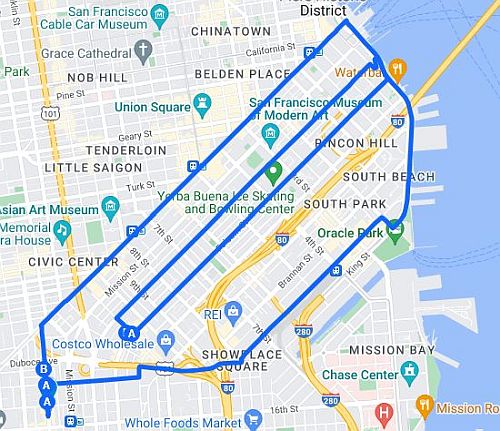
Google Map detail showing Aromas in relation to he Google Bike Route, which doesn't adhere to the Pacific Coast Bike Trail...
Catching up from the last episode, in the shop I worked to complete the tent and sleeping gear logistics...

I partially unrolled the double camo tarp to wipe up any remaining dew within the folds, then rolled it back up reasonably tight. Turns out the roll was similar to the tarp condo roll...
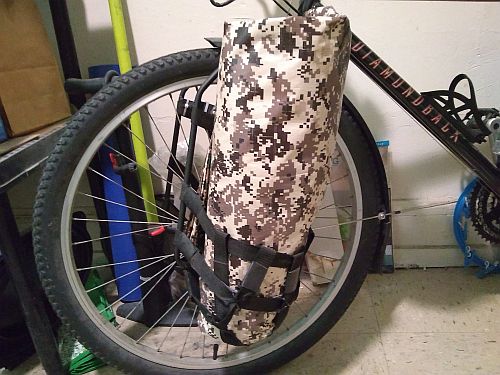
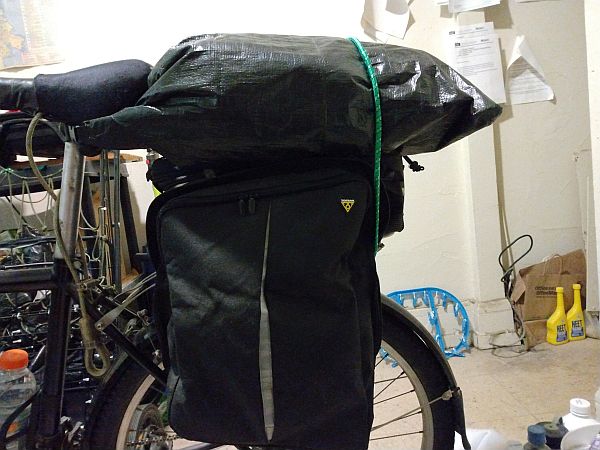
The slightly tighter roll actually does fit in the front rack basket, sbut it's too tall, so it should go to the handlebar harness......
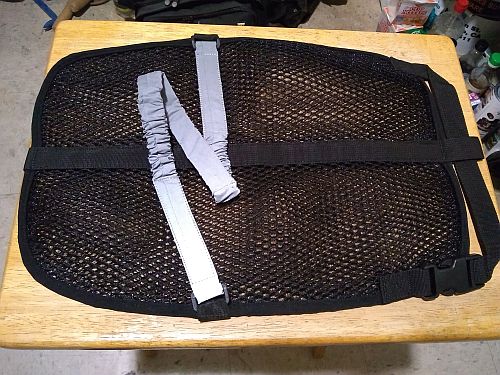
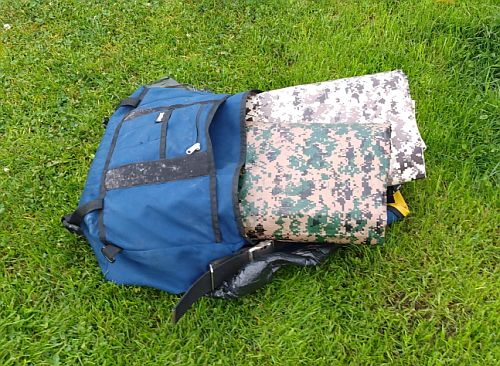
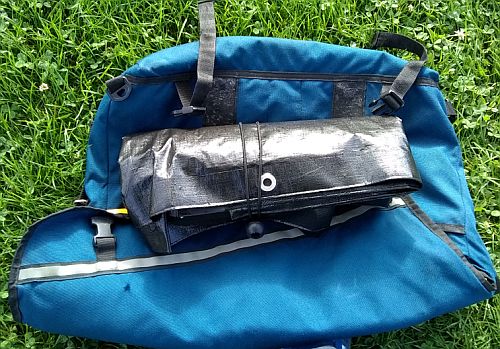
The replacement backpack spacer came in the mail late Monday the 25th...
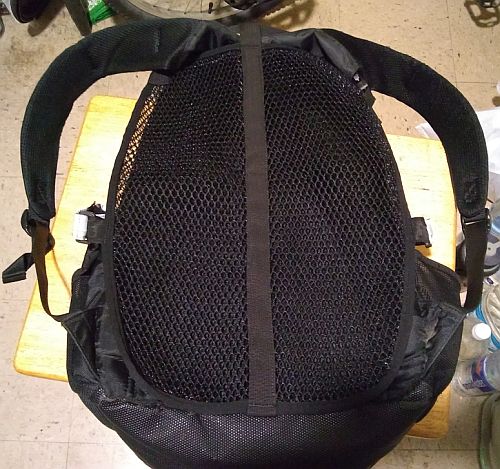
The spacer installed onto the laptop bag. Finally I can pack the laptop and podcasting gear and produce an episode on location...
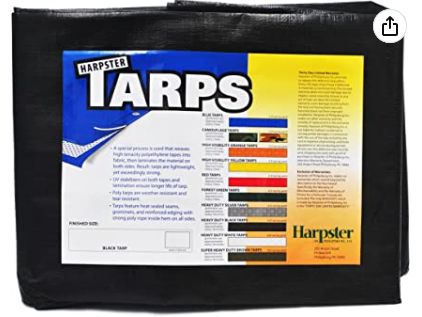
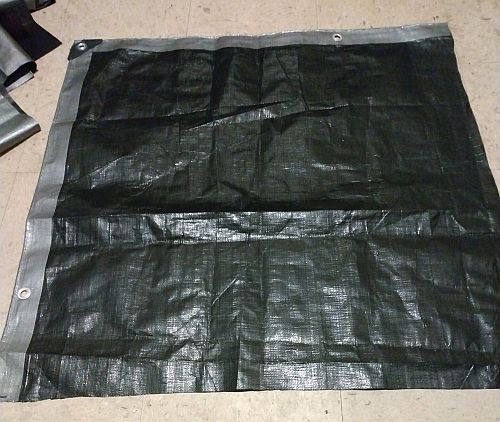
For a ground sheet I ordered a 6x8 ft heavy duty waterproof poly tarp...
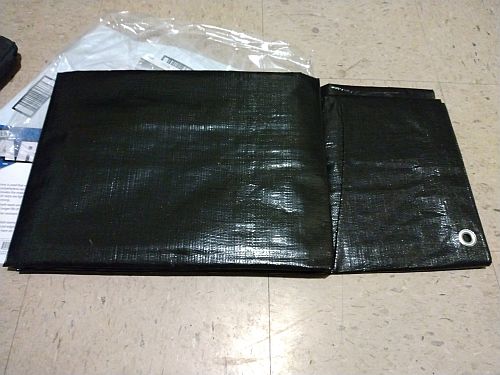
Two days later the ground tarp arrived, ready for a rollup at the park...
Then I got waylaid by my first cold in 3 years, had a Covid freak out, then spent the next week tracking my symptoms, staying in bed and watching Netflix. By the time this episode went out, my symptoms have remained mild and beginning to fade. When the next updated booster comes out, I'm getting it for damn sure..
(08/15/22)
Considering the two most challenging situations and areas where a road closure would occur is the Central Coast, where parts of Hwy 1 hugs cliffs and mountain passes, where rock or mud slides (with accompanying CalTrans work crews) will cause detours, and the area around Diablo Canyon Nuclear Power Plant. If an earthquake caused the Plant to fail, the fallout would threaten almost 100 miles of coast and turn that section of Hwy 1 and 101 into a potential death trap...
-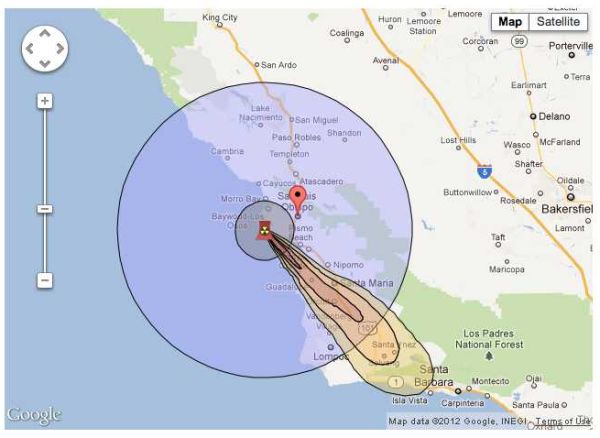
NRDC Google map showing the fallout pattern if a Fukushima-style disaster occured at the Diablo Canyon Nuclear Plant on March 11-12 2011...
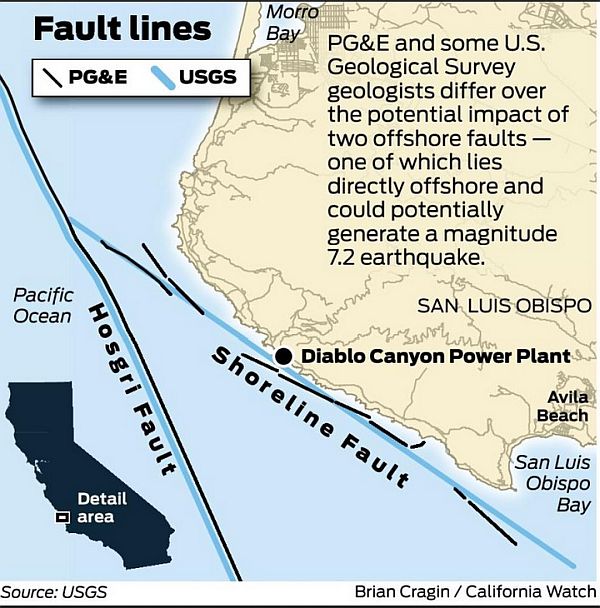
Fault lines near Diablo Canyon Plant, Image: USGS, Brian Cragin/California Watch...
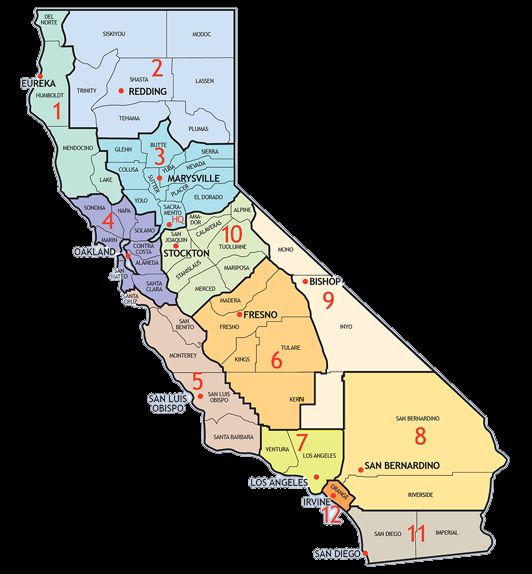
CalTrans state district map. Districr 5 covers the central coast from Santa Cruz to Santa Barbara, where I expect most road closures and detours to occur along Hwy 1...
--------------------
Meanwhile, dental season is pretty much done, just in time for me to come down with a cold that stopped everything for two weeks, but I've mostly recovered and getting back to the tasks in the bike shop..

A fresh batch of dollar store bungees for the shop...
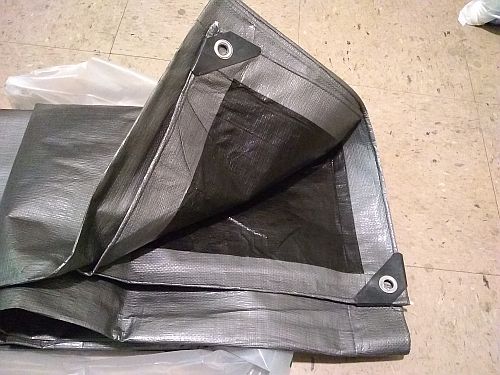
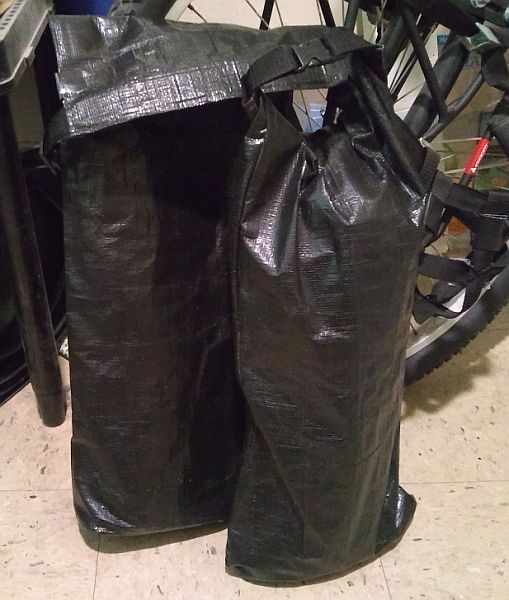
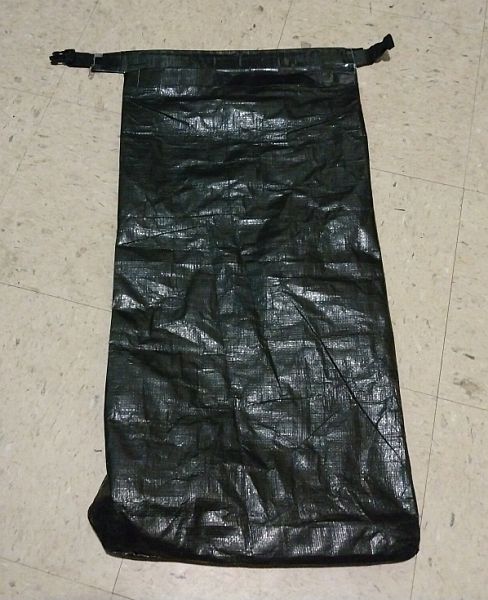
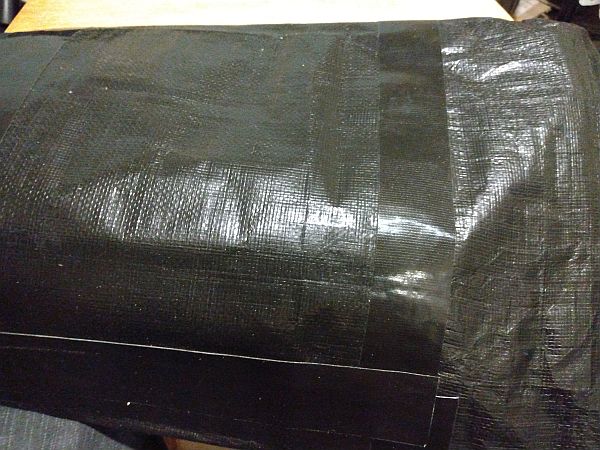
Also, a cheap heavy duty silver/black tarp to make bags for the front cargo racks...
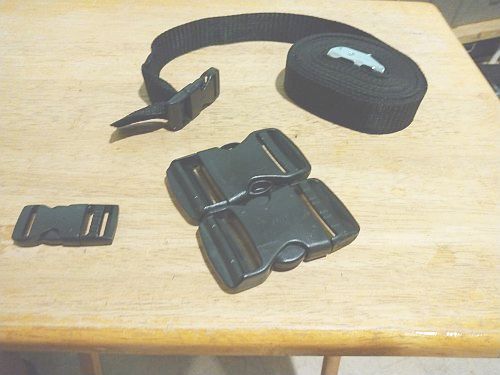
To give the front rack bags a dry bag look, I got two pairs of 1 inch side release buckles and a roll of 1 inch webbing strap. The 2 inch buckles are spares for future use...
Checking the case and switches to confirm that there is enough room to stack the A battery cut-off above the B switch...
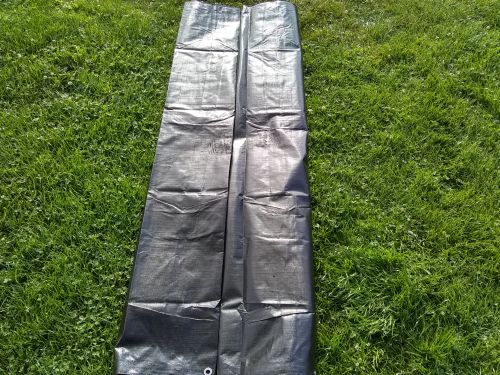
On Mon 8/8 I took the ground tarp up to the park to roll it. On the grass, it makes a seemingly tiny tent floor...
The finished roll will easily fit in a front rack bag, but what else can go with it is the question...
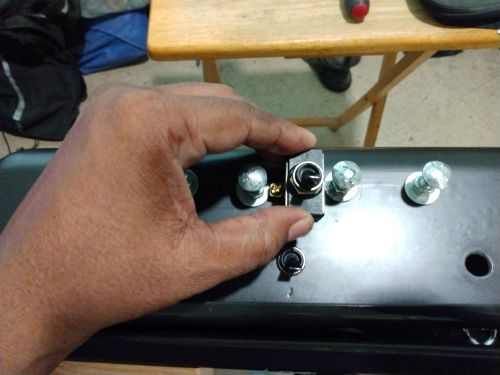
The A battery cut-off switch stacked above the B switch, a bit off center to accomodate the terminals...
-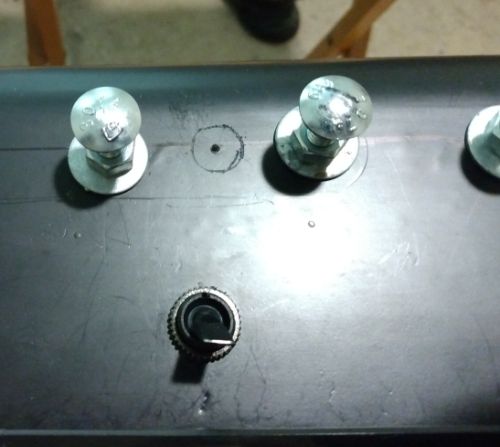
The hole roughly scored for drilling. Those two terminals will be insulated with electrical tape...
After drilling the new hole, the A cut-off switch is installed...
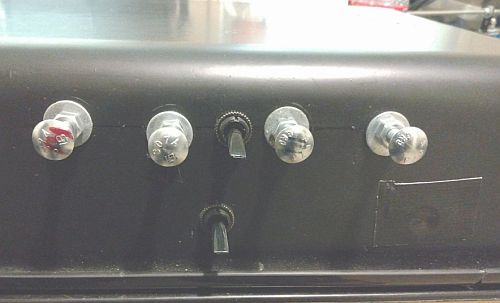
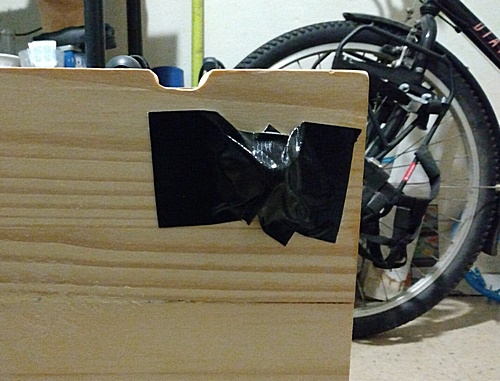
Tne battery box case with both switches mounted between the batteries and the old hole double patched...
(08/29/22)
Ok, the Itinerary was just more obsessing over the lack of info on finding a bike-oriented, non-RV or campervan dispersed campsite, mainly because I have yet to take any rides down the peninsula to Half Moon Bay or the Monterey/Big Sur region for boondock sites, let alone overnight spots. I've been imagining worst case situations of only finding overnight camps near the highway and no places where I could hang out during the day and rest and catch up on the laptop without blowing a hole in my travel budget. I know I should focus on finding my first overnight spots in Northern California first, but it is what it is...
Meanwhile in the Log, I decided to focus on the single task of finishing up my set of bikepacking-touring bags...
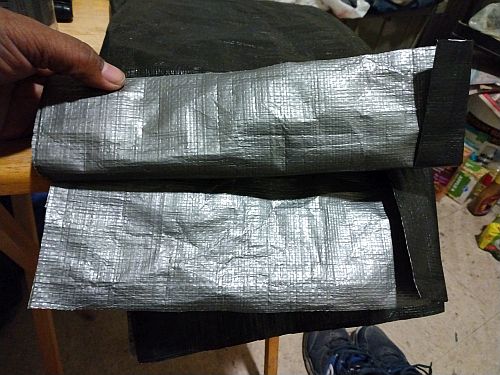
The first set of tarp bag pieces ended up too small, so this set (24 x 30 inches) should do...
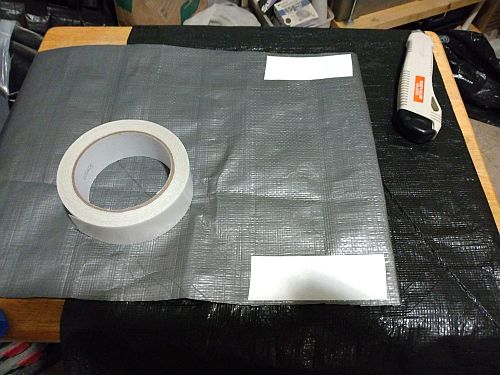
First, taping the seams and turning them inside out...
Opening up the opposite side for the dry bag strap...
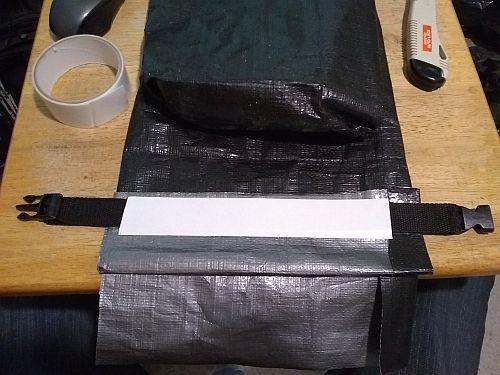
Centering the strap (20 inches) within two layers of carpet tape...
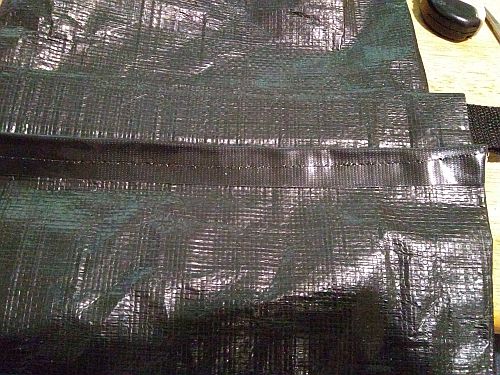
The excess on the non-strap side is removed and Gorilla tape covering any remaining raw edges...
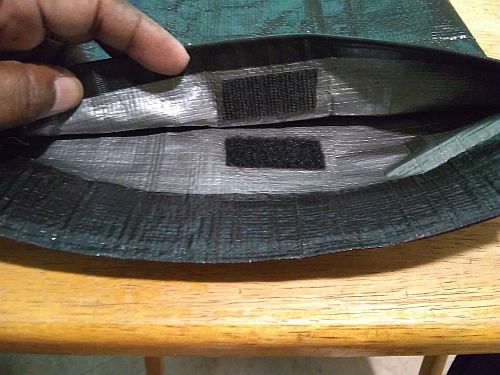
The last of my velcro tape used to secure the opening...
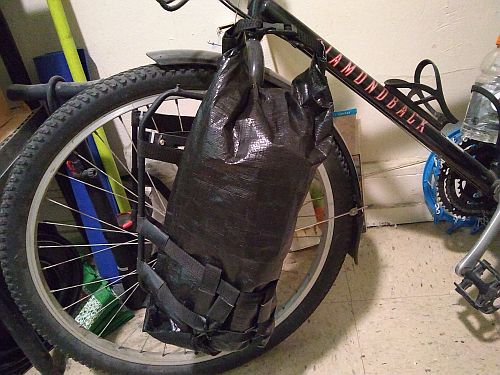
With the ground tarp inside, the top rolls down nicely with room inside as it sits below the handlebar harness frame...
The second dry bag completes the front rack set...
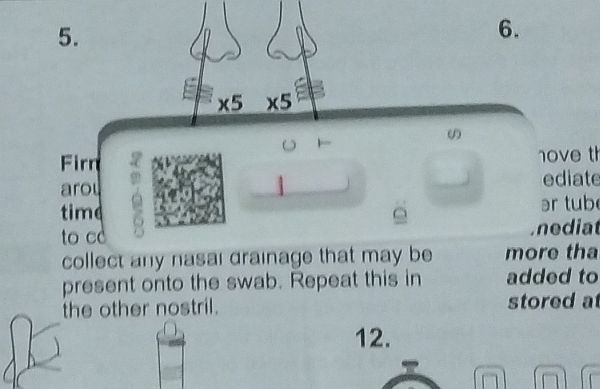
The city Health Dept. sent me a few fresh Covid tests a couple days after the latest show date, so I checked to confirm that my recent cold was actually a cold..
A test fit of the tarp tent, ground tarp, sleeping bag, pad, bag and bug bivys and bivy frame. Combined weight is 17lbs. This alpha version is a bit clunky and can be improved...

Side view. It's rough, but not bad for a first look...
The bag bivys and bug frame...
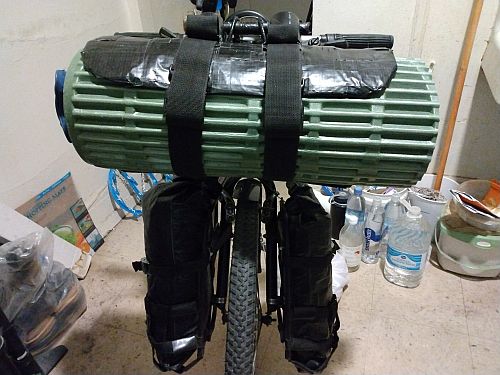
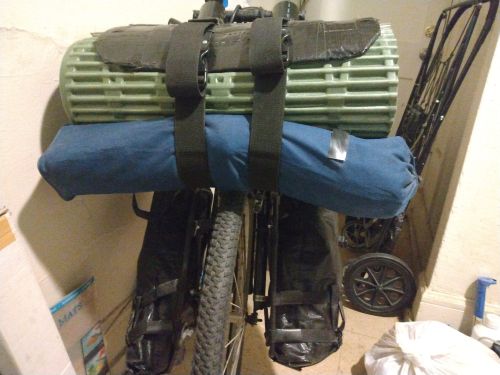
Second attempt, this time the sleeping bag is inside the bug bivy, rolled up and tightly stuffed into the cargo bag on the chain side, the ground tarp is in the other cargo bag, and the bug bivy frame in rolled inside the camo tarps in the harness...

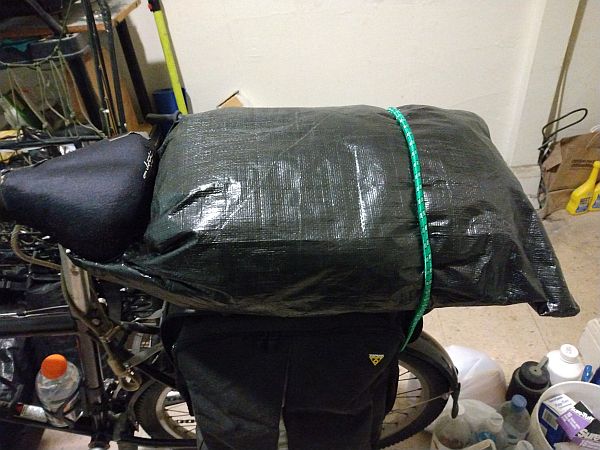
This way the roll inside the handlebar harness sits above the bottom of the harness frame, a cleaner more efficient look...
Side view is much better...
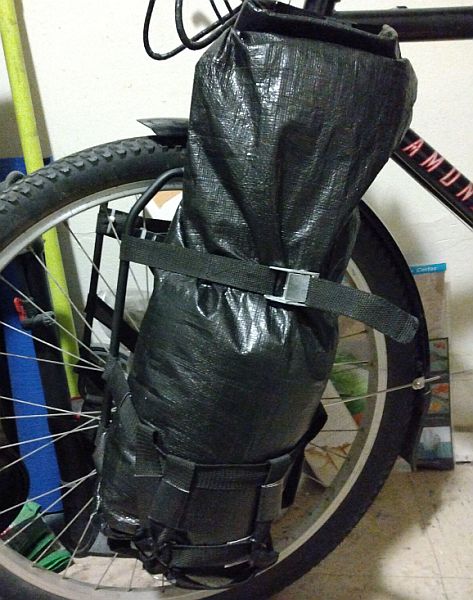
With the sleeping bag and bug bivy separated, the cargo bag is topped off, but it easily accomodates the rack strap...
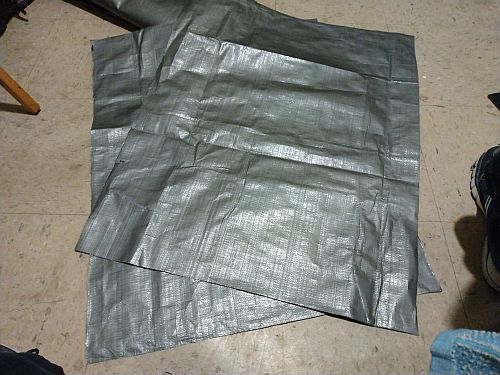
As soon as I thought 'that's it for the bikepacking bags' I decided to replace the messenger bag. A 32 x 32 inch blank (minus the grommets) should be big enough...
The finished bag should easily take 20 - 30 Liters of clothes and other light but bulky items that won't fit the trunk bag or the big backpack. The top strap is double reinforced. I may or may not add a feed bag to the handlebars, but I won;t be making that one...
I put the trunk bag back on the rear rack and stuffed a dummy load of clothes into the designated 'seat' bag. The single bungee cord across the bag seems to stabilize it, no shifting side to side...
A wear guard around the lower third and a spare bungee cord (and some emergency Gorilla tape) should fix any mishaps on the road...
A nice wide wrap around strip of tarp, carpet and Gorilla-taped to the bag...
The seat bag with wear guard. The DIY bag set is almost complete...
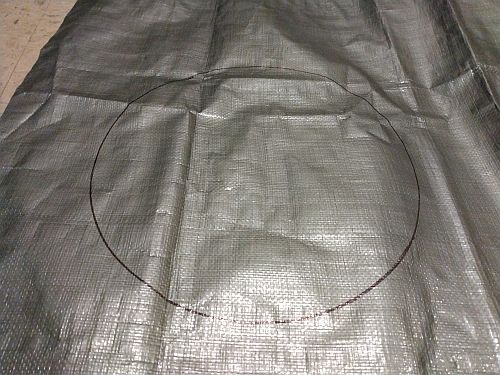
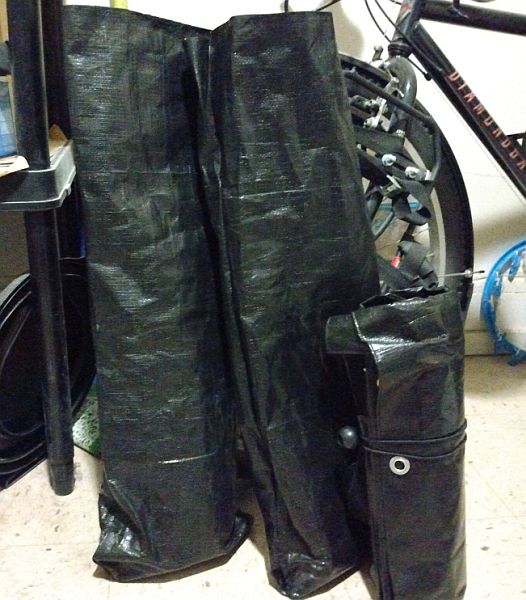
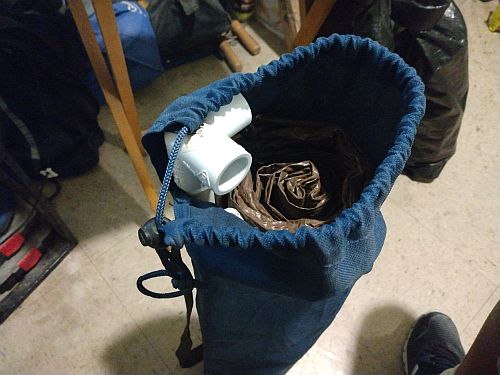
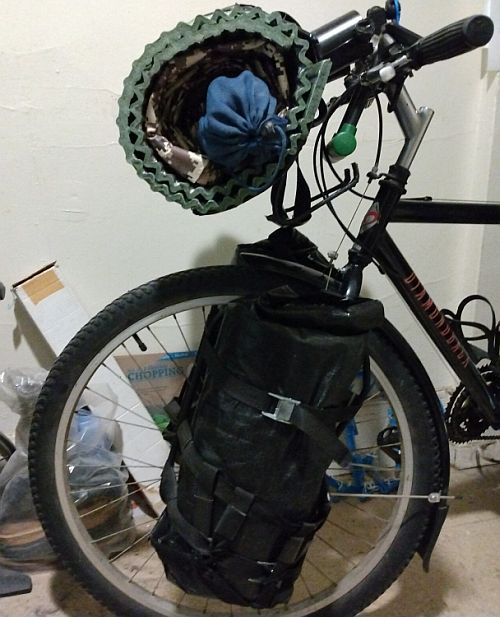
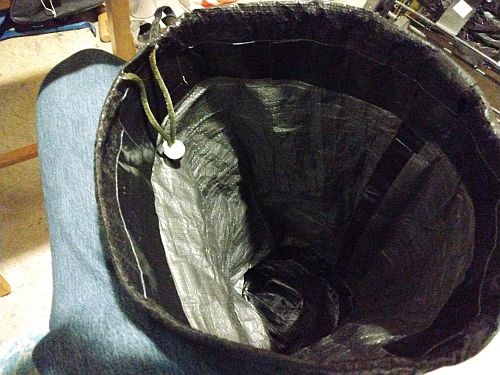
Looking at the exposed sleeping pad and camo tarp tent inside the handlebar harness, I decided to try a simple cylindrical bag. I used a 5-gal bucket lid to cut the bottom...
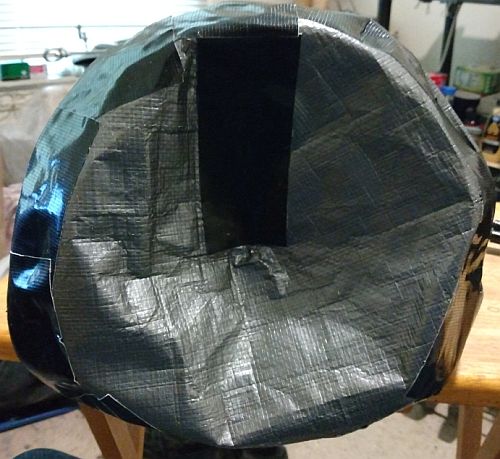
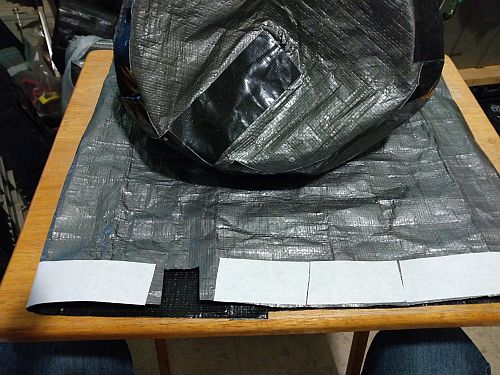
I made the blank 36 wide x 30 tall, taped the side seam and slowly attached the bottom overlapped without a seam, then put Gorilla tape on the inside and outside overlap. The bottom isn't intended to be load bearing...
The unfinished top will take a drawstring and spring stop. The quick and dirty solution is to buy a new dollar store laundry bag and re-purpose the stop from the old one...
With paracord replacing the string, the harness bag is rough, but it'll keep dust and rain off the front roll...
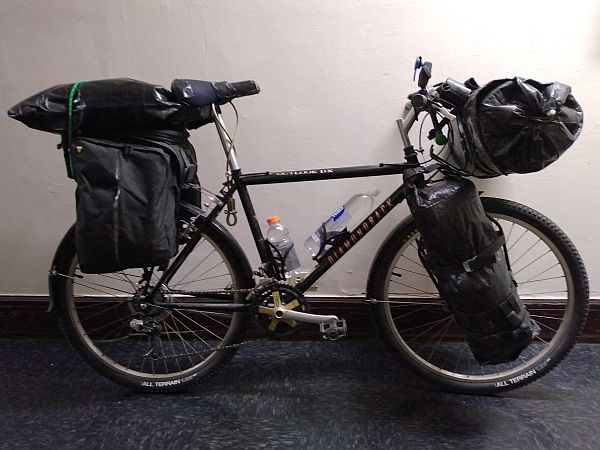
My full matching set of bikepacking-touring gear, minus the backpack. It took so long to complete such a simple setup, but this is a major baby step closer to getting on the road...
(09/11/22)
Ok, the Itinerary covers the basic exercises I'm using to tone up my core and major muscle groups to help with bike touring. I'm not doing racing-style wind sprints either, just trying to prevent charly horse leg injuries and otherwise get somewhat back into the shape I was in during my bike messenger days, which is only the mid-90s. The video I pulled the stills from is '8 Exercises For Men That Will Transform Your Body In Just 4 Weeks' by Bestie...
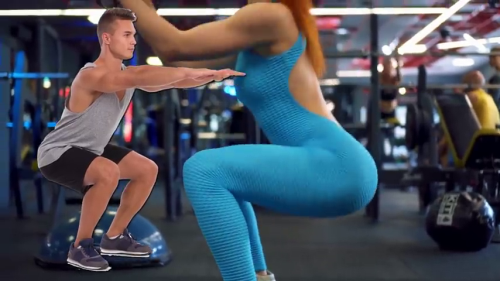
Squats - I'm not starting off getting that low, but working on it...
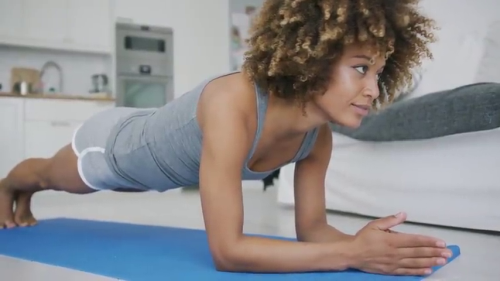
Planks - This one is actually harder to do than push ups...
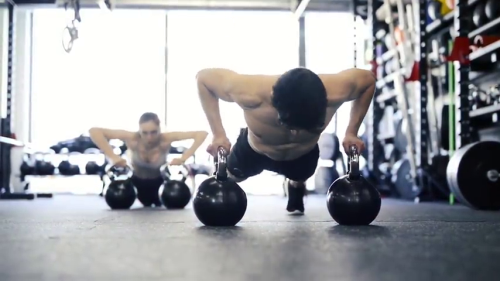
Push Ups - I checked many trainer articles and blogs, and they all agree modified push ups aren't cheating, no matter how embarassing it feels...
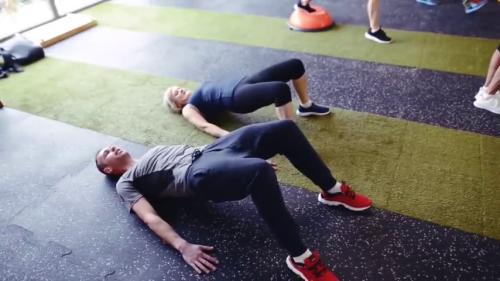
Hip Raises - These I have to do after warming up or the hamstrings will complain...
Meanwhile in the Log, the single task is concentrating on the trailer's electrical system - battery box, power plant and the 60W solar panel...
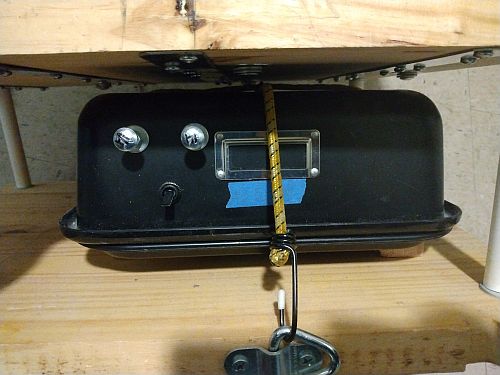
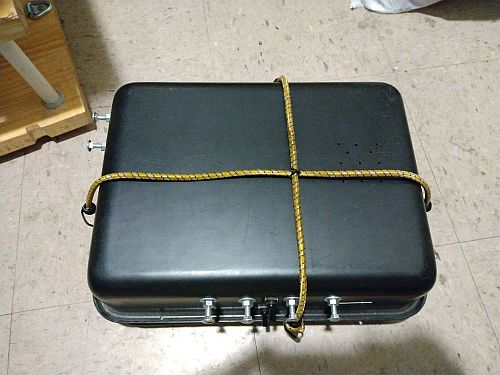
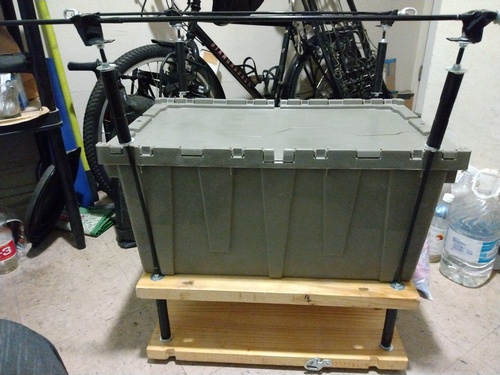
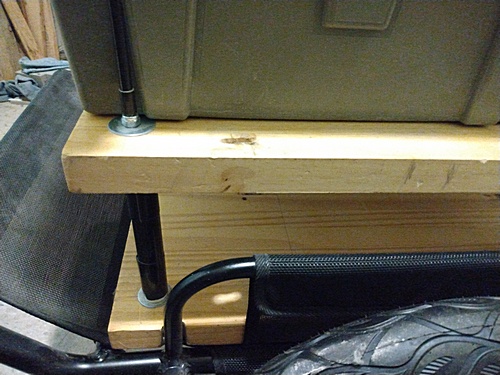
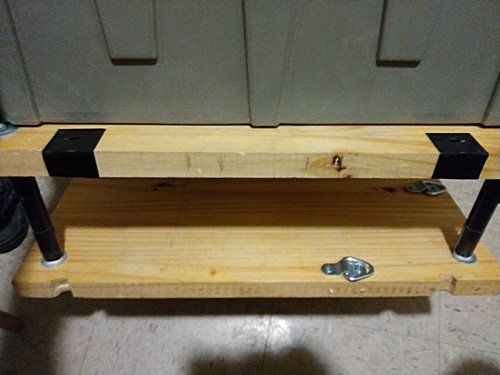
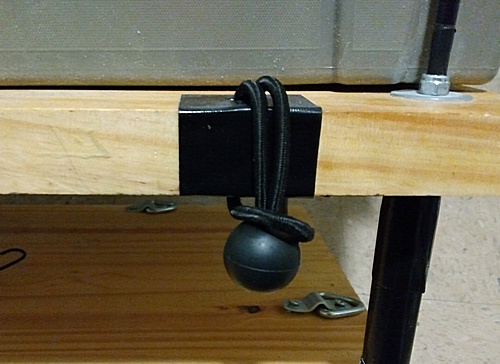
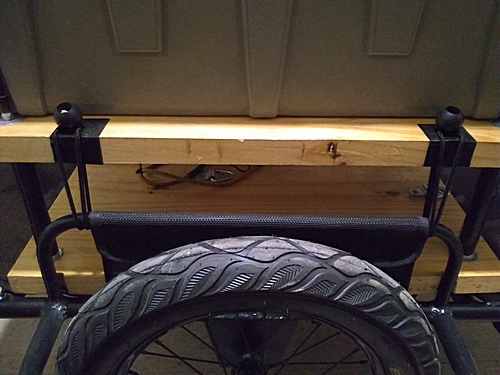
-The battery box is more or less held in place by a roughly 20 inch bungee cord to the bottom shelf sides...
The cord knotted on each end shortens it to 15 inches front to back...
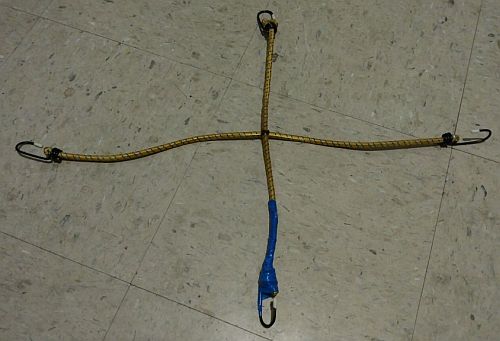
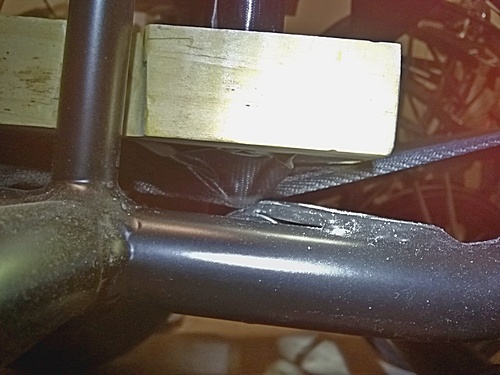
I'll shift the front anchor tie a few inches left so the bungee cord doesn't impact the cut off switches. I'll also add electrical tape around the cord and the hook just in case...
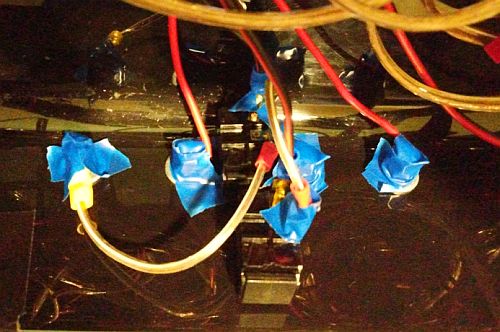
Electrical tape on every bare battery box interior terminal up front as a safety measure...
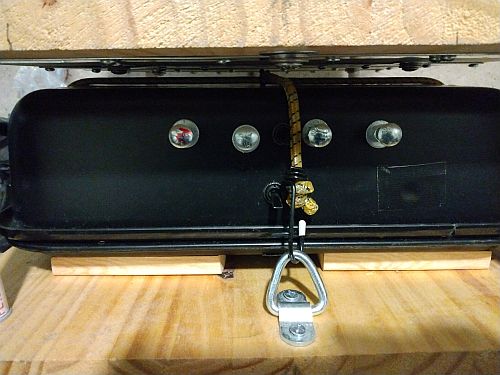
The front bungee hook and cord insulated where it'll come in contact with an exterior battery terminal...
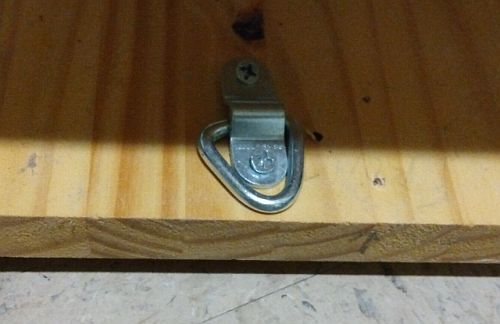
The front anchor shifted left to keep the bungee cord off the cutoff switches...
The last terminals to be insulated are the Y-leads off the float battery...
The power plant extention cables don't go with the battery box in travel mode...
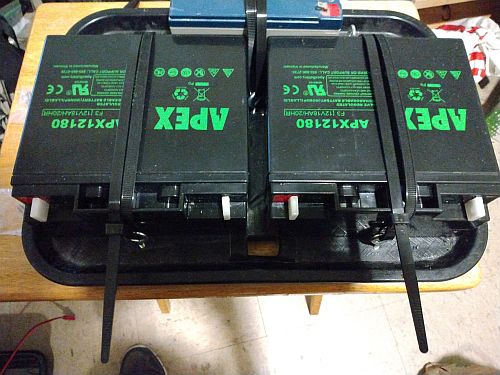
The batteries are finally locked down and secured...

The thick zip ties take up a lot of elbow room...
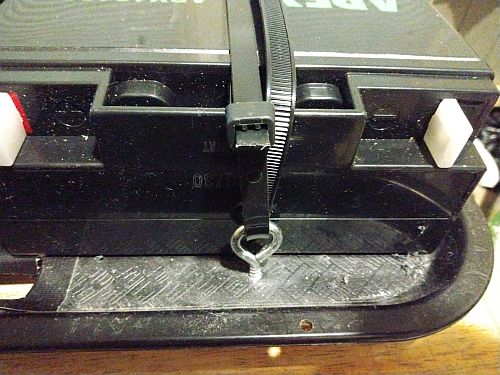
That's as close as the end can be clipped...
The normal rubber terminal covers didn't fit, so gorilla tape to the rescue...
(09/23/22)
Ok, the Itinerary covers what I thought would be a bigger deal - comparing a lot of bikepacking and touring gear lists for what I was sure would be items missing from my own list, but no, aside from personal preferences in clothes, I'm 98% solid in essential gear. That means I can get on with sorting the different categories and figuring out where stuff goes...
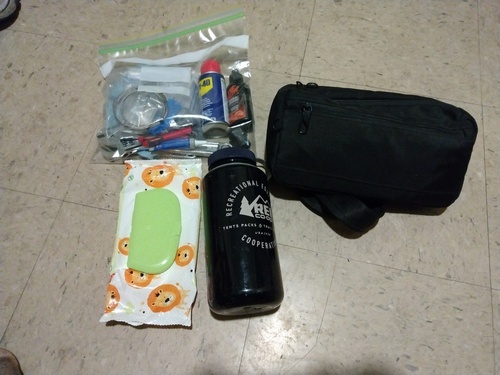
The road repair fanny pack including patch kit, maintenance and spare parts bag, a few road wipes and nalgene bottle - this easily fits in one of the trunk bag half size panniers...
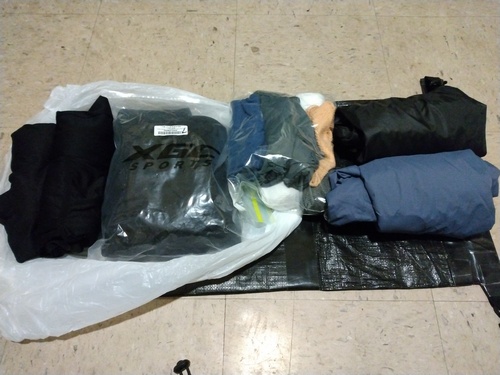
Bike Clothes: Short Jersey and base layer, Long Jersey and base layer, 3 pa. cycling underwear, 3 pa. cycling socks, Rain jacket and pants. Not shown - an Opsak for dirty bike clothes. All this stuffed into a water resistant plastic bag fits in the other half size pannier. No bike shorts, no spandex - I'll be wearing either cargo shorts or my comfortable bike jeans that are in the seat bag...
Meanwhile in the Log, the single task is concentrating on the trailer's electrical system - battery box, power plant and the 60W solar panel...
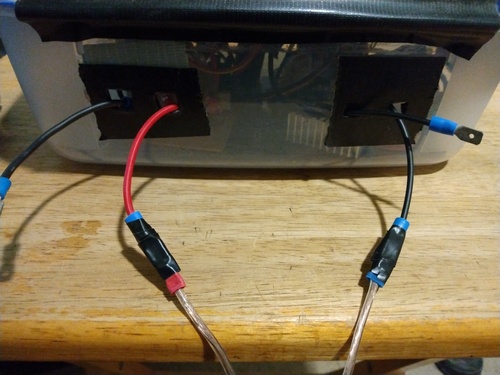
The first battery extension cables connected to the A Neg and A Pos lines of the power plant...
The B Neg and B Pos lines next, with the spade terminals insulated for safety...

The power plant control panel ready for travel inside the traiker...
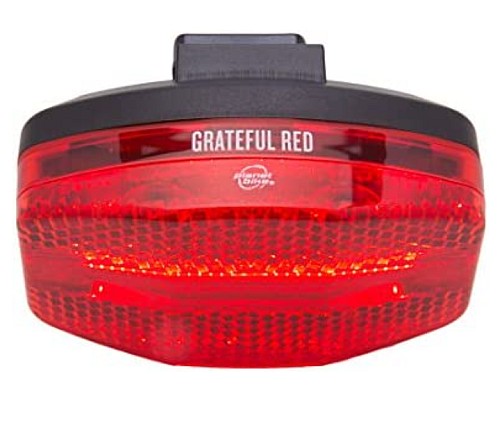
The Grateful Red tail light is made by the company that made my rear bike rack...
The tail light arrived a few days later, looks and works fine. Added bonus is the rubber shim from the seat post mount, that can help whatever headlight I get...
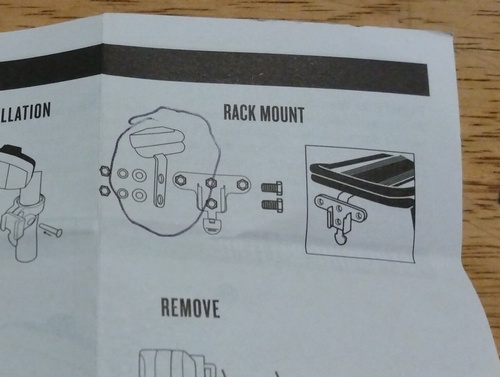
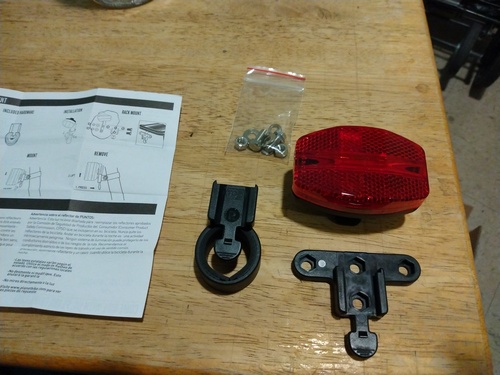
...But it's missing the metal bracket of the 2-part rack mount. It's a minor irritation that could be easily fixed, and honestly, there are customer complaints that the metal is flimsy and breaks off at the hole, but actually, I didn't get this light to mount it to the rack...
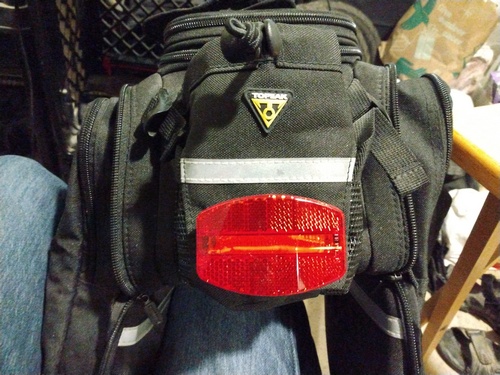
I got this light for the clip that lets me attach it to the back of the trunk bag. Violent shaking doesn't dislodge it either, so I'm satisfied...
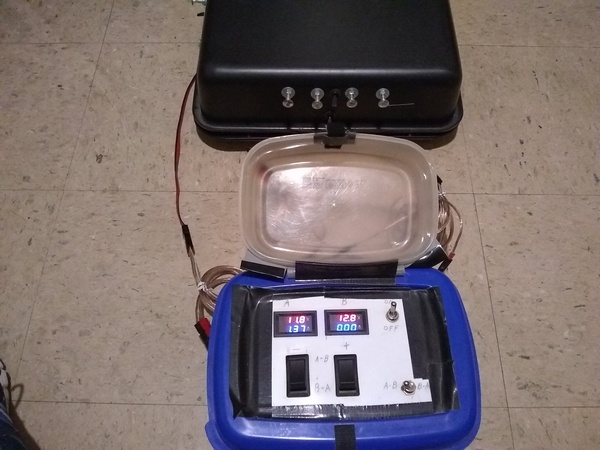
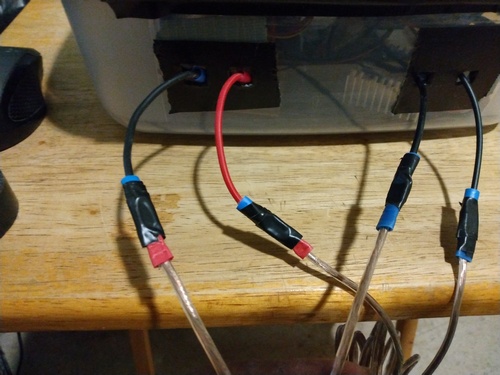
Simple run tests to check the lines and circuits of the power plant. It took a little jiggling of the powerpole connectors to get both meters lit, but then it ran 5 by 5. This is the control panel in A to B position...
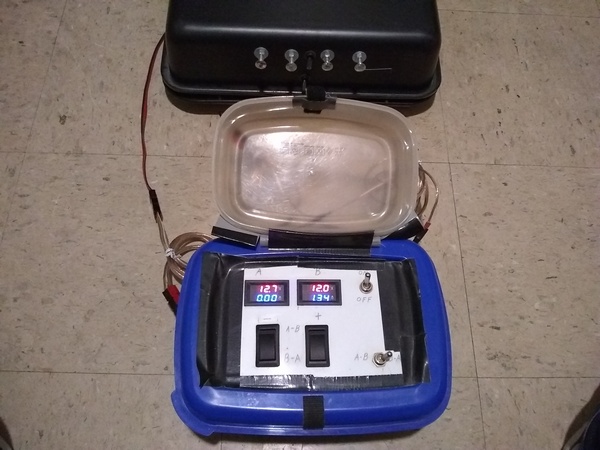
The control panel in B to A position. I'm not quite ready to lock down the battery box lid, but this part of the electrical system is done...
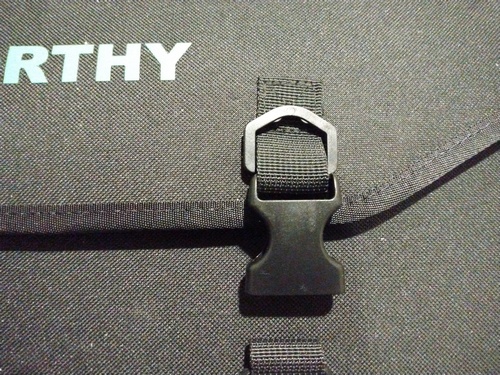
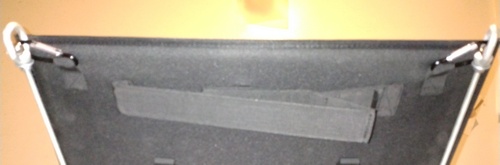
This plastic D-ring is a weaker link than the front strap...
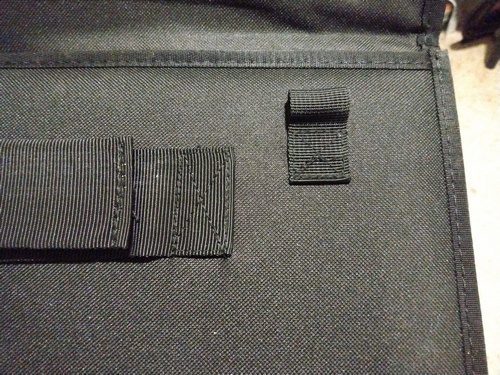
The rear strap will have less stress placed on it because it's more or less level with the eye nuts, but I'd rather not try running a cord or cable through it...

Luckily, Eco-Worthy included these carabiners as tie down anchors...
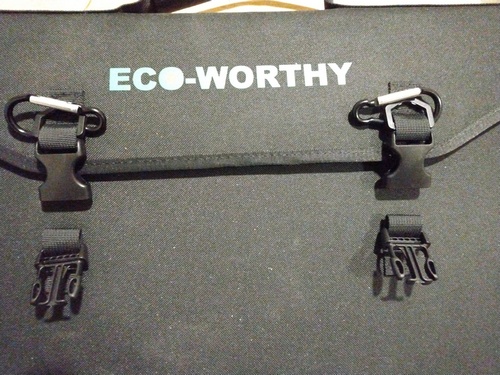
As a replacement for the plastic rings, the carabiners will help prevent the solar panel from becoming a sail in a stiff wind. A better option would be to treat wind like rain and not deploy the solar at all...
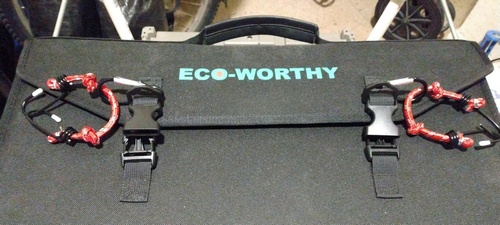
Double knotted short bungee cords are just taut enough to hold the front carabiners to the eye nuts...
This arrangement doesn't put undue stress on the straps. The hooks can also be closed up a bit to ensure they don't pop loose...
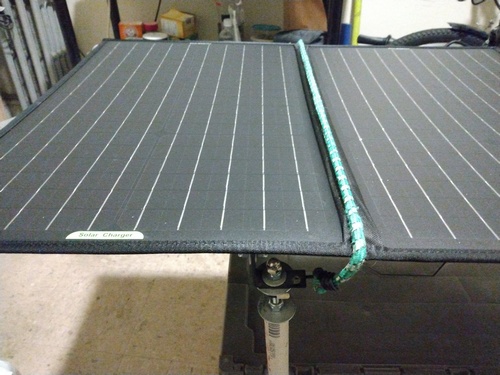
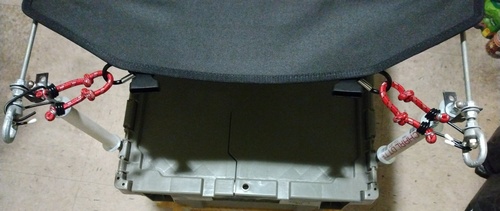
This bungee cord to support post connection also keeps the panel from becoming a sail...
The rear carabiners doing their job, simple and efficient. A bungee connecting the eye nuts should prevent lateral stress on the straps...
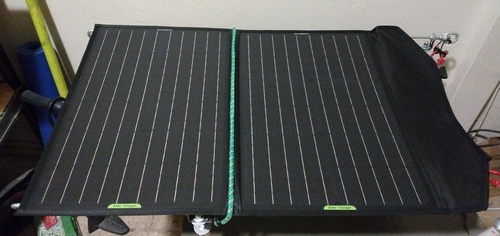
The solution to securing the solar panel to the trailer seems too easy, but I'll go with it for now. The top rail also needs to be wrapped in duct tape to prevent abrasion damage to the back of the panel...
(10/07/22)
Ok, I still find myself huffing and puffing on any uphill larger than a 10% grade, and no amount of stretching and warmup exercising is gonnafix that, so I took a look at whatever options there are to help, and thee are only two - an ebike, or toe clips.
I already ruled out ebikes, being the expensive yuppie toys they are, with batteries I'd have no way to keep regularly recharged while bikepacking, but there are ebike hub motor kits the include a battery in the hub, but they don't solve the recharge problem, with one exception - a model that charges while you ride, but it's still too expensive, so I decided to go with toe clips, particularly after reading that continually pushing down on the pedals going uphill without pulling up eventually leads to a pulled hamstring
I'm not going with clipless pedals and shoes because you can't walk comfortably in them and I don't trust them in an emergency. The same goes for clips with straps that lock your feet in them. My best bet is strapless clips that look like cages with open sides, so that and replacement pedals are what I'm after...
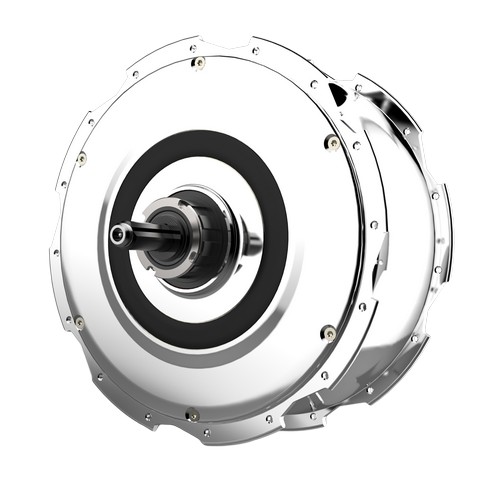
Zehus Bike+ rear wheel hub kit, a high end all in one unit...

Retrospec unbreakable strapless toe clips...
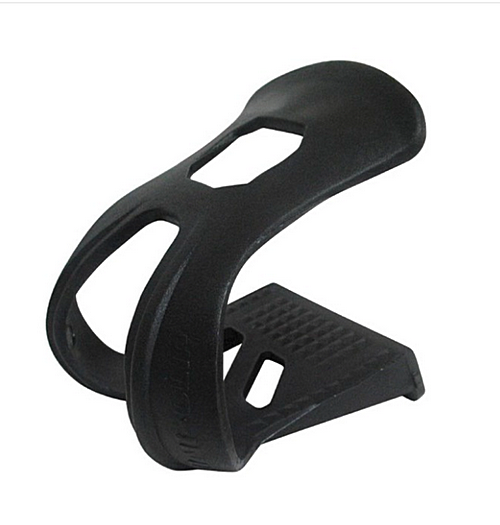
Evo Strapless toe clips, another type of toe cage with more upper material...
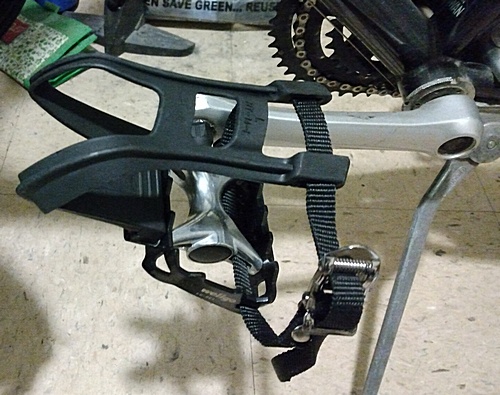
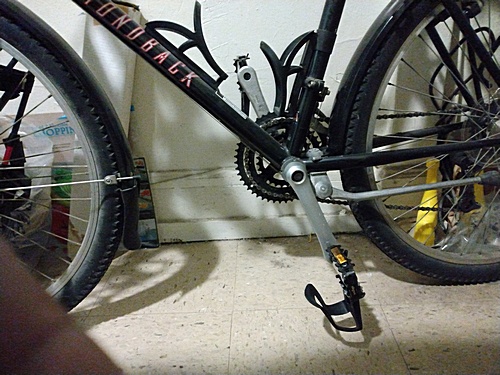
The neighborhood bike store is closed on Mon., so I went to Mike's Bikes and picked up a convenient bike pedal solution - a set of standard sized MTB pedals with clips that can be replaced...
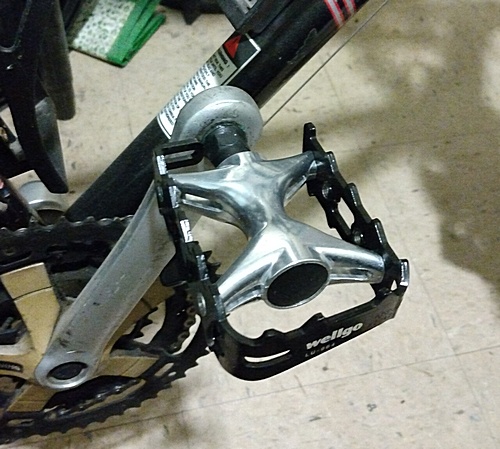
After popping the reflectors off the mount side of the flimsy plastic clips, I unscrewed them and can now order the strapless toe cages...
Meanwhile in the Log, I'm finishing up the work on the cargo frame and making final adjustments of fitting it and the trailer body before putting them into storage. I'm done with using the granny cart to move bulky household and extra camp items, meaning I'm finally fully into Pre-Launch mode...
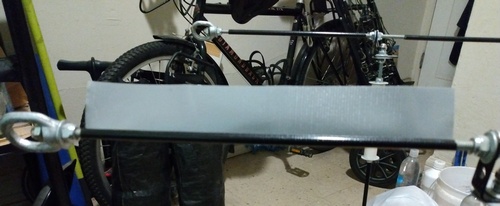
Wrapping the top rails to prevent damage to the solar panel, and the support rods to protect against corrosion with Gorilla tape...

An extra piece of tape covering the brackets. I used electrical tape on the remaining segment...
I planned to do something else with the pvc sections, but the tape makes a cleaner look...
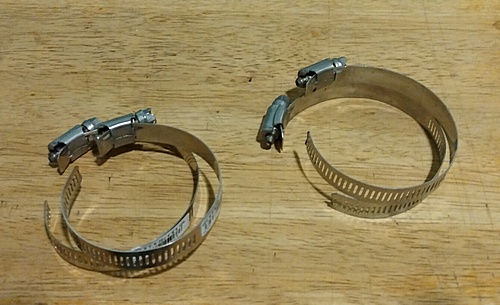
Last piece of hardware for the cargo frame - hose clmps to mount it to the trailer body...
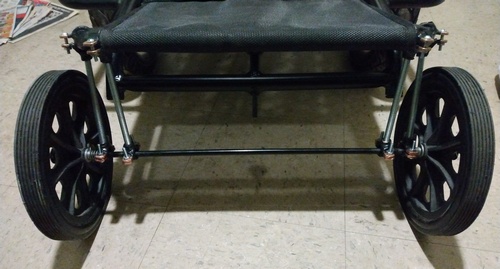
The 10 inch steel wheels and axle freshly installed on the trailer. There will be fine tuning (like applying threadlock to all the machime screws) before putting it in storage...
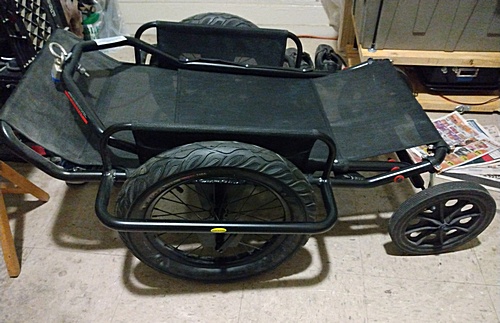
The assembled trailer ready to go...
This is also part of the fine tuning - adjusting the build after assembly. Since the hose clamp are now useless, maybe ball bungees can tie down the frame to the trailer...
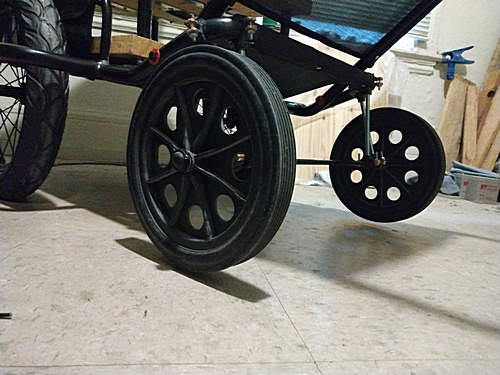
I hitched up the trailer to the bike and the front wheels have maybe 1/4 inch clearance, but that's ok...
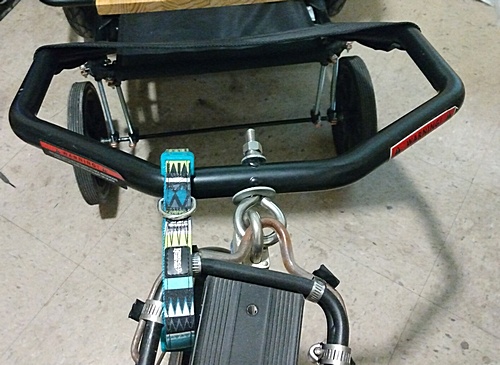
The trailer hitch with safety strap...
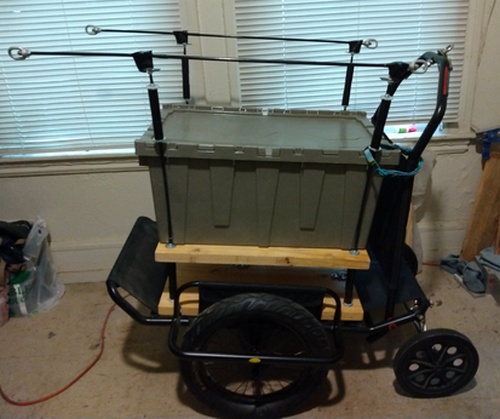
The fully assembled trailer and cargo frame.
Fine tuning the frame by shifting the battery box side anchors up off the edges so they won't damage the side rail mesh when removing or re-seating the frame, and placing tape in and around the tie down holes so the bungees don't fray...
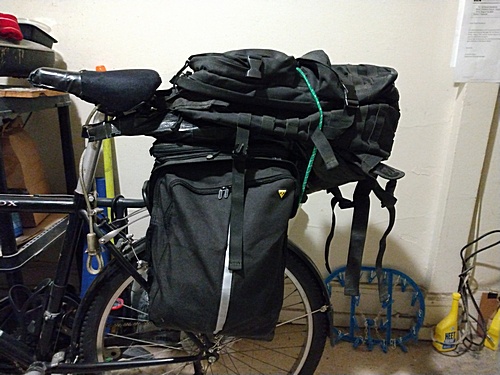
One other way to carry the big backpack on a long tour - strapping it on top of the seat bag and trunk bag, using a ball bungee to tie the handle to the seat post. This mock up may not bear out when the actual items are packed, but I'll keep it in mind...
(10/21/22)
At this stage in my walkabout plans I turned to one of the last components of the bike to upgrade - the saddle. The standard seat that came with the bike is strictly for urban riding, having been 'uglified' and bound with a thick steel cable to prevent theft in one of the world capitols of bike thievery. For long term touring, I need an upgrade for long term comfort, so I went back through the weeds for modern examples...
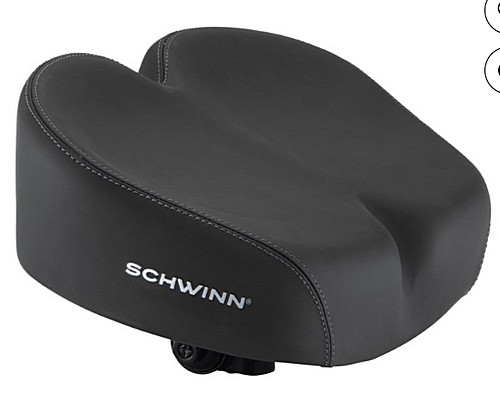
Schwinn Cruise noseless bike seat, a $20 example of a comfort saddle. A couple video reviews pointed out that the straight across front edge interfered with the thighs while pedaling...
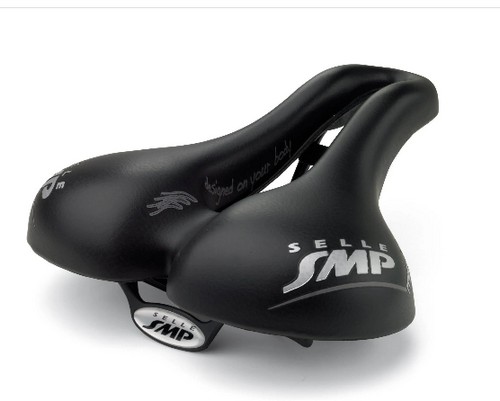
Selle SMP Martin Touring Saddle, a moderately priced example of a saddle with a cutout. Some say it's for perineal comfort, some emphasize ventilation. I'm sitting more upright, so there's less pressure on soft tissues, and the size of the cutout may affect the soft tissues...
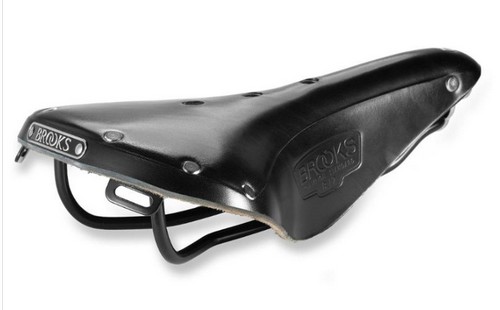
Brooks B-17 Saddle, a leather bike seat with a 100 year old design, said to be the best bike saddle model made, priced between $130 and $160. This seat requires the most mainenance and is the most vulnerable to malicious damage...
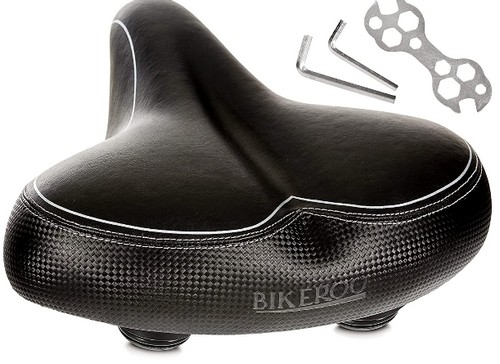
Bikeroo Oversized Bike Seat - 10.2 inches wide, priced around $40...
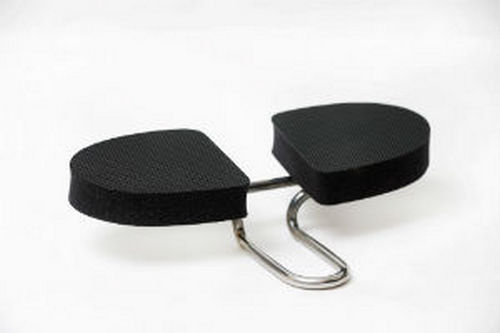
Spongy Wonder Noseless Bike Seat, completely adjustible, specifically for cyclists with prostate issues, or just can't use a regular saddle, but still an interesting option One advantage it has over all other saddles is that you don't need padded bike shorts, ever. Around $112 US...
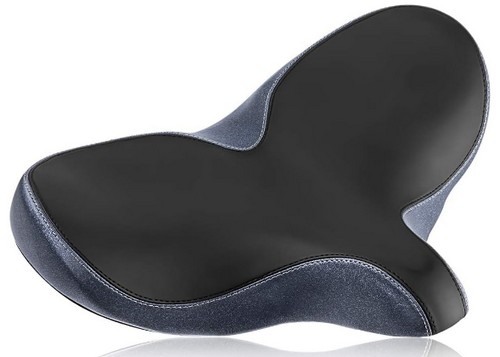
YLG Oversized Comfort Bike Seat - 13.38 inches wide. This seat curves up to wrap around the butt. Priced around $40. This particular seat is waterproof, doesn't need maintenance,and has a nose some say is short enough to not interfere with the thighs when pedaling while others disagree...
Meanwhile, I checked the Trunk part of the Trunk Bag with a mockup of 2 days of food, mostly no-cook dinners and snacks. There's easily enough room without having to expand the space. One change I'm making is if I buy fast food for dinner, it'll go in a half size Opsak that goes in the backpack...
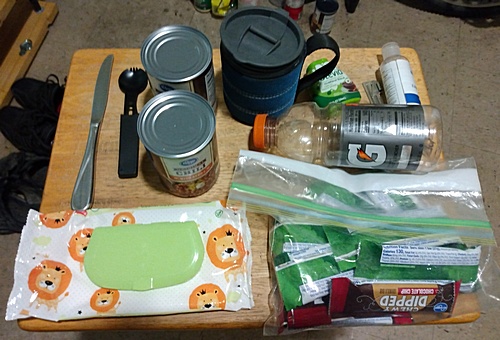
Mock up of the items for the trunk part of the trunk bag - Butter knife; Spork; 1-2 no cook dinner items in cans; Travel Coffee cup w. Lid; Stevia bottle; P-38 Can Opener; Hand Sanitizer; Gatorade water bottle in the rear pocket; kitchen wipes; Snacks for 2 days (6-9 items)...

The food items easily fit with room for another can...
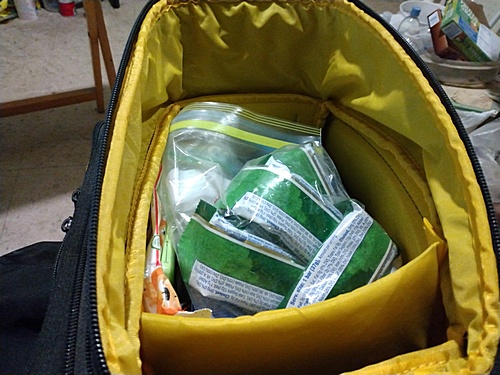
With the expansion sleeve unzipped I could add a few more no-cook items in an Opsak...
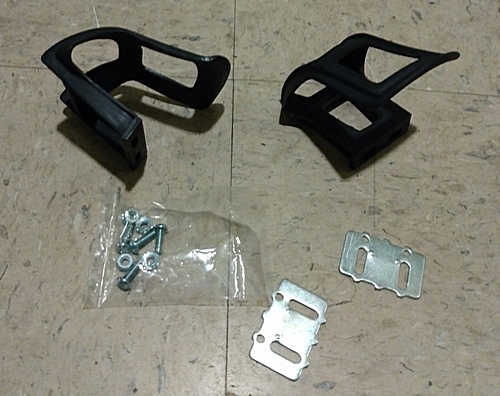
The strapless toe clips came in a day early, no parts missing..
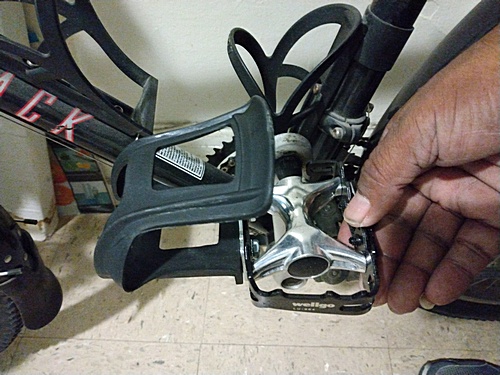
The installed toe cages look good; they should, since they and the pedals are both made by Wellgo...
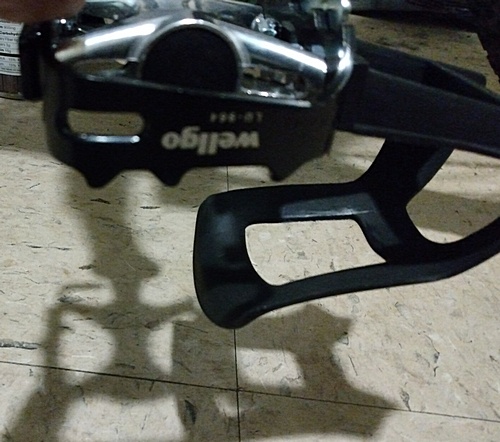
When the clip is undeployed, there's at least a couple inches of clearance from the ground...
The pedals are now ready for a training run. The clips themselves are solid enough to not worry about them warping or breaking during uphill cycling...
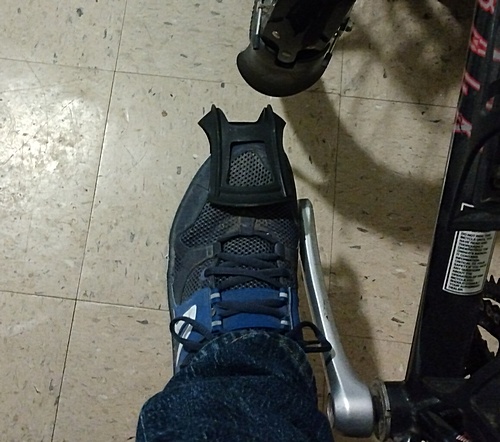
Mockup of foot placement when standing. In the seated mockup, I found it very comfortable and easy to slip my feet out. Flipping the pedal over and seating the foot was a simple move, shouldn't be hard to get used to...
Finishing up with the cargo frame - adding ball bungees to the side rail mounts that will hold the frame firmly, but not nard enough to damage the wood shelf...
Final frame tuning - padding the cap nuts underneath to ease pressure on the bike trailer mesh bottom and hopefully prevent them punching holes in it...
The cargo frame is now mounted and tied down with the bungees. I'll leave the rig like this for a few days to see how the mesh does...
The bottom of the front support rods rests on a crossbar, taking some stress off the mesh...
(10/31/22)
As I rode up to City Hall to deliver my mail-in ballot for the Midterm Election, I made note of a few personal cycling details like my 70% upright posture, how I used the nose of the seat while riding and the measurements of the current saddle to help narrow down what type I needed Based on that, I ruled out noseless saddles and decided to limit my shopping to the local REI Co-op instead of the higher end bike seats from a bike store....
I picked out three different seats from the store website in the $30-60 range, and we'll see what's actually in the store...
Meanwhile, I re-assessed the gear I made or bought for the different modes of travel, and had to admit that the trunk bag I got for trailer mode just won't work for Backpack/Touring mode, particularly since I decided I'm not wearing that big backpack at all...
For Backpack mode, the trunk bag will be replaced by a pair of 30 L backpacks modified into rear panniers, with the rear rack freed up to carry the seat bag and the big backpack in a more stable manner
For Scouting mode, which is exclusively long day rides, the trunk bag and the laptop bag provides enough cargo space. I'll add a couple plastic bags to the front racks for misc. needs, and I got the bright idea to carry a compact camp chair in the handlebar harness. I'm looking forward to riding down to Pacifica or Half Moon Bay and taking a lunchtime rest break, maybe even do a little work on the show...
Youtube channel for Bike Shop and Travel Vids 