Bike Shop
(11/18/22)
I had it all planned - get a new bike seat and camp chair, have my eye doctor 's consultation, then I'd have a week and a half to wait for a couple dry sunny days to get in a ride down to Pacifica State Beach....
Then Murphy's Law struck. No scout ride, no lunch break at the beach...
at the very least, I got a few things done as I lost a week of gorgeous weather...
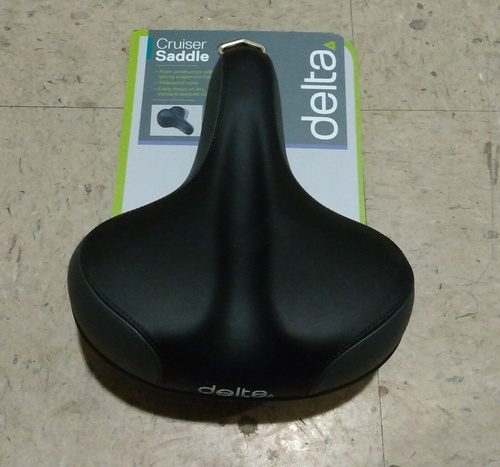
A - At the REI Co op, I found only one of the three bike saddles on my short list, the Delta Cruiser comfort saddle, roughly 9" L x 8" W, $40. Because I'm an REI member, I have a year to check it out and return and exchange it if it doesn't work out...
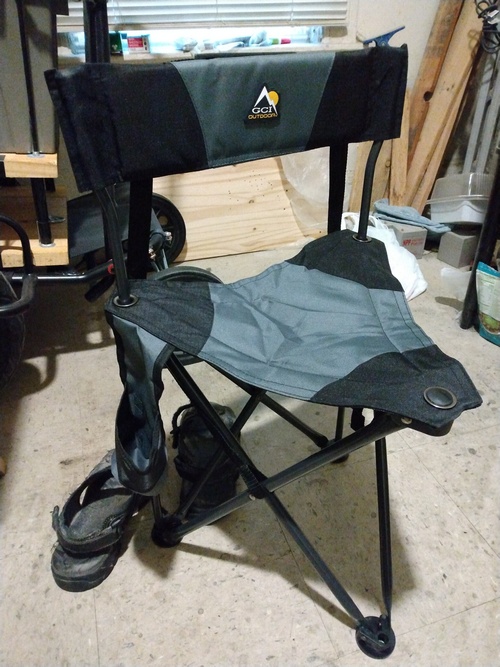
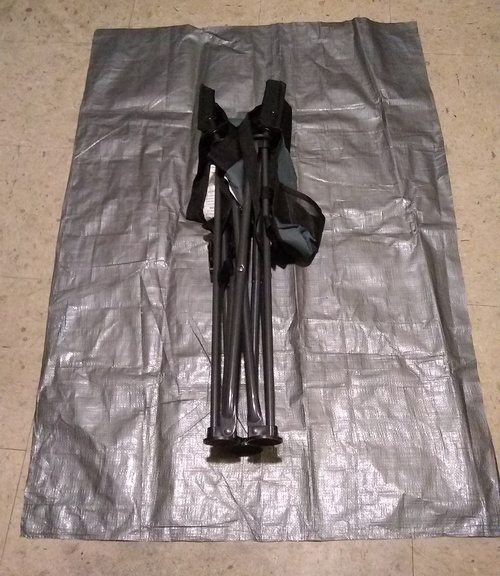
Instead of taking the long slog out to the Big 5, I picked out a compact camp chair at the REI - the GCI Outdoor Quik-E-Seat, also $40. It's essentially a camp stool with a padded seat and backrest, but feels solid and has a 250 lb capacity, with no bad customer reviews. The beverage holder and shoulder strap are fine, but it doesn't have a carry case...
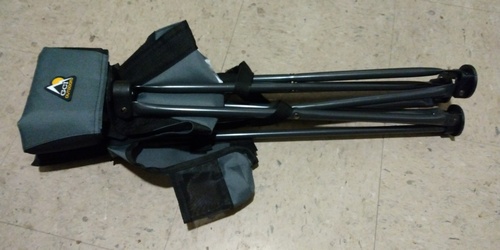
Closed length is about 27", weight about 4.5 lb. I have enough of the black and silver tarp left to make a bag for it...
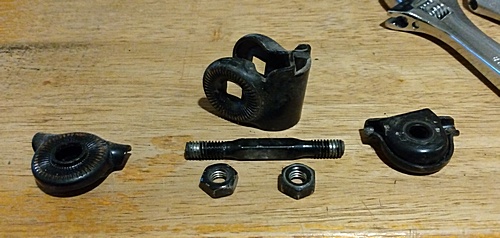
I removed the guts seat clamp to swap saddles and measure the bolt for a locking replacement. It's 70 mm L x 6 mm W (2.75 in x 1/4 in). BTW, the seat post bolt is 40 mm (1.5 in) x either 4 or 5 mm, measured in place. Now I know what size Allen head bolts to get...
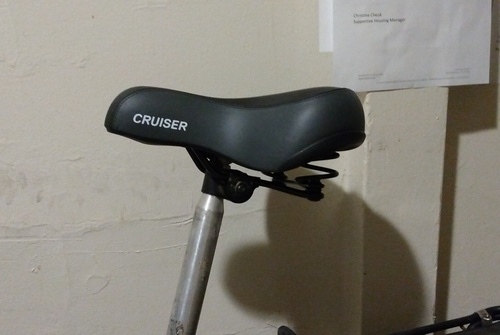
I installed the new saddle, and while adjusting it a few days later Murphy's Law struck...
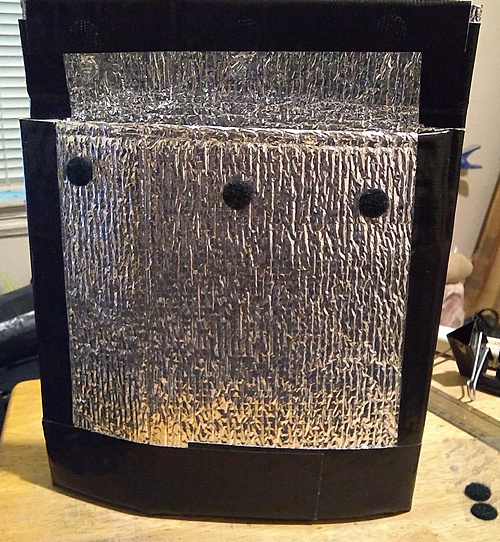
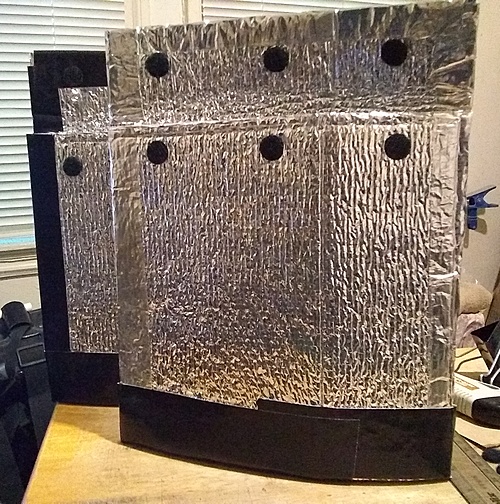
Meanwhile, I cut out a blank for the camp chair from the last large bit of tarp...

An hour later I finished the bag...
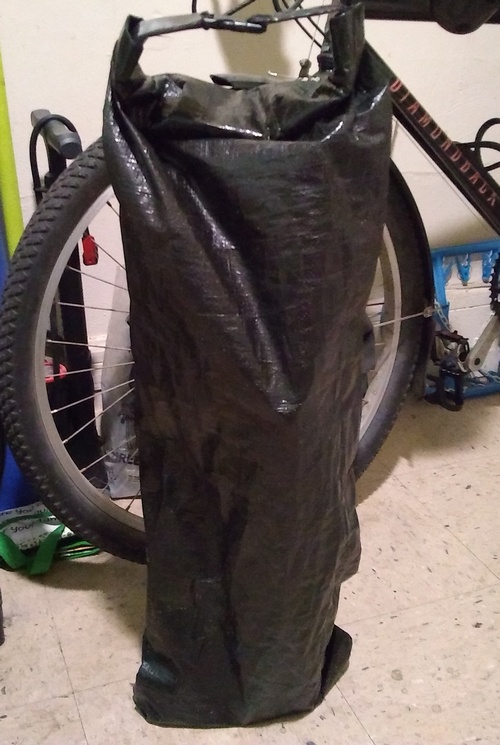
The camp chair is too big to fit in the other harness bag, and here it shows...
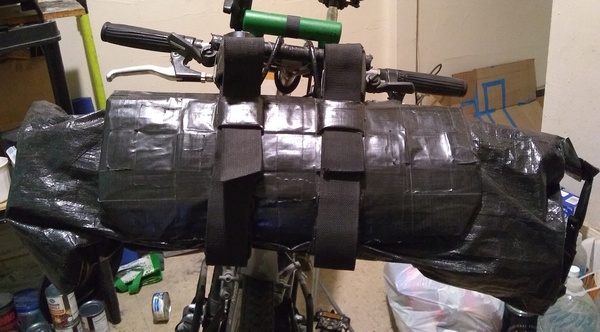
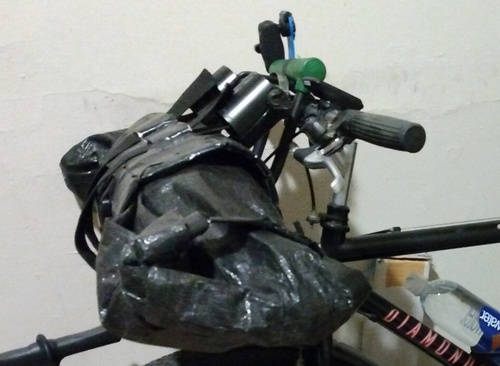
The compact chair in the handlebar harness shows that a regular camp chair with a higher back would be unwieldy...
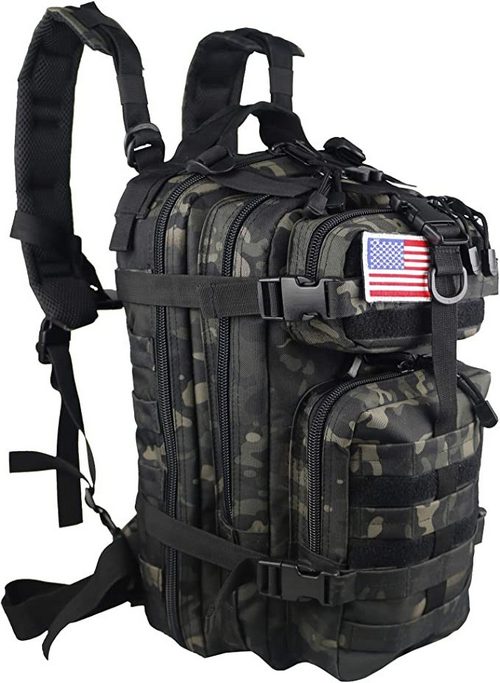
Found my pannier bags - ArmyCamo 30L Tactical Bug Out Bag. Reviews claim it's sturdy, it has a waist strap and shoulder D-rings, and not on sale so the price won't rise by the time I purchase a pair...
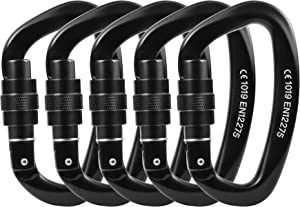
An alternative to using bungees with shoulder D-rings is a set of locking climbing carabiners. The backpack's waist strap around the rack's bottom rail finishes the hookup...

Bike trailer baby step - using Gatorade bottle caps to cover the cargo crate wingnuts...
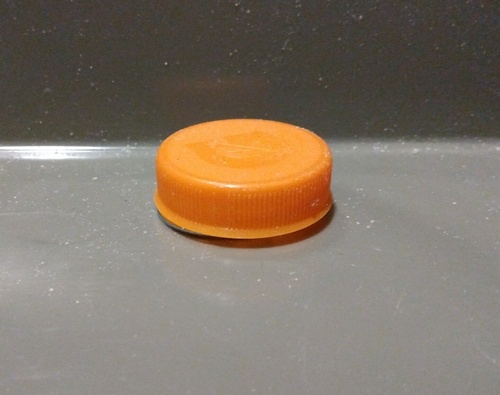
They don't have to perfectly cover the wingnuts, but they'll protect whatever cargo is placed in...

Gorilla tape keeps the caps in place...
(12/12/22)
This episode was intended to drop before the second cataract surgery, but the date got bumped up, so it's shortly after. The only reason I'm able to squeeze this one out is because I managed to find the three pair of glasses I needed to get me through the rest of vision season...
I have a full month of recovery to slowly adjust to the new lenses. I wanna spend that time taking leisurely walks outside, enjoying the clear panoramic view through a couple pairs of cheap sunglasses (well, cheap compared to Ray Bans)...
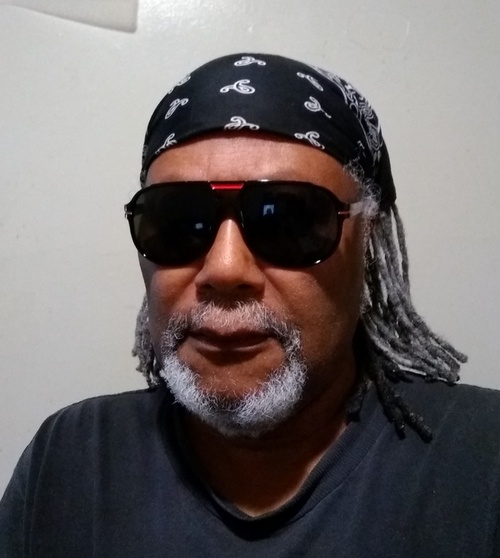
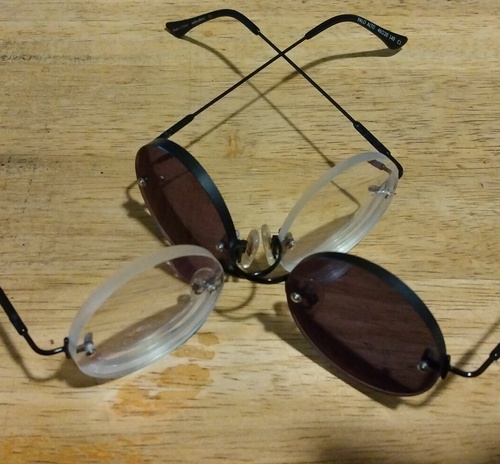
These are fashionable polarized aviators from the local dollar store. Beause I don't entirely trust the dollar store, I'll probably buy a ball cap for further protection in bright sunlight...

These shades are from the local REI outlet, guaranteed 100% UV protection...
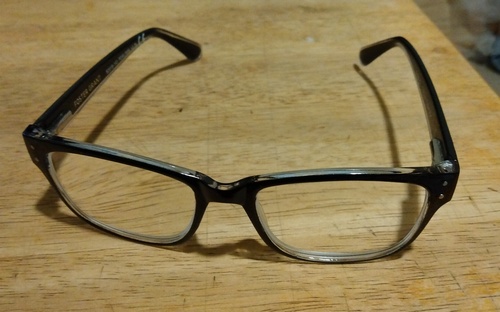
These drug store reading glasses helped me put out the episode, and will have to do until my eye exam and new specs next year...
With the cataract surgery done, I no longer need these glasses...
Meanwhile, the bikepacking gear I ordered from Amazon proved to be the biggest headache. The order didn't even process for a week - turns out it was because the warehouse is only a couple hours away by truck...
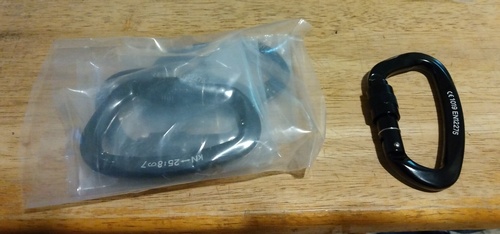
So far I only have the carabiners from my Xmas shortlist...
The first Amazon vendor 30L backpacks advertised with removable shoulder straps arrived with permanently attached straps, so back they went...

My second try to get 30L backpacks from an Amazon vendor with removable shoulder straps...
Also meanwhile, the 11" laptop I wanted turned out to be a netbook, no better than a Chromebook, but I kept looking and found the best compromise on sale at Best Buy...
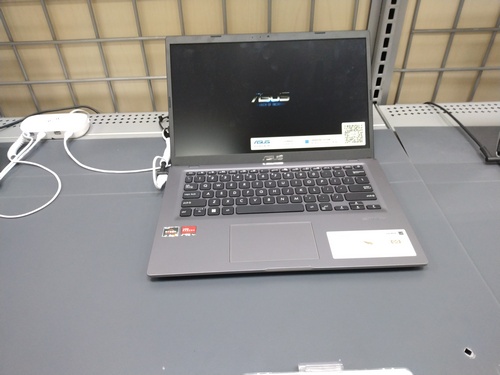
The new laptop on display - ASUS 14" Vivobook. 8GB RAM, 128GB SSD, a relatively lower end full featured gaming unit that should travel well and let me do basic smartphone video editing and podcasting. It has Windows 11 in S mode; we'll see how exiting S mode effects the size of the hard drive...
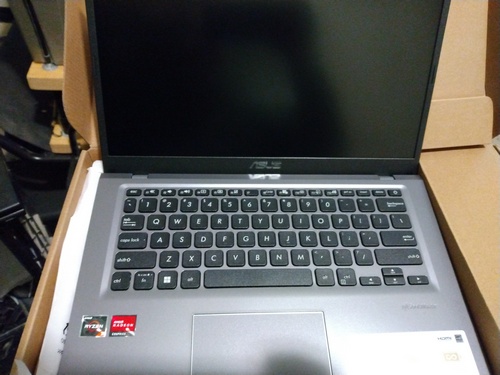
Unboxing revealed a very small power cord and 45W charge plug, the laptop that is definitely small enough to fit the 30L bag, and a very thin booklet manual and quick start guide...
That's pretty much it. The remaining items can wait until Spring, after I finish vision season. But if the 30L bags turn out ok, that'll be enough to make a New Year's episode...
(12/30/22)
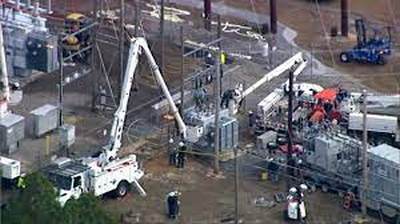
A power substation shot up to prevent a local Drag Queen Story Hour. Image: Raleigh News and Observer...
Ok, the Itinerary is pretty much me riffing on the latest fad of foreign and domestic right wing terrorists - shooting up electric power substations to cripple a local or regional grid. In a nutshell, there is no easy solution because for one, utilities won't pay to staff or monitor substations because it'll cut into their profits. Check out the podcast for my full pontifications...
Meanwhile, the only reason for this year end episode is to cover the drama of my efforts to get the last piece of bikepacking/touring gear...

A refresher of the rucksacks displayed by the second vendor I tried...

...And what they delivered. Apparently nobody sells the removable strap bags anymore...
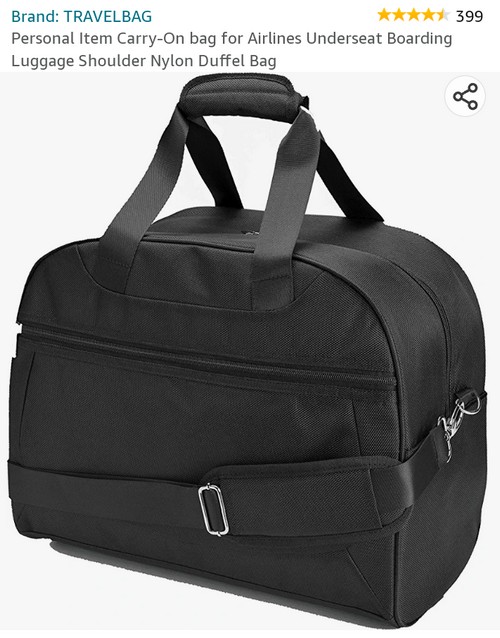
I thought this type of carry on bag could work with my carabiners, but I couldn't find them locally...
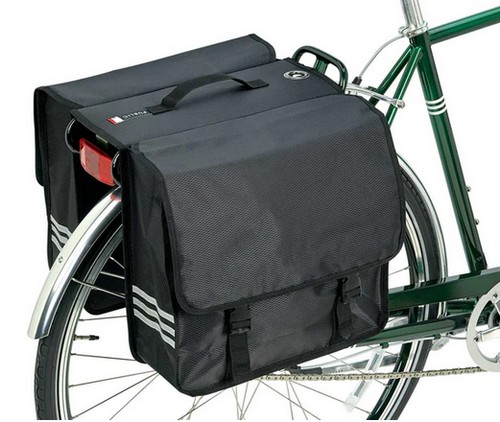
Strictly looking locally, I fell back to saddle bags, a subset model of panniers under 30L where regular touring panniers have 40-60L capacity. These are the Public Bikes Professional Panniers - waterproof, 25L capacity. Not cheap, but a third the price of full rear panniers...
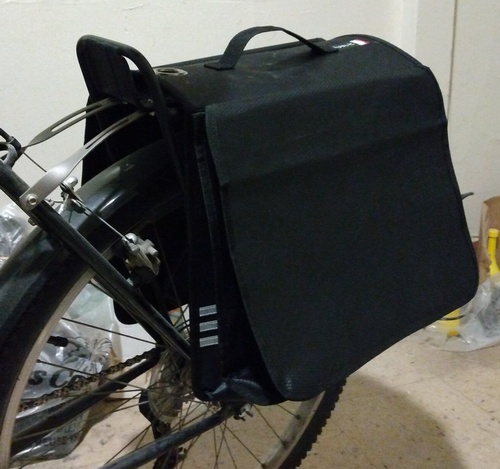
They were in stock at the local Mike's Bikes, so as I'm going through the drama of getting a refund from the 3rd party Amazon vendor, I walked up to SoMa and bought these...
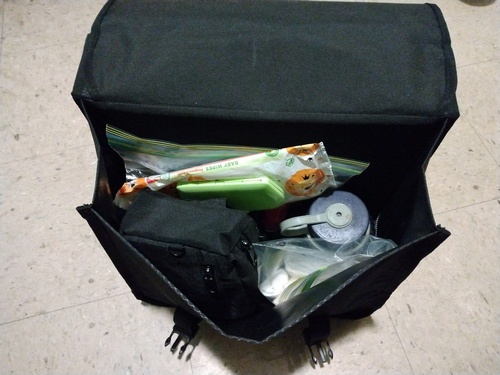
The left side with 95% of the intended gear packed...
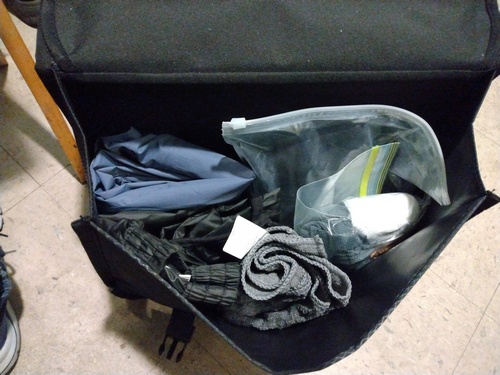
The right side with 70% of the intended gear packed but there's enough room for the rest...
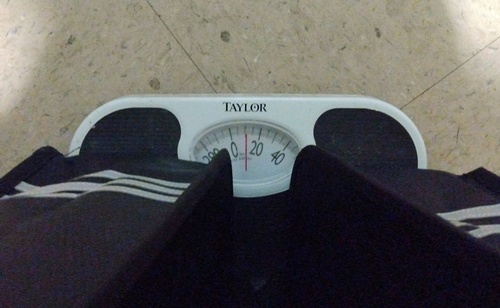
So far only 10lbs.; the rear rack can still hold another 45lbs. of gear from the panniers, seat bag and big backpack...
(01/10/23)
This episode marks a year since I shifted the focus of the show to getting out of the SRO and going on the road, with most of 2022 mired in prep and waiting for surgery and making lots of over ambitious plans, but now dental and vision season is about done (well, dental may have a couple extra innings), the cargo trailer is done, I've made, bought, and sorted my gear into the appropriate travel modes, and Pre-Launch stage may take most of the year but it's down to a few simple moving parts, like the virtual mailbox, and finding a place to practice pitching my tarp tent before going on any touring runs...
Spring cleaning will be a lot easier this year, and I'm raring to take my first scout ride down to Pacifica State Beach once the season changes, and no more grand pronouncements - inch by inch is the way to go...
Meanwhile, I've reassessed the power system for bikepacker touring mode (I now prefer the term Tourpacking). The main issue comes down to charging the laptop on the road, and the essentially shrunk down version of Trailer mode is a 12V 40W folding solar panel and a laptop charger...
At first, any laptop power bank with 20K mAh would do, and many new models sported the new system of USB-C Power Delivery cables and ports. My new ASUS travel laptop is also equipped with a USB-C port, but I decided I wanted to use the power cord because it charges the laptop faster, and because a power bank with an AC outlet gives me more flexibility...
I also need to upgrade from my 10 year old AA/AAA charger and 5+ year old batteries...
The portable solar panel also needs to have USB-C output, so I window shopped for those specific models, and there aren't that many that will work mounted on a bike. Most arrangements I've seen are strictly 10-20W backpack solar panels for charging phones, or full size panels permanently mounted to charge an E-bike battery. A temporary frame that can work with the gear on the rear rack is the next thing to deal with...

The laptop charger I'm switching to - the RAVPower PD Pioneer...
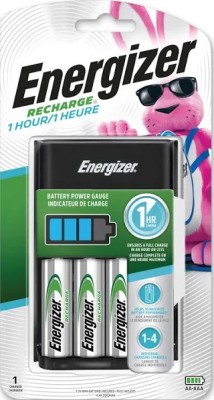
To more efficiently use NiHM batteries I like this 1-Hour AA/AAA charger...
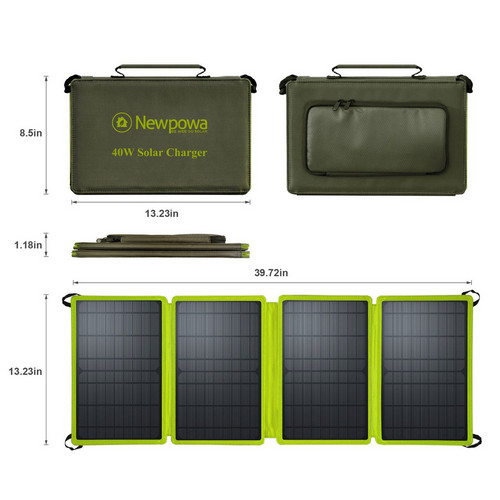
The Newpowa 40W Foldable Solar Panel, the model I picked last year, but currently it's out of stock...
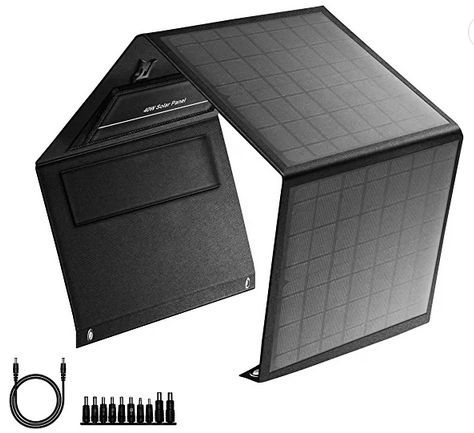
The SinKeu 40W Foldable Solar Panel, the most expensive of the three featured, but it's a bit larger...
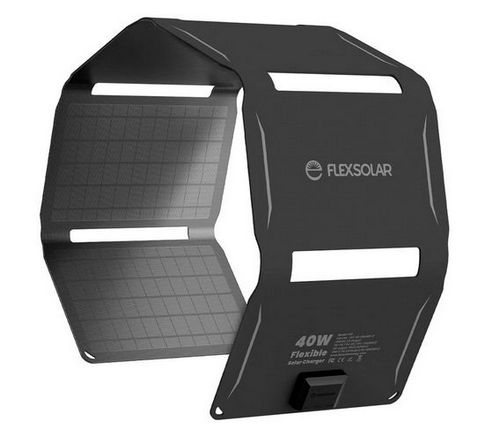
The Flex Solar 40W Foldable Solar Charger, the longest of the three backpack style panels...
(01/20/23)
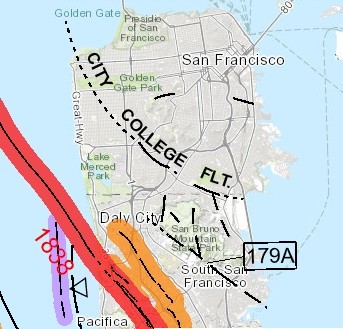
The San Francisco Peninsula with major and minor fault lines. The San Andreas is in red-orange. Image: California Fault Activity Map...
Ok, the Itinerary this time considers another one of the hazards faced in California whether I'm in an SRO or out on the road - earthquakes. They're a constant concern and an occasional threat, and just because that's one of the reasons why I want to escape the city, it doesn't make me feel much safer...
Fact is, the most seismically active parts of the Pacific Coast are the general Bay Area (which hasn't been hit yet) and the mountainous central coast (roughly between Santa Cruz and Santa Barbara), which is also where mudslides and wildfires occur, but I wanted to know where the faults on Hwy 1 are, so I checked out the Fault Activity Map provided by the Calif. Dept of Conservation and the Calif. Geological Survey.
Here are a couple of the detail sections I downloaded:
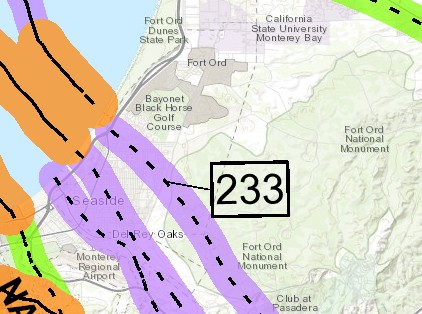
The area between Fort Ord and the Monterey Peninsula. The fault lines cross the bike route here...
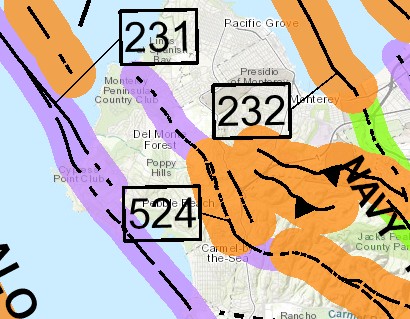
The numerous fault lines within the Monterey Penisula itself...
Meanwhile, I took the bikepacking touring solar power system to the next step - the logistics of mounting a solar panel to the rear of the bike. Using a pvc frame as the most portable form, the 40W folding panels proved to be the weak point, leading to my decision to bump up to a portable flexible 50W single solar panel...
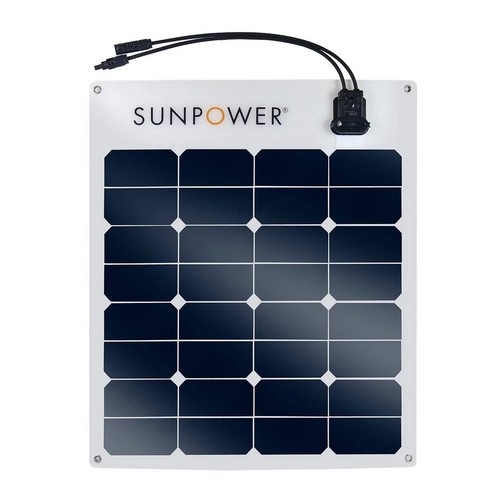
An improvement on the 40W solar panel is this 50W 12V model, which I almost picked for Trailer mode. This single panel size would be much easier to mount over the rear Tourpacking gear...
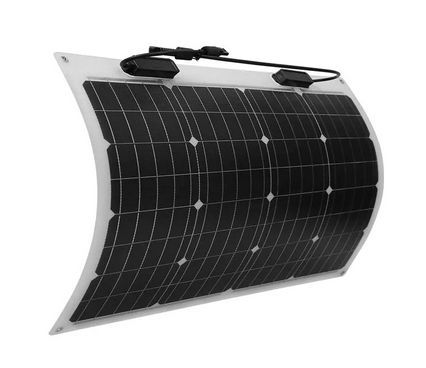
This Renogy 50W 12V solar panel costs roughly the same as the SunPower, plus it's more flexible, making it easier to pack down when not in use...
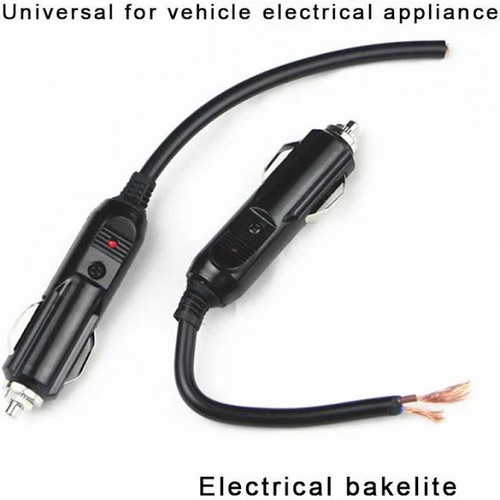
A 20V DC male cigarette plug with wire ends to the battery output terminals of a 10-20A charge controller, part of the circuit to distribute juice to the laptop power bank...
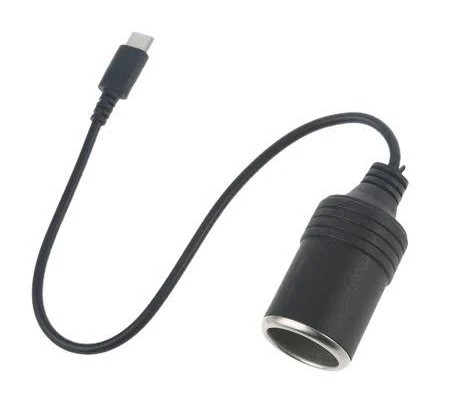
A 20V female cigarette socket to male USB-C plug, the other part of the circuit that routes power from the solar panel to the laptop charger...
(01/30/23)
Ok, the Itinerary lately has been focused on Tourpacking gear, but after sorting out items for the new solar power system, I can pause to pick up with Scout mode because what's immediately ahead of me is day trips down to Pacifica Sate Beach and HMB to confirm whether any overnight stealth camp spots are possible.
Most of the gear for Scout mode has already been compiled from the Tourpacking list. What's left is a short list of specific personal items I set out to buy locally...

Most cycling windbreakers are crazy expensive, so I first tried to get a frogg toggs Bull Frogg Signature Rain Jacket at Dick's Sporting Goods, but they were sold out...
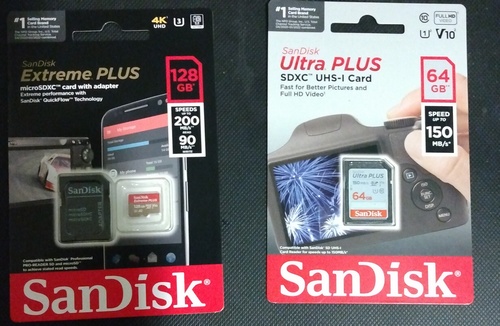
Extra SD cards for my 10 year old Nikon digital camera that still works and my previous phone now serving as the handlebar mounted still and video camera...
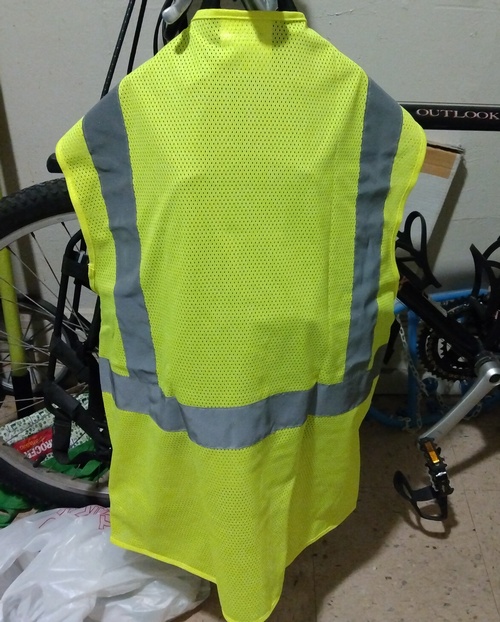
A medium yellow safety vest easily fits over the laptop bag. The shoulder straps fit through the sides, and I'll close up the bottom bag style...
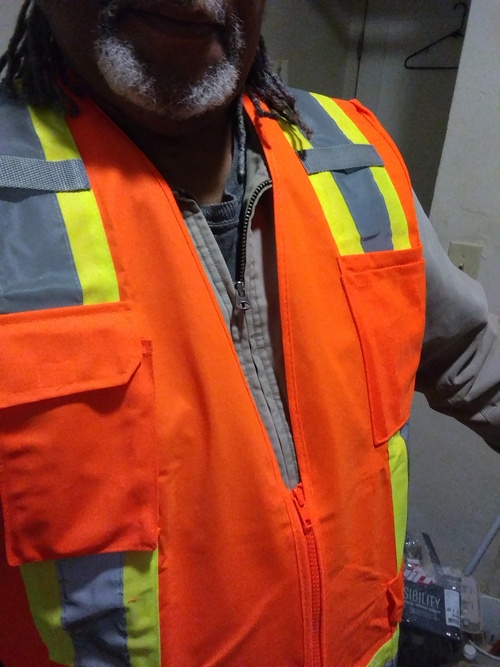
The large orange safety vest accomodates whatever winter or rain jacket I'd wear. The extra pockets don't hurt...
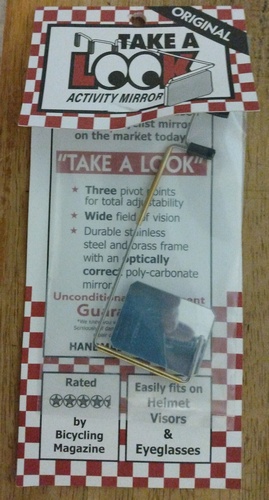
I walked over to the REI outlet and got my helmet-mount rear view mirror...
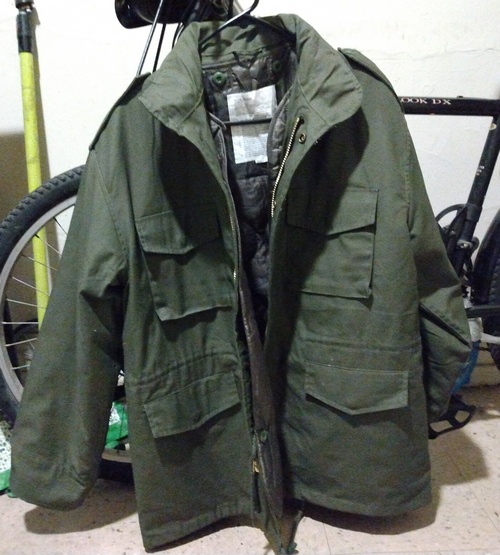
A Rothco M65 Field Jacket, a better alternative to an expensive Fall-Winter cycling jacket/windbreaker. The Field Jacket is both breathable and water resistant even while wearing a backpack, and the insulated liner makes it an ideal off the bike winter coat for California's climate...
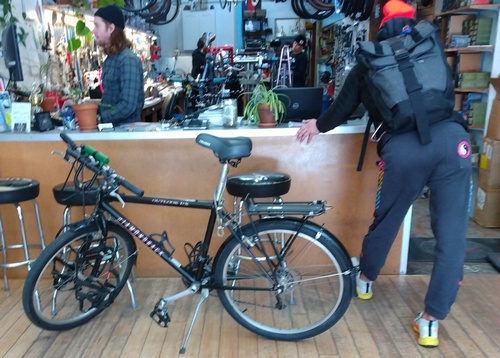
To get spare spokes for the bike, I had to leave it at the local bike shop (Box Dog Bikes) for an hour or so while they custom cut a few for each wheel...
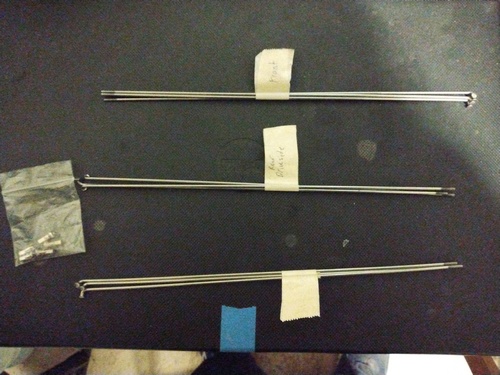
I got 4 for the front wheel, 3 for the rear drive side, 3 for the rear street side, and some extra nipples. My road repair kit is now complete...
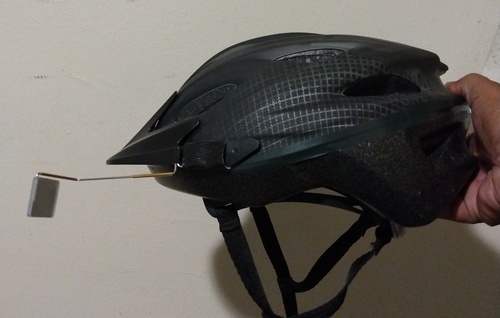
My Take A Look rear view mirror, clipped and taped to the visor of my bike helmet. I'll adjust the actual view when I get to ride again...
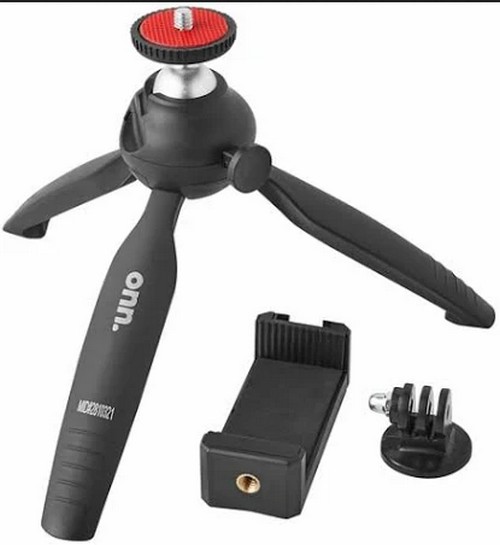
A late entry: my old mini tripod from an LA thirft store just broke on me, so I'm considering this low-cost model from the nearest Wally World in the East Bay...
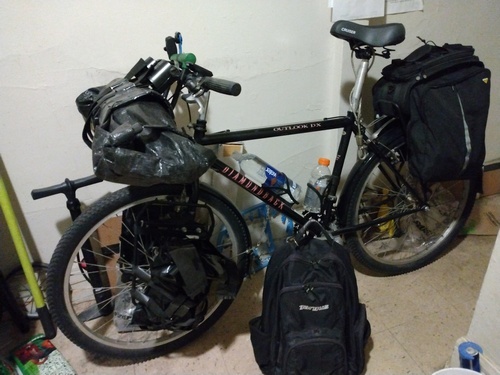
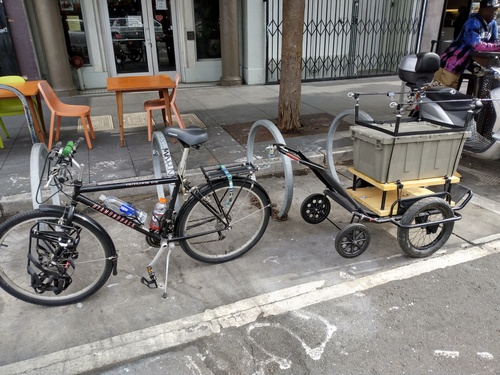
The bike with Scouting gear loaded - trunk bag on the rear rack, handlebar harness holding the camp chair, a couple fresh plastic bags for misc. in the front racks, bottle cages full, laptop bag...
(02/10/23)

Ok, the Itinerary took a serious look at possible stealth campsites in the East Bay, not specifically in either Oakland or Berkeley, because the cities are just as hard, if not harder, on the homeless than here in SF.
Over the rather tony Oakland Hills you have the nature preserves and parks that make up the East Bay Regional Park Dist., which has a limited number of bike routes and trails and literally one Hike and Bike campsite: the Sibley Backpack Camp in the Sibley Volcanic Regional Preserve, with only a few tent spots and often hard to book ahead of time.
All that suggests the Dist. parks are heavily monitored for homeless campers...
In the end , I concluded the East Bay is only good for daytripping on the Bay Trail around the bay itself, so next I'll look around San Jose to cover the South Bay...
Meanwhile in my bike shop, I addressed one of the few Pre-Launch tasks remaining - squaring away the bike trailer. It's been assembled since the middle of October, waiting for me to get through vision season, and now that I'm post surgery, I've had my eye exam and got my new reading specs, I pondered any final modifications....
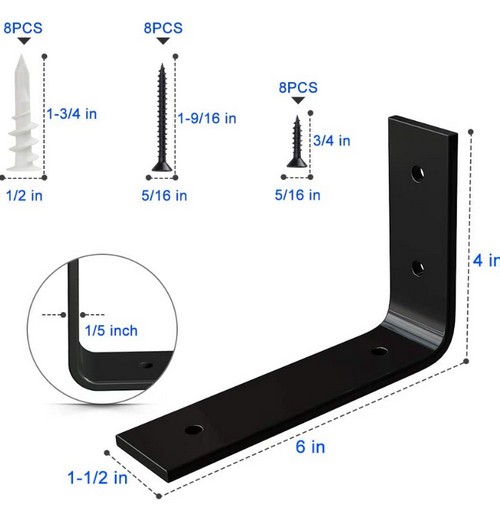
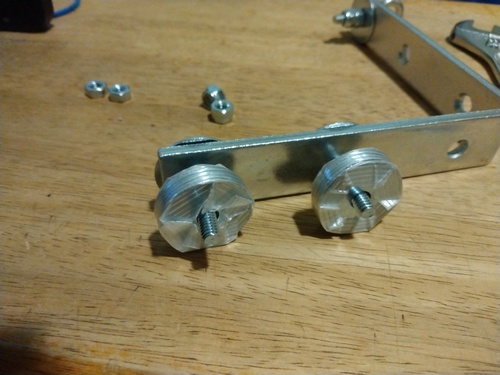
I picked a 4x6 inch heavy duty steel shelf bracket to serve as an elevated trailer hitch to keep the 10 inch cart wheels well off the ground and the solar panel top rails level. On the bracket's 4" side, the holes need to be between 55-60mm apart so I can double bolt it to the rear rack...
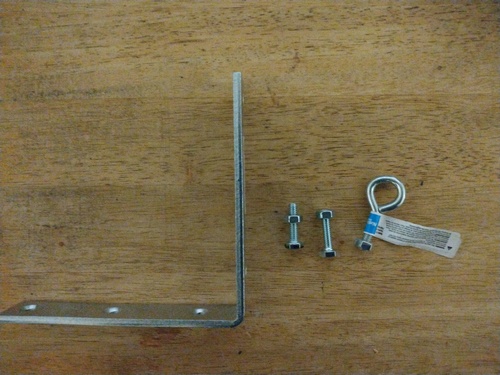
What the home improvement store actually had were 6x6 inch corner braces. 1/4x20 1 inch long hex bolts and a similar sized eye bolt rounds out the hardware...
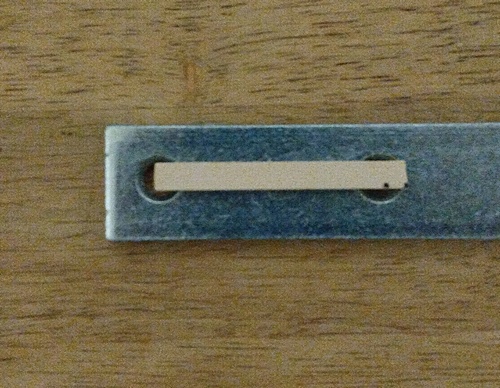
The mounting holes perfectly fit the 55-60mm specs...
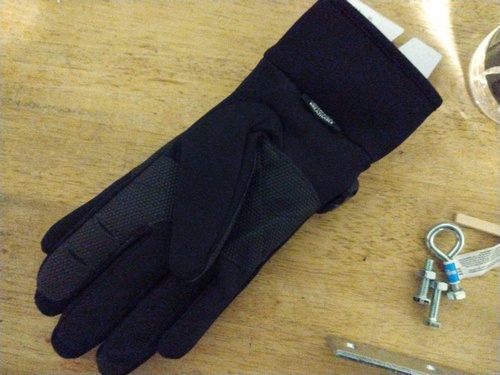
I went from that store to the REI outlet and got my waterproof winter gloves out of what the yuppies left in stock after raiding the place for cold weather gear in the past two weeks...

I tested the smaller eye bolt to make sure that part of the hitch works...
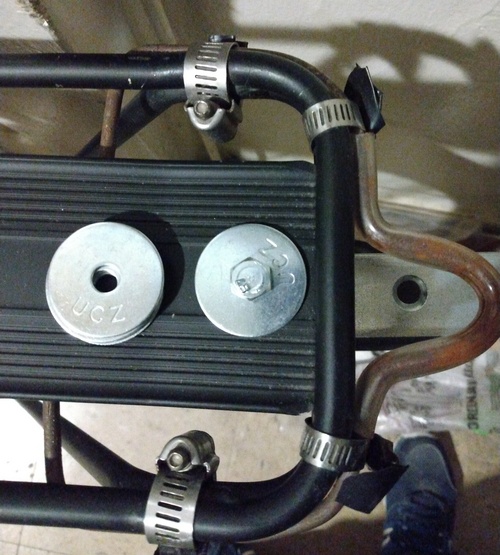
The rear rack frame prevents a flush seating of the corner brace, requiring 6 washers underneath to fill the gap for each anchor point, so 1.5 inch hex bolts are needed...
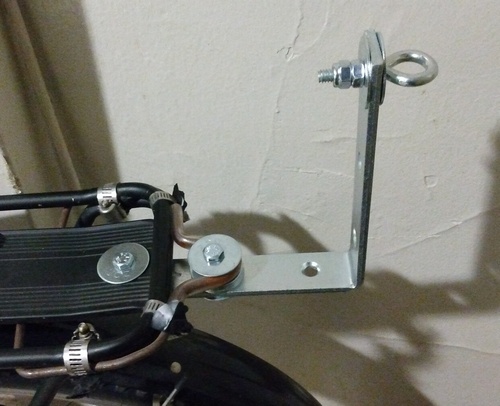
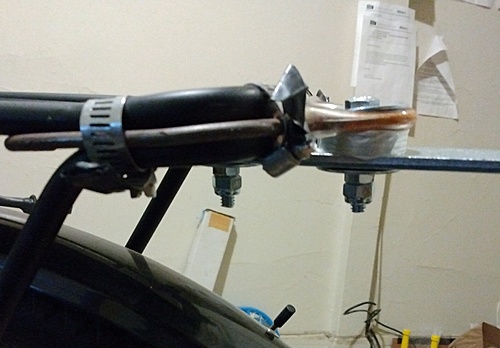
The extended trailer hitch installed in mock up form. One benefit of the 6 inch bottom section is that it won't interfere with the trunk bag's bottle cage when it's used in trailer mode...
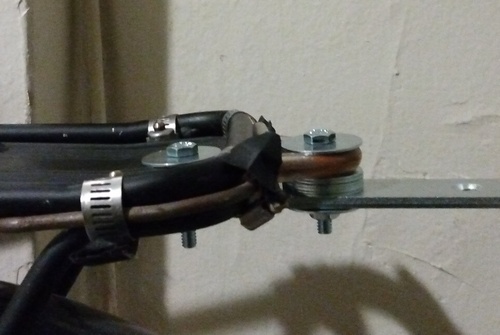
Each anchor point needed 6 fender washers in the gap to stabilize the base against the rear rack. A couple nylon lock nuts will finish the installation when it's time to haul the trailer...
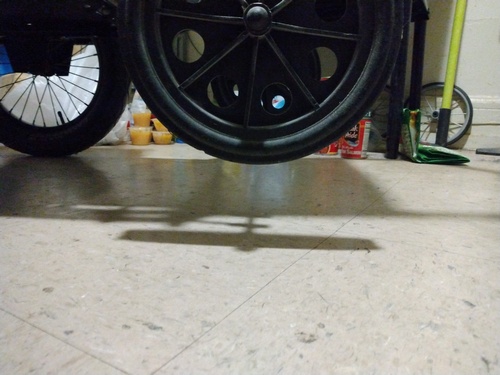
With the trailer connected, the 10 inch front wheels are 3 to 4 inches off the ground...
To simplify the mounting process, a little packing tape turns 6 loose washers into a single gap washer...
The extended hitch formally bolted down tight enough so it won't wiggle around...

For now the hex and lock nuts are dry fit to take the trailer to storage, but when it's time to install the hitch for real, threadlock will be applied to the bolt...

The shiny front wheel struts covered with gorilla tape...
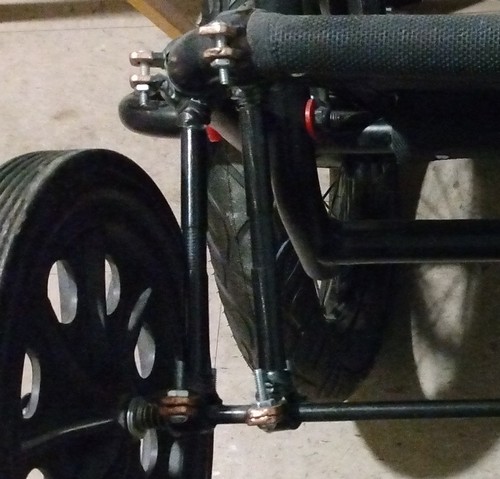
The tape also helps to protect them from the moist ocean air. A little electrical tape on the axle mounting screws couldn't hurt...
(02/20/23)
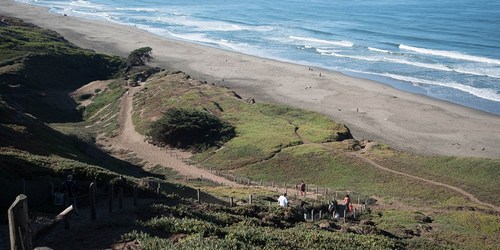
Image: National Park Service
Ok, the Itinerary this time out involves an actual first step in plotting out the route ahead if I were already on the road. In scouting down the peninsula, I picked out a number of prospective locations between Ocean Beach and Pacifica using Google and Bing satellite view. This part of ongoing route planning will have to be routine - a birds eye view of interesting spots along the way, and estimating where to end the day...
This first location is Fort Funston. It's at the far SW corner of the city, one of the premier hang-gliding spots in the country, but not considered at all for stealth camping...
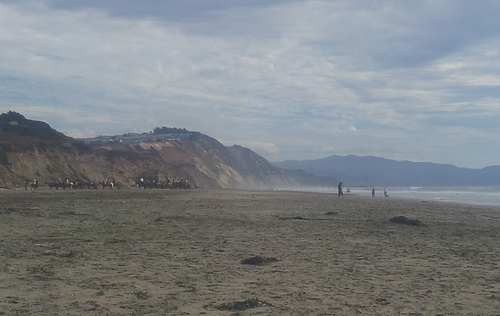
Thornton St Beach, a ridge of low bushes and scrub land with no actual access to the beach, just W of Daly City...
Image: Juliusz Gonera
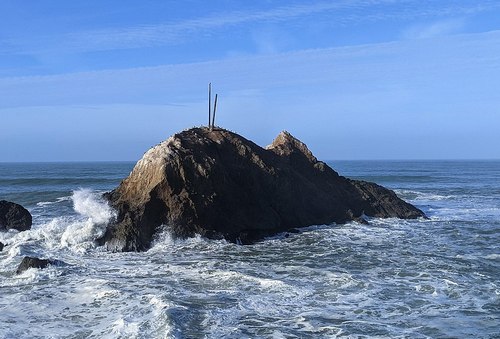
A view of the rock at Mussel Rock Park, also a cool place for hang gliding and hiking, but not suitable for camping either, also W of Daly City...
Image: Lee Ball
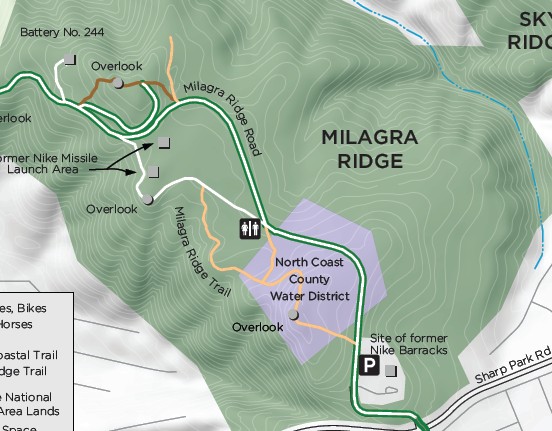
Milagra Ridge - the first place with the possibility of dispersed stealth camping, but it's also an endangered species site and a roundabout path getting to it...
Image: Detail from Milagra Ridge trail map
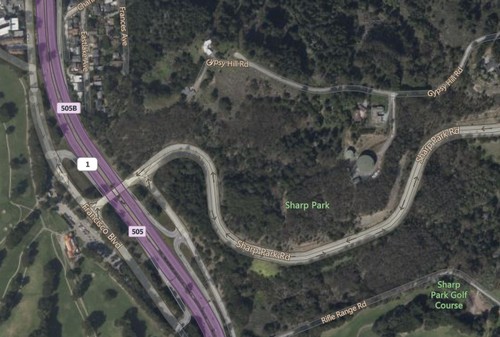
Sharp Park. E of the hwy and across from the Sharp Park Golf Course, known as 'the poor man's Pebble Beach.' Some areas on Sharp Pk Rd. on the way to Milagra Ridge might provide enough cover for stealth, but residential areas are very close; could be tricky...
Image: Bing

Mori Point - a 110-acre park located in Pacifica, California. Mori Point itself is a bluff next to the Pacific Ocean that provides scenic views of the peninsula coastline. Also known for wildflower viewing in April. No camping spots, but does have MTB trails...
Image: National Park Service
Sweeney Ridge - a hilly hiking area of ridges and ravines between San Bruno and Pacifica. The ridge's 1,200-foot-high summit, covered with coastal scrub and grassland, slopes down to the bay on one side and to the Pacific on the other. No camping...
Image: Leijurv

In all the surveying, the area between Pacifica and Devils Slide (formerly a hazardous section of Hwy. 1, now a hiking/biking route), a woody stretch just W of the Hwy., seems the overall best place to attempt a short overnight no cooking stealth camp...
Image: Google
Meanwhile, in my crib as I do satellite reconnaissance, I'm getting back to the stamina and stretching exercises, watching the weather, getting used to winter gloves again, and still testing the saddle indoors. And also getting on with moving the trailer...
After separating the frame from the cart to get it outside, the trailer was re-assembled and hooked up to the bike for the ride to storage. The building staff all got a good look, but they liked the build...
At the storage facility, it took less than 30 minutes to get the trailer broken down and stored more or less how I imagined. I brought the cart wheels back in the messenger bag and took note of the saddle and the ease of riding in the Levi's 511 bike jeans vs the looser pair I got injured in. No seating issues, so I guess I'm fully recovered. To be on the safe side, when I'm not wearing the bike jeans, my options are to buy another pair, get cycling underwear for the loose jeans and cargo shorts, or just go on and get a pair of regular bike shorts for summer riding. Still a hard pass on wearing tights though...
(03/03/23)
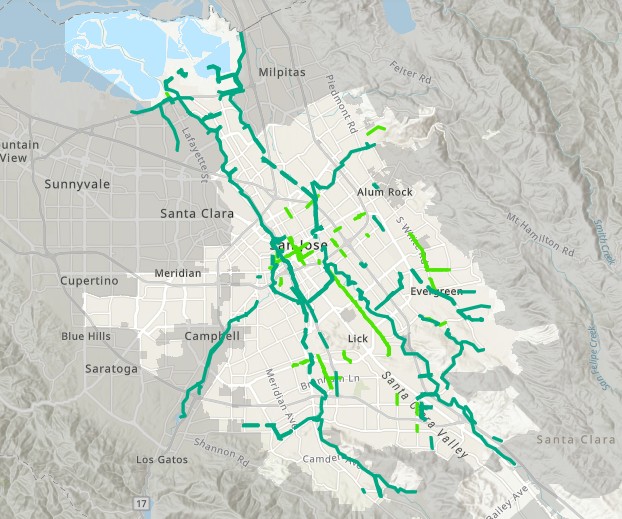
Image: Detail from Bikeways map of San Jose showing bike trails and protected bikeways. On-street bike lanes are removed but easily connect these sections...
The territory in and around San Jose was the last place in the general Bay Area to check for any stealth camp possibilities, but I'm not holding my breath, mainly because San Jose is the geographical center of Silicon Valley and the 3rd largest city in the state, part of a sprawling metropolitan region with very few green areas available for stealth tent camping...

The only reason I even considered the South Bay is because there are BART stations with BikeLink elockers that rent for 5 cents/hour ($1.20/day). Maybe I could stash the bike and lug my gear into SF for business the next day with much less hassle...
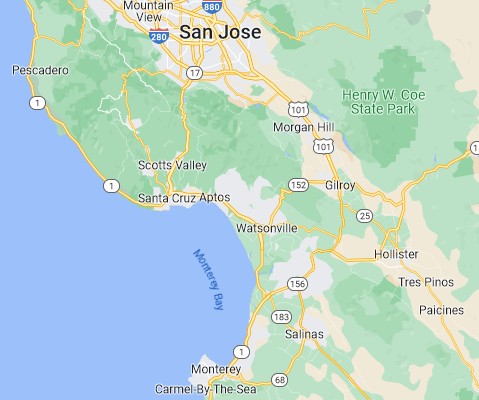
I did find one family campground in Fremont on the Bay that rented spots for $45/night, but, riding into San Jose from the south on Hwy. 101 is hazardous in some places and illegal in others. It's also practically impossible to get from Hwy. 1 to the 101; there are 3 state highways between the Monterey Peninsula and HBM, but none of them are safe routes for cycling, which further rules out Silicon Valley as an overnight camping destination...
So that kinda rules out the entire general Bay Area for convenient overnight camping if I have to make a business trip to SF. Any place I find will absolutely have to be a stealth camp spot which I have no intention of pinpointing if and when I find them.
Meanwhile, as the wet and dry and windy winter ground on, I separated a few Scouting mode items from the general shopping list and after the local Best Buy crapped out, I decided to finally go to Walmart in the area instead of buying online...
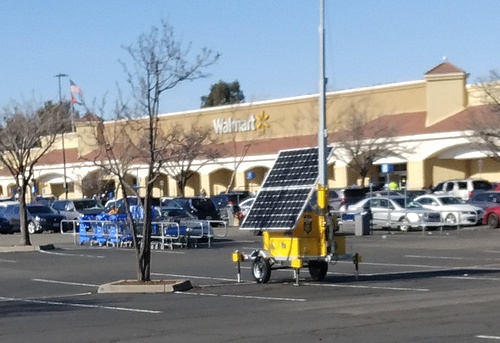
The early February excursion out to Wally World in the east bay Union Landing mall turned out as underwhelming as going to any other big box store. Because it's the Bay, the store was full of more black and latinx than white shoppers, and no obvious Red Hats...
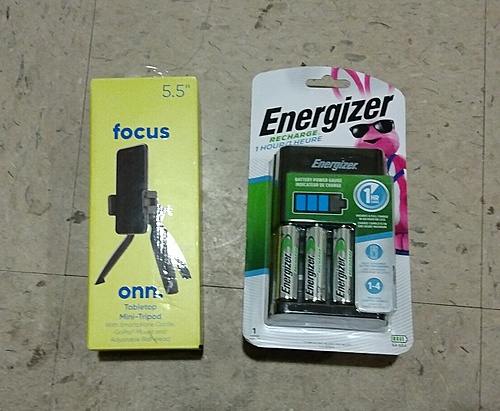
I only got one item from Walmart after all - the mini tripod. I took a chance and checked the huge Best Buy in the mall and they actually had the Energizer 1-Hour charger...
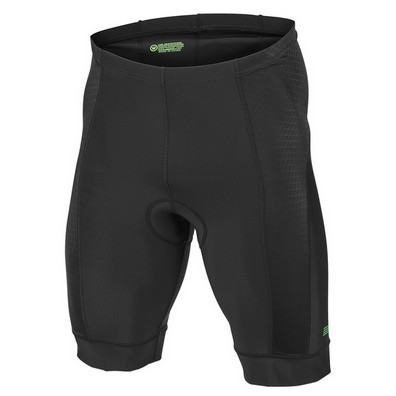
There were two bike shorts advertized at Big 5 that were not or were never in stock, so I wound up getting these Canari Ultima Bike Shorts because they had gel padding, which is recommended over foam. These are strictly for hot weather or wearing under cargo shorts...

I forgot I had these two scraps of black tarp left over, so I made a couple simple dry bags to replace the liquor store plastic bags for use in Scout mode...
At the end of a long tiring day walking around the mall, if I need anything else online and the choice is either Amazon or Wally World I'll probably buy it there. At least eBay has yet to give me grief...
(03/15/23)
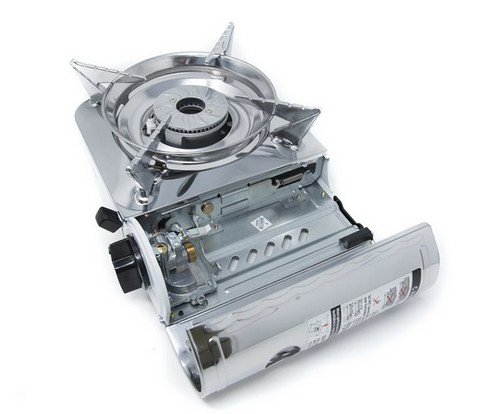
Image: GasOne GS-800 Mini Butane Stove...
I returned to the topic of cooking in tourpacking mode covered in episode 3. Though I still plan to do mostly uncooked meals, sometimes I do want a hot late afternoon dinner or evening supper...
My current gear is the DIY alcohol stoves I made to avoid buying a high priced backpacking cook kit, but now I prefer more practical butane stoves. I like this one model that's small enough to fit in my seat bag and can accomodate a regular 8 oz butane canister. Less fuss, more stable, relatively low price...
I added it to the shopping list, and in the meantime I checked a few video and blog 'how-tos' to make my own reflectix cozies to help cook those 'just add hot water' meals...
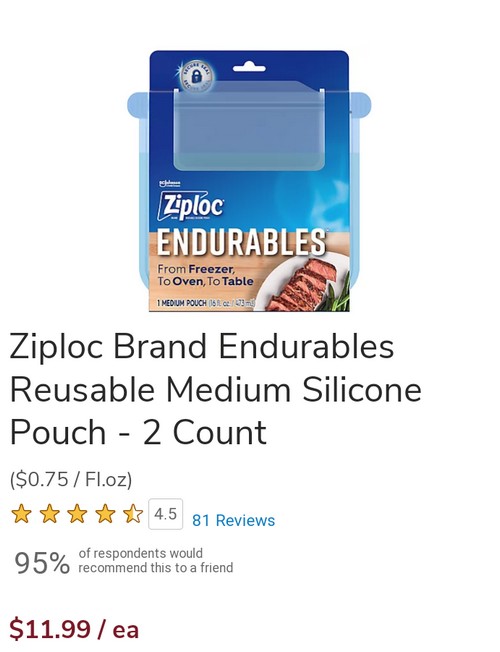
Silicone freezer bags, the reusable foodsafe type you can add boiling water to cook simple meals...
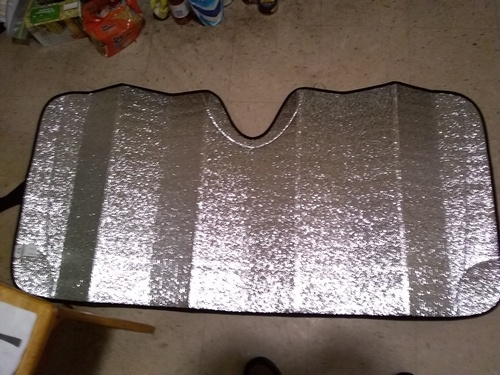
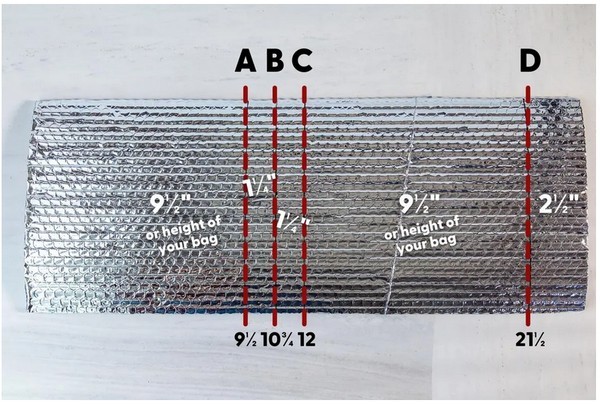
The auto store had big truck windshield sun screens for $20...
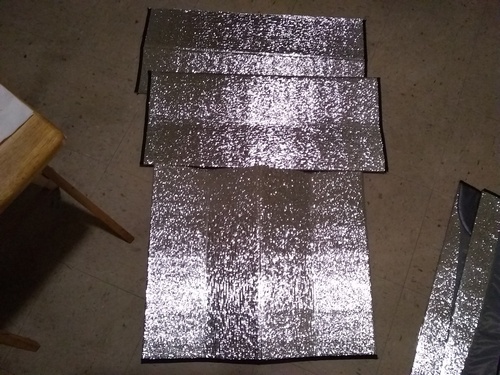
After cutting off the excess, I had two 12.5x28" blanks and one 21x25" blank...
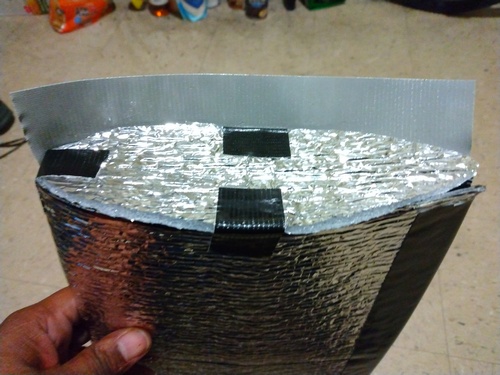
From one 'how to' video, I folded the pouch material horizontally, cut the flap excess to make the base and taped it to the bottom...
The more or less finished cozy isn't that pretty, but it should work...
The 3 inch flap isn't long enough to tuck in, so I'll get more velcro...
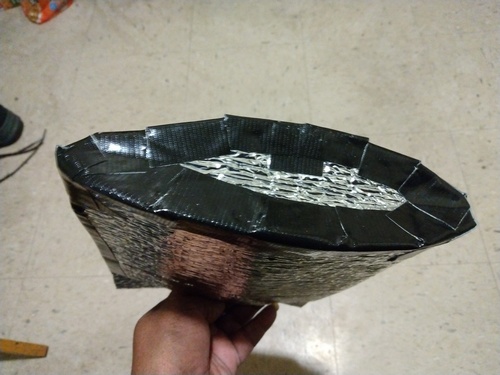
A much neater design is taken from 'How to Make an Insulated Cozy for Backpacking', freshoffthegrid.com. It's made to hold the type of backpacker meals you'd find at stores like REI, so it'll accomodate a larger freezer bag, or even a burger and fries...
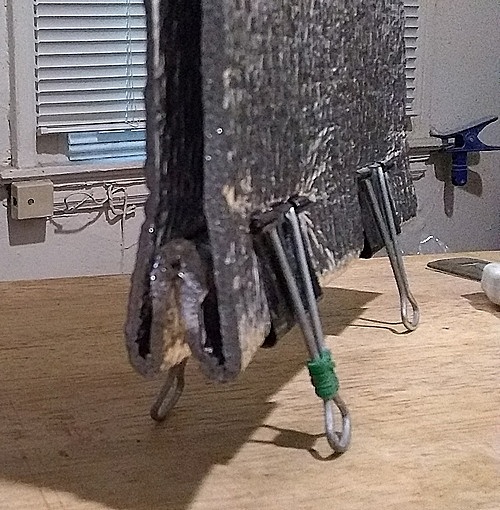
Securing the base before sealing the sides of the newer design...
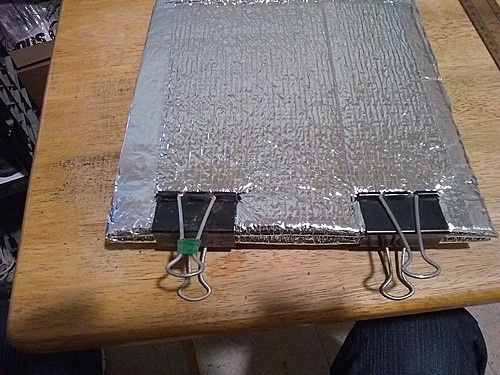
Pressing hard on the bottoms to make the base corners tight...
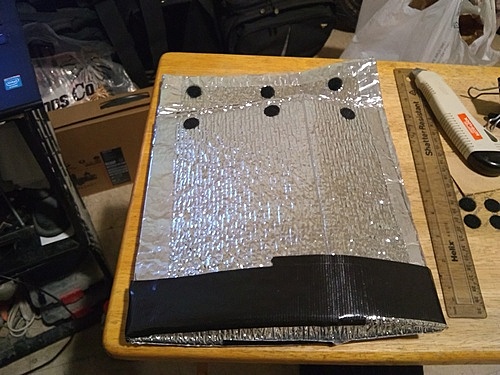
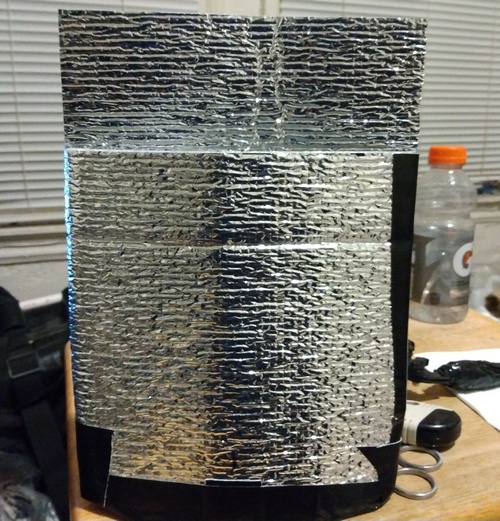
Gorilla tape to reinforce the base and velcro dots finishes the first larger cozy, along with the last of the aluminum tape...
The second big cozy is sealed with Gorilla Tape...
The finished meal cozies can be kept in the kitchen Opsak for Tourpacking. I'm anxious to see if it really can hold a burger and fries...
------------
Meanwhile, the 10th atmospheric river of the winter season began sweeping through the state...
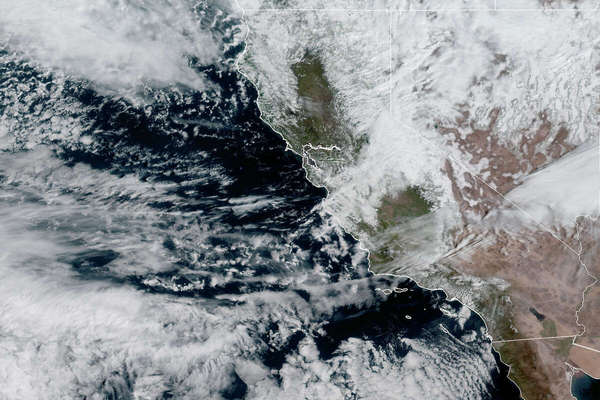
3/08 NOAA satellite image of the next storm system approaching California...
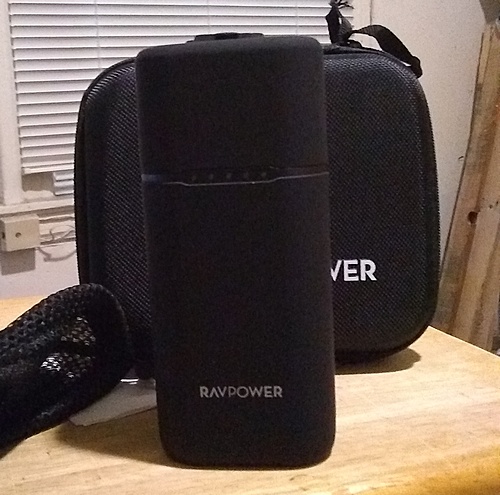
The RAVPower PD Pioneer power bank arrived just as the evening rain kicked in...
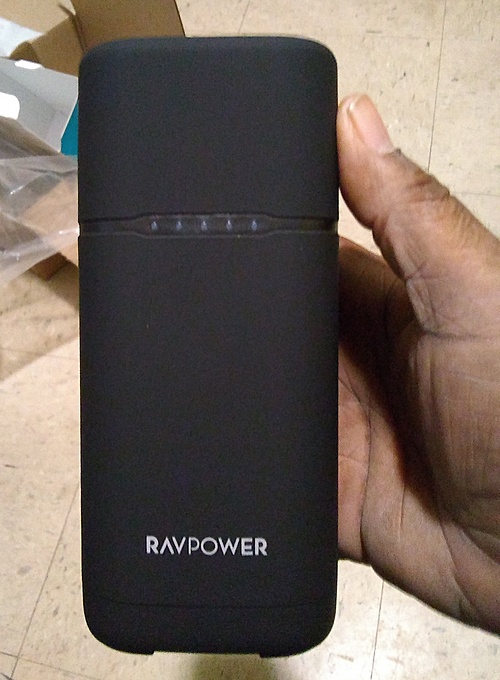
At 6" it was smaller than expected, but fine for traveling...
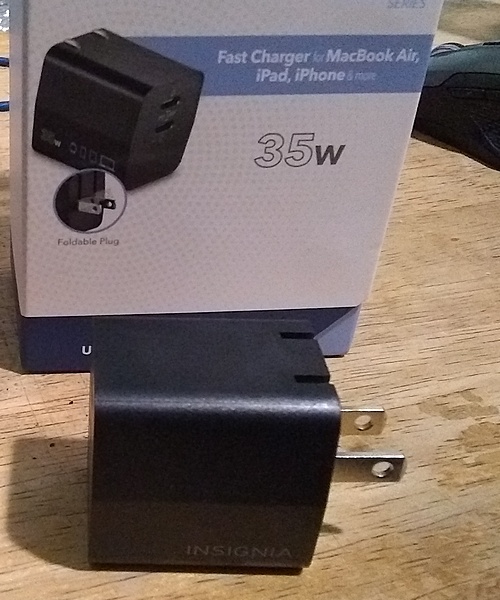
The local Best Buy was out of 30W PD 3.0 chargers for the power bank, but the same manufacturer had a 35W dual port charger for the same price. You only get fast charging with one port...
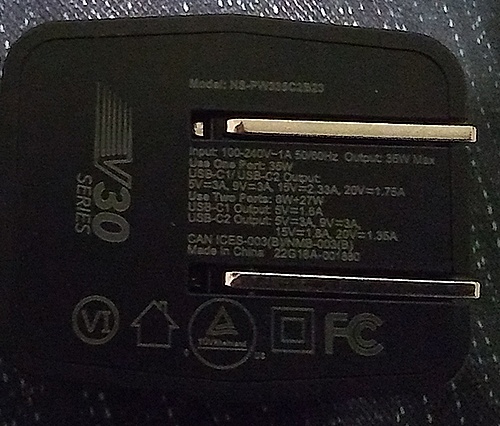
The specs were too small to read...
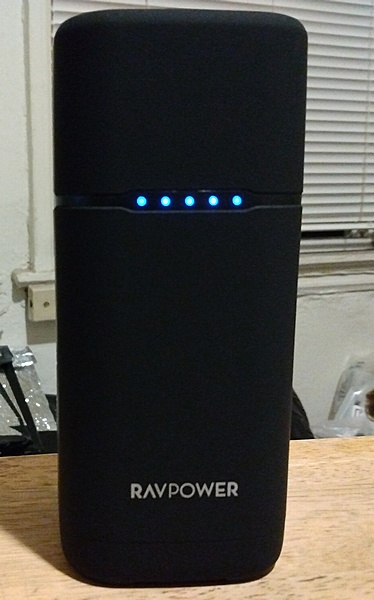
It took between 5-6 hours to go from half to fully charged. Cool...
Youtube channel for Bike Shop and Travel Vids 