Bike Shop
(03/27/23)
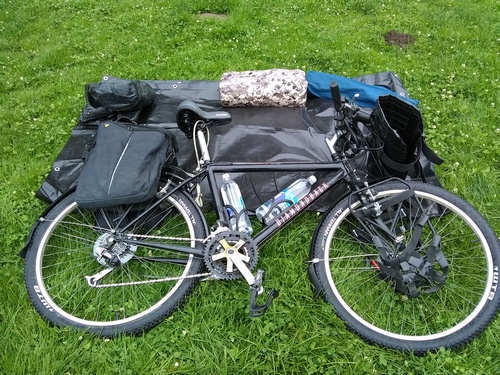
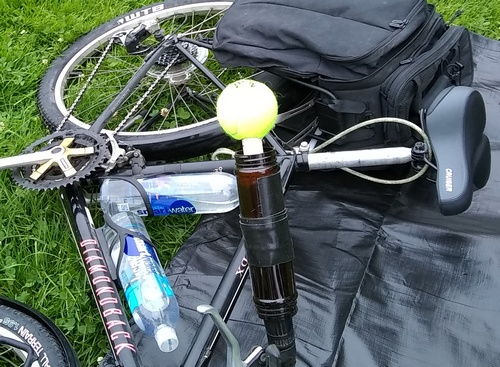
This time out I considered an item I overlooked during the past year or so gearing up to go long touring - the need for a second bike in case the main bike is out of comission. The initial idea was a backup bike if the Diamondback had to go to a shop for a major repair, but I'm not a commuter or weekend rider, I'm going on walkabout. The two scenarios are apples and oranges...
If I have an issue I can't fix myself or replace far away from my storage locker (something like the frame broke and it needed welding), I'd be sitting in a motel room or in my tent outside town waiting for a strange shop to gouge me for the work, making a backup useless. If the repair cost is more than I can afford, or the bike's insured worth, it's also a total loss. If the bike itself is stolen, I'll be lugging my gear (that hopefully didn't also get stolen) on a Greyhound bus back to the city and now hassling with the insurance company. In that case, it makes sense to have a replacement bike ready to go...
Anyway, my choices are a new bike, a decent used bike, or refurbish another 90s mountain bike. A new bike would be in the low end $600 - 1200 range, while a decent used gravel or touring bike would run $300 - 600. Refurbishing another 90s mountain bike would be starting from scratch most likely, eventually cost as much as used and take a lot longer than just buying a used bike. What I won't do is buy a cheap $200 - 300 bike from a big-box store or look for a 'great deal' at a flea market which could easily be a stolen yuppie bike - that's just asking for bad karma...
Instead I did a little window shopping, first looking for new 'cheap steel touring bikes' or 'gravel bikes under $1000' and found these bikes that all had solid front forks (I've never been on a bike with a suspension fork, don't wanna ride them)...
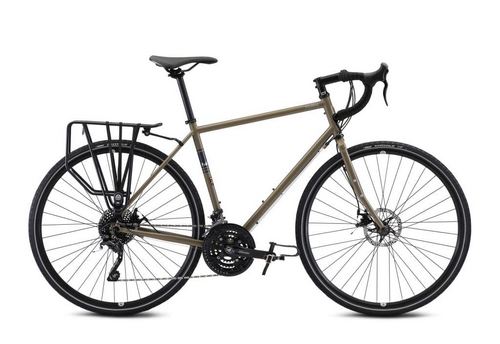
Fuji Touring bike, a model that's been around for decades...
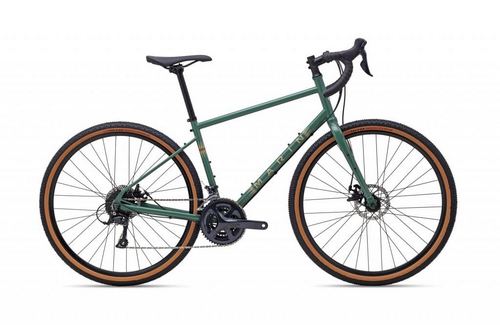
Marin Four Corners, a stylish gravel bike for touring...
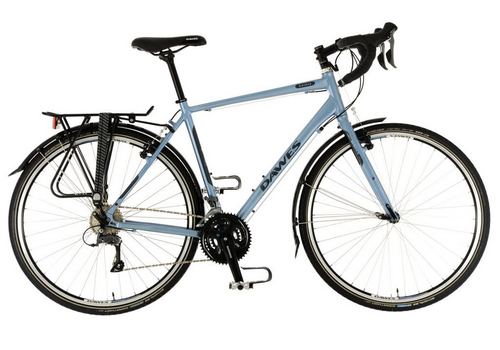
Dawes Super Galaxy, a touring bike designed to give a more comfortable ride...
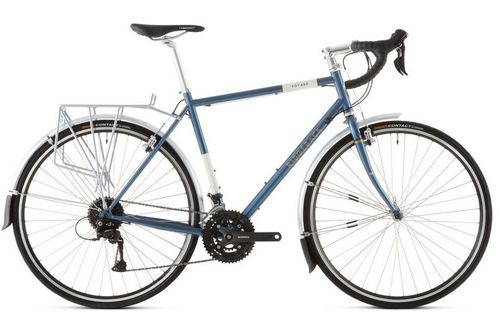
Ridgeback Voyage, considered the best light touring bike...
It would take at least six months to save up for one of these 'low end' new bikes, even more now that I know dental season has to go into extra innings, so I gotta go for a used gravel/touring bike.
There are three options - A local neighborhood store; The Bike Kitchen, a well-known co-op where I could build a bike relatively cheaply, except some people donate bikes that have been to Burning Man, which means a total strip and degreasing to remove any and all sand; a used bike superstore in North Beach. I checked out the first and third option...
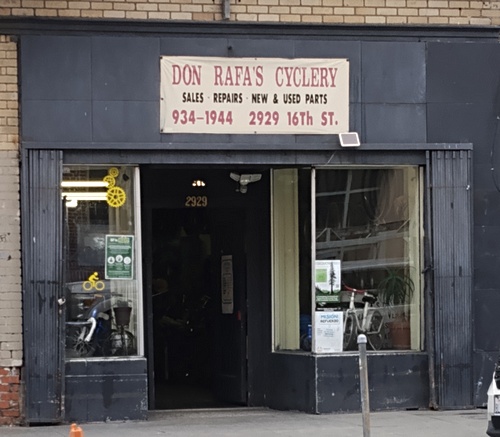
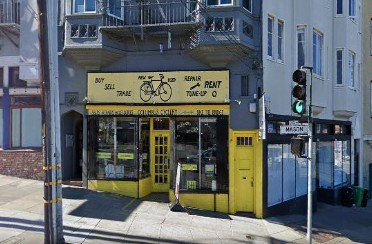
Don Rafa's Cyclery near 16th & Mission, a shop with a solid reputation in the neighborhood...
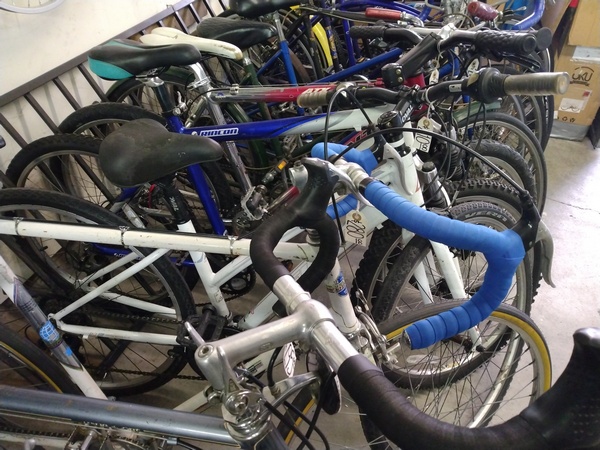
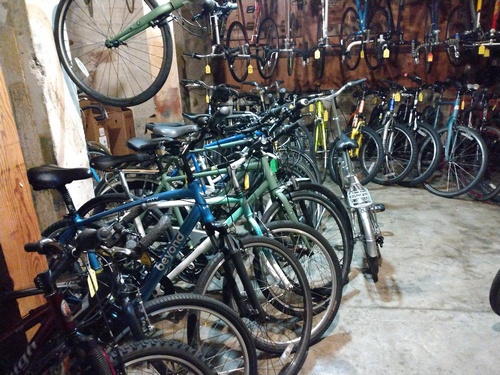
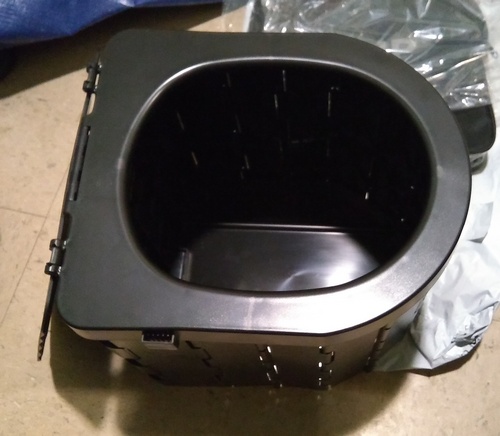
After getting permission, I took these pics to check the models for features. Most of the used bikes in the shop are in the $200-400 range...
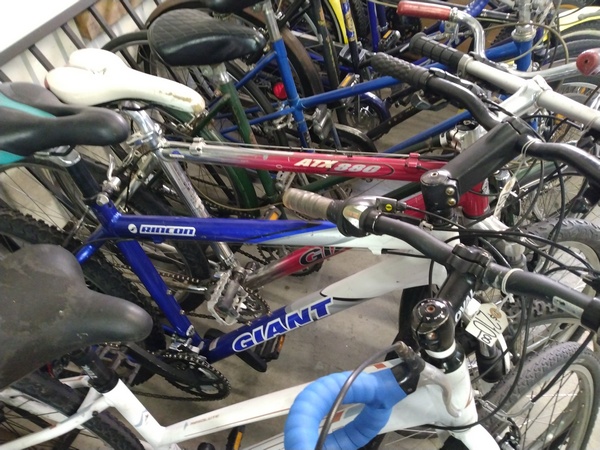
Many brands from the classics and new names like Giant...
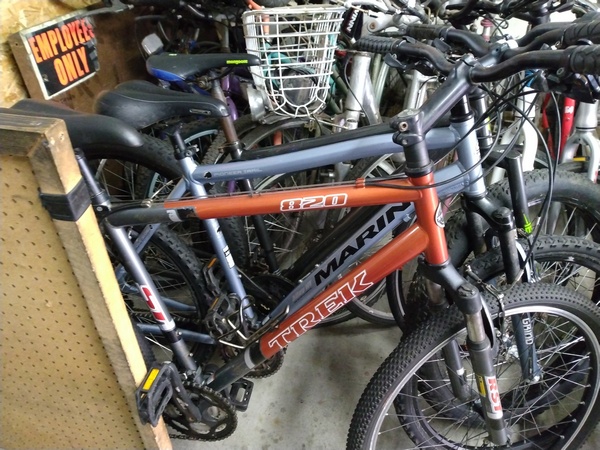
I asked, but they didn't know if or how many 90s bikes they had...
A few days later, I was in North Beach and went to Columbus Cyclery to check it out...
One of the guys there took me down to the basement level where most of the older bikes were. Not exactly 90s mountain bikes, but many early 2000s road, gravel and MTB with rigid front forks...
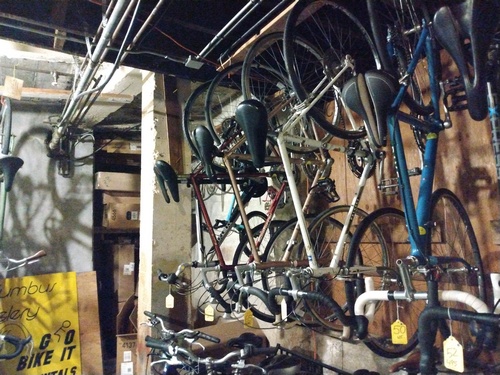
A choice selection of vintage 10 speed bikes on the wall. Very cool...
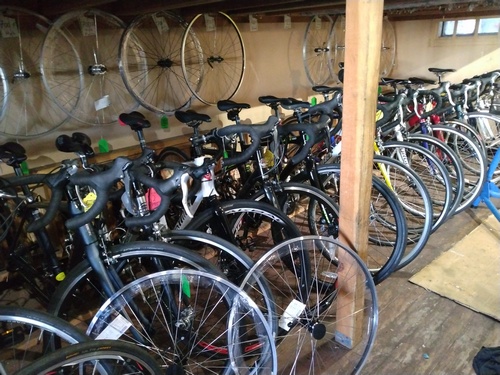
On the main shop floor I saw many new and used road and gravel bikes, plenty of solid front forks with rack mounts. The shop website has lots of bikes with specs and prices listed, a slight advantage over the neighborhood bike shop...
Both stores had very nice bikes to choose from, so I decided to check back after I secure the rest of my Tourpacking gear, cause I wanna start riding once the damn rain finally clears out. The extended dental season shouldn't take that long, so I might just get a short tour in by the time I put a down payment on a replacement bike...
[Note: LBS bikes from the cycloscope.net article 'Make it Cheap! 11 Best Touring Bikes Under 1000$ (in 2022)']
(04/06/23)
This time out I had to take a tangent from the backup/replacement bike musings - dealing with the Tourpacking gear minus the bike...
Previously, I only considered pulling all the gear off the bike whenever I would go to a supermarket; a shopping cart can easily fit the bags (other than the backpack and the solar panel case) while I roam around the store looking for a few days of road food, dinners and something fresh for that day. But, in a worse case scenario I'd be left with having to ride that Greyhound back to storage to retrieve the second bike while lugging my gear in a portage maneuver.
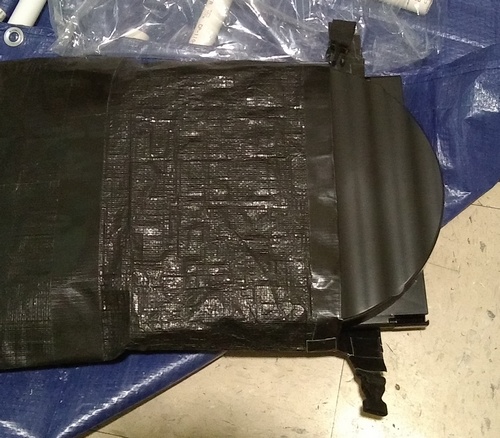
The natural choice for a portage bag would be another big duffel. I narrowed it down to a 120L collapsible duffel bag that folds down into a size small enough to fit in the seat bag.
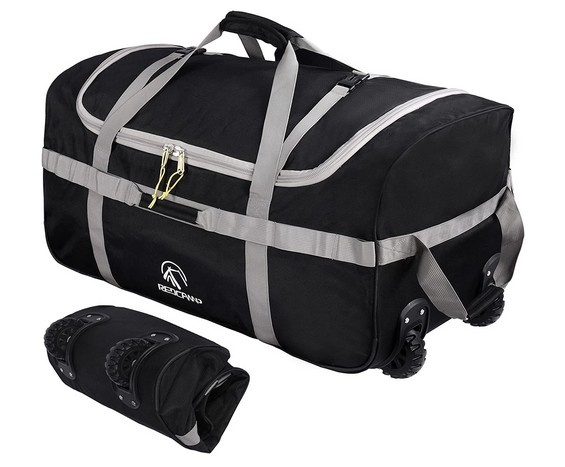
This roller duffel should easily carry the Handlebar Bag, Front Rack Bags, Pannier Saddlebag, Seat Bag, and maybe even the Big Backpack if needed. That should at least make the Greyhound trip somewhat easier, but I hope I never have to make a portage move...
(04/20/23)
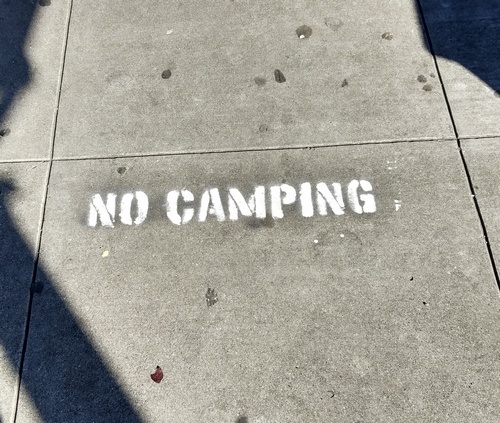
After searching the entire Bay Area and not finding any safe or convenient overnight dispersed campsites near the city, only potentially risky stealth spots, and considering other consequences of long-term touring, the harsh realization means a major alteration in my plans - I can't cut the SRO loose and go rent-free after all.
Granted, there are advantages: the mayor's Section-8 program for SROs, combined with the cost of storage means I pay some of the cheapest rent in town; the convenience of a combination boondock basecamp and garage in one of the most difficult parts of the state for me to camp in can't be dismissed; I wouldn't have to deal with the permanent address and ID issues that come with living in a van.
The big disadvantage remains - this SRO is essentially a collection of one-person homeless shelters, with quite a few 51-50s cycling through the building. Some have difficulty remembering how to live off the street - breaking windows, knocking holes in the walls, using the shower as a toilet, and occasionally trying to set the place on fire. Another reason I didn't want to be stuck here without options...
At the very least, it expands my range for finding an overnight staging area before riding into SF. A day's travel would be a max of 50-60 miles, which includes enough dispersed camping public land North and South to be feasible. It also adds another expense - the need for renters insurance to cover the gear while I'm on the road...
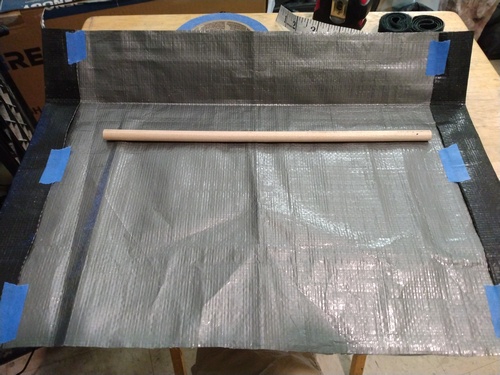
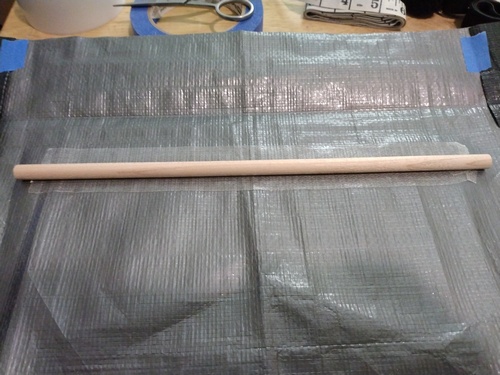
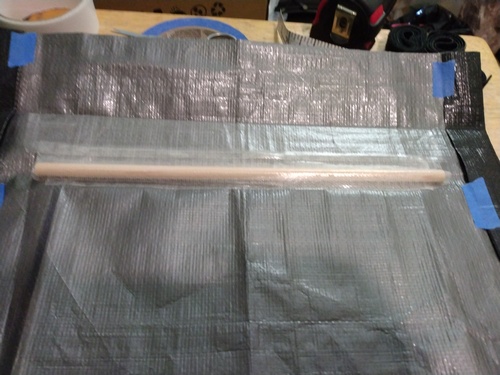
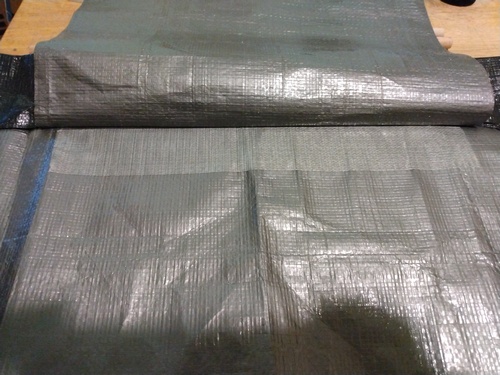
Meanwhile, the next project is designing and building a portable frame for the flexible solar panel...

Using the last of the silver & black tarp, I cut a 27 x 20" blank of the flexible solar panel to fabricate the frame and carry case around...
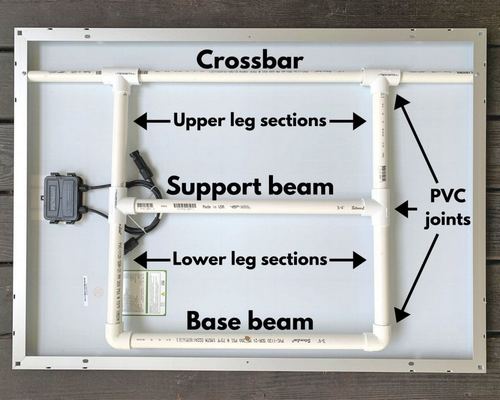
A pretty basic pvc frame for a rigid solar panel, from the article '$11 DIY Portable Solar Panel Stand', Alex Beale. My mobile frame will have to be much more elaborate...
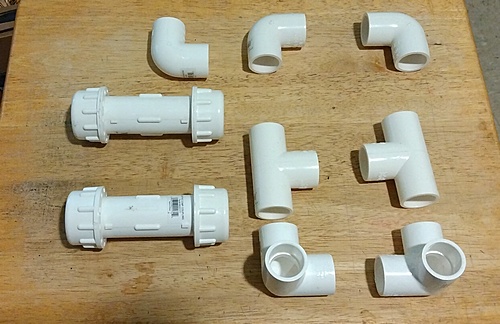
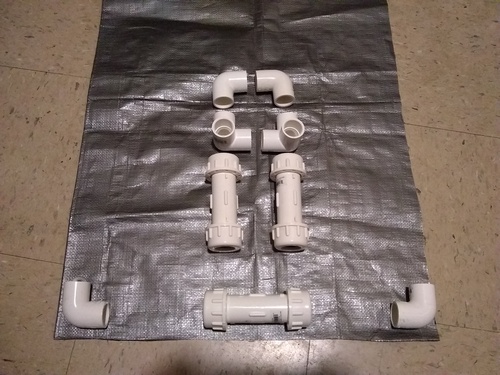
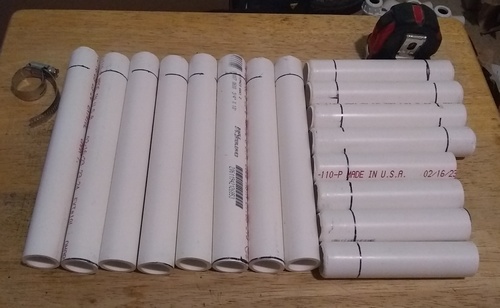
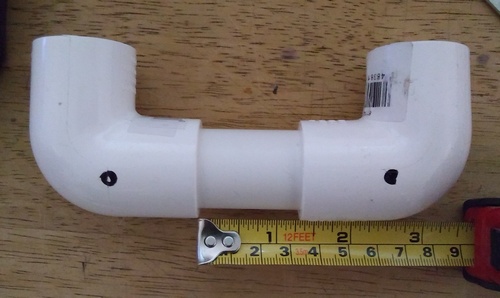
I started buying the first batch of pvc fittings a few days after putting out show no. 40...
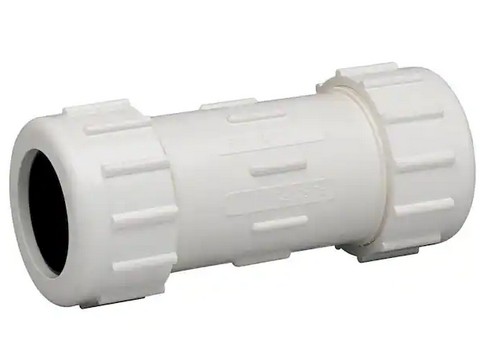
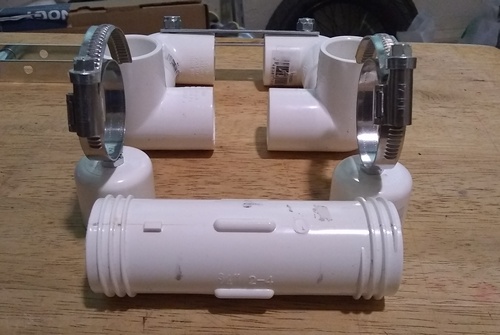
To make the frame sections more solid, I'll use these compression couplings...
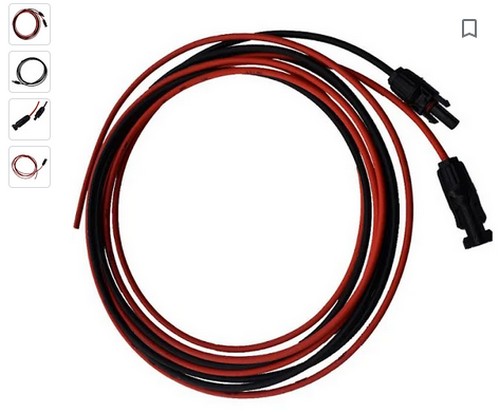
A pair of 3 ft. MC4 solar cables with bare ends to connect the solar panel to the charge controller...
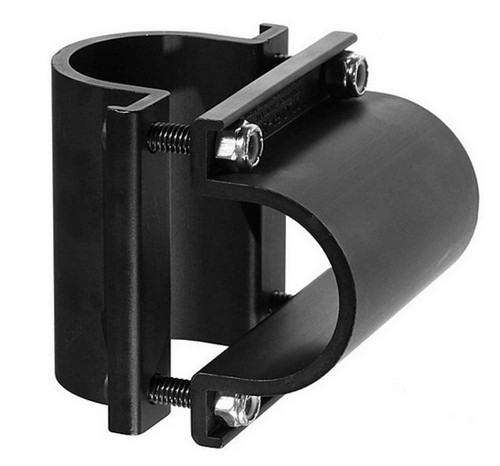
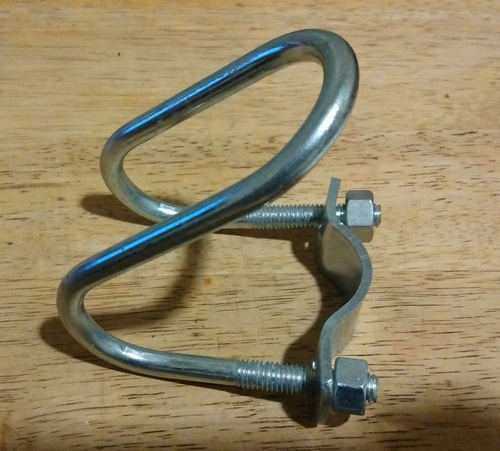
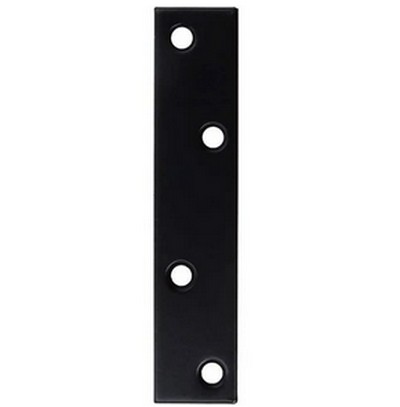
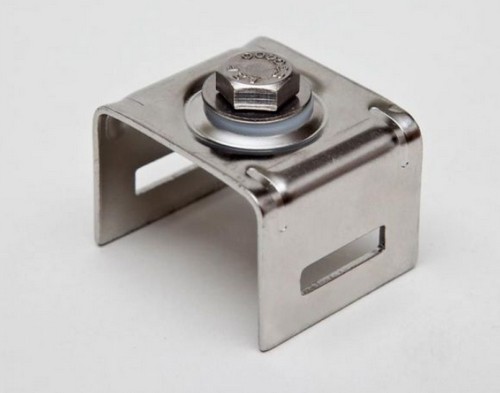
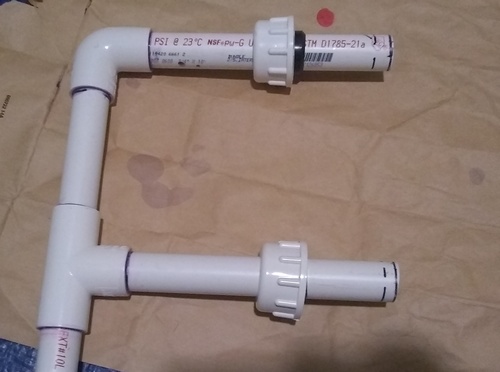
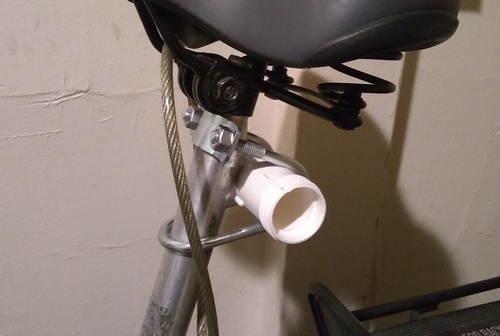
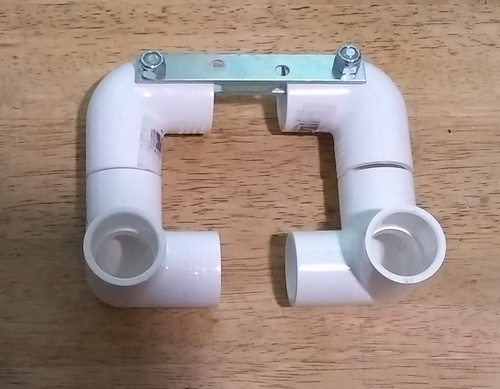
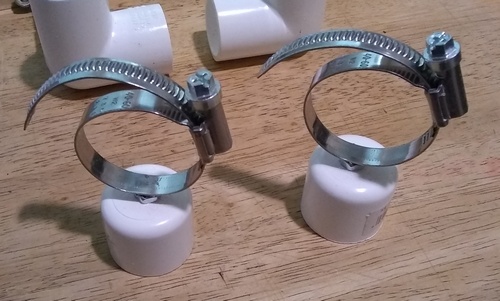
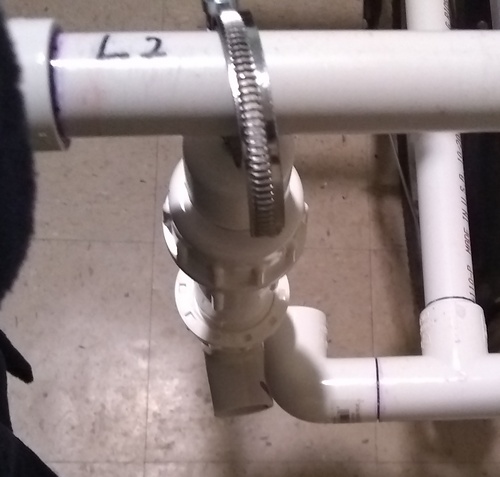
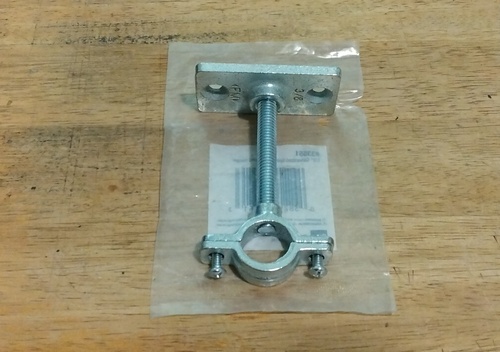
The first design hitch was finding the right pipe clamp to attach the frame to the seat post...
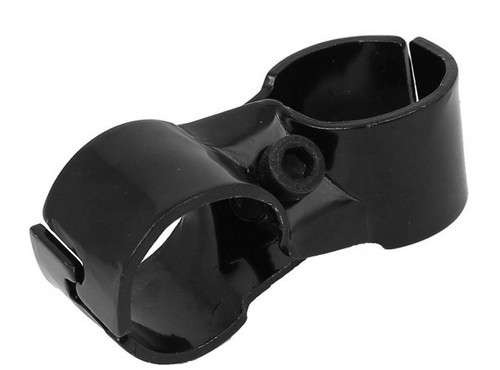
By chance I discovered this double port pipe clamp that would fit my 29mm (1.1") bike seat post in one port, but the other port has to fit a compression coupling with an OD of 1.5" in the center - no good...
I came across this LightSource Mega Clamp that is oversized, designed to fit 1.5" and 2" pipes. It would work with a .5" rubber shim on the seat post...
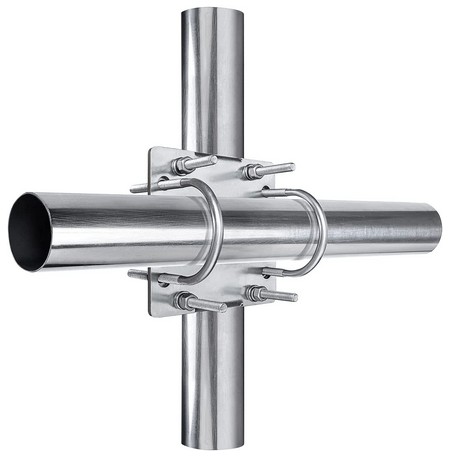
This is a mast pipe clamp used for mounting antennas, with another huge plate that would complicate tying other gear to the seat post...
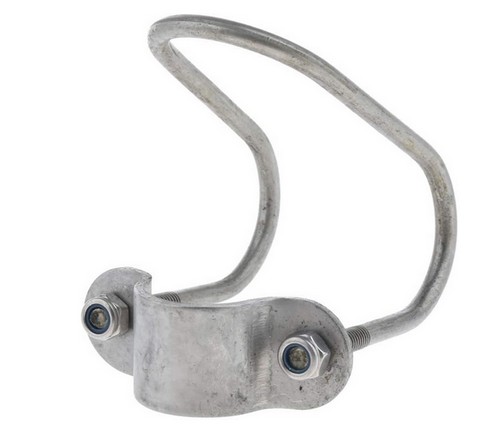
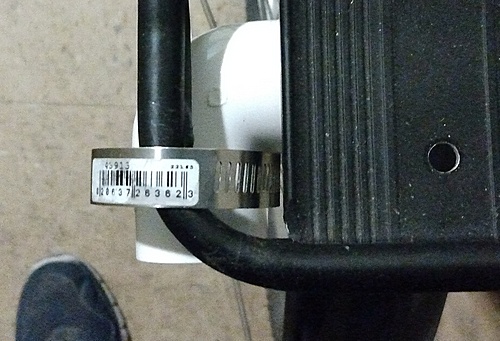
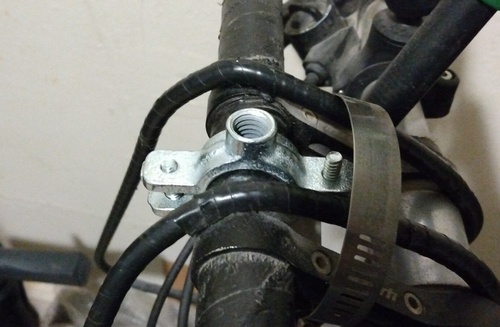
I finally came across this, the simplest 90° steel clamp for 1" to 1" pipes, sold by another Amazon 3rd party vendor in China...
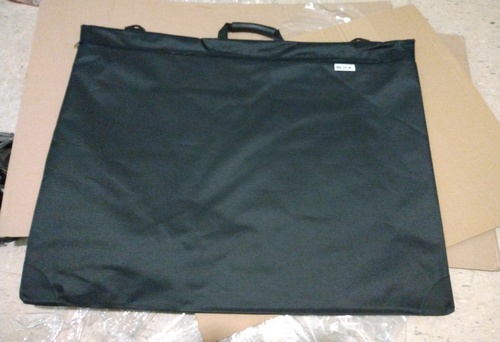
I also had to either build or buy a carry case for the solar panel and portable frame. The ideal build size is 30" x 24", but I first looked at soft-sided art portfolio cases...
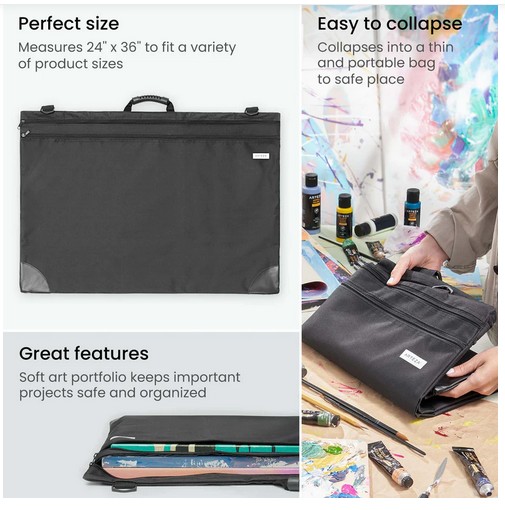
The Arteza soft sided portfolio case, 36" x 24"...
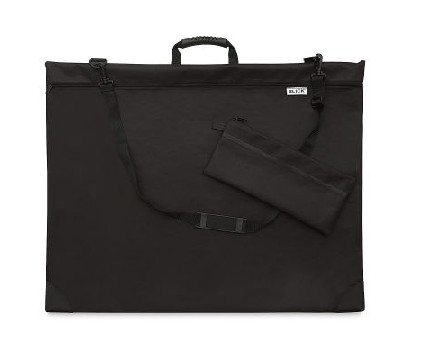
The Blick soft sided portfolio case, 31" x 24"...
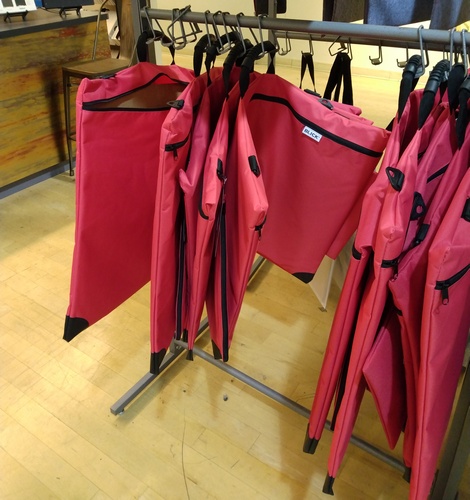
At the downtown Blick store, I confirmed that the portfolio base corners weren't stiff, but all the black ones were taken. Nobody likes the red ones. I ordered a black case to skip the DIY for this part...
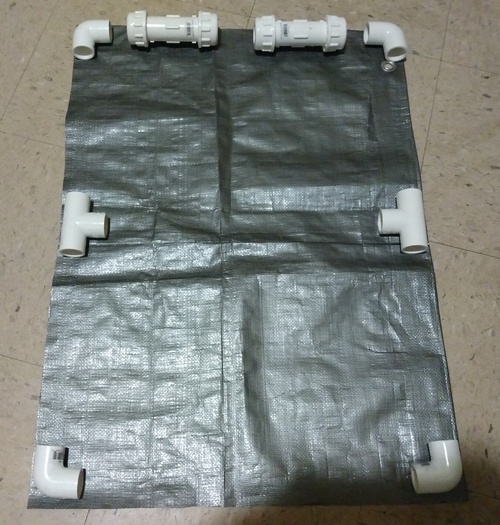
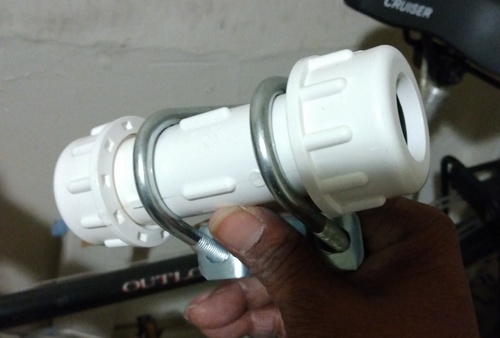
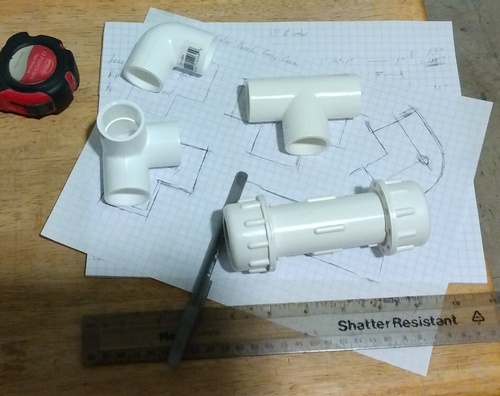
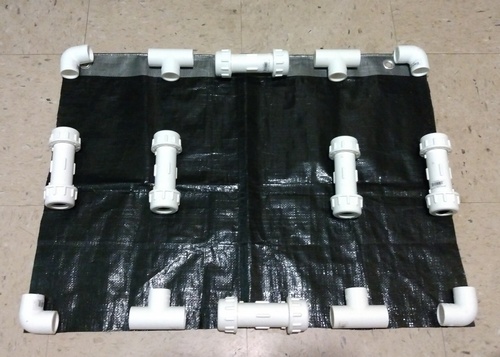
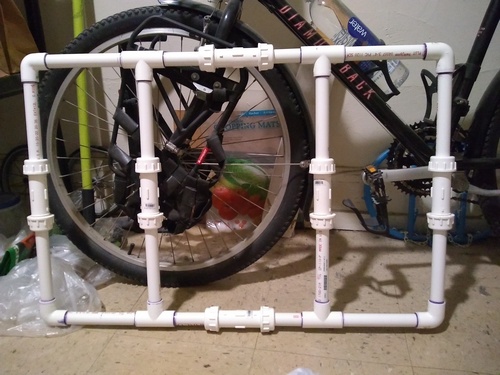
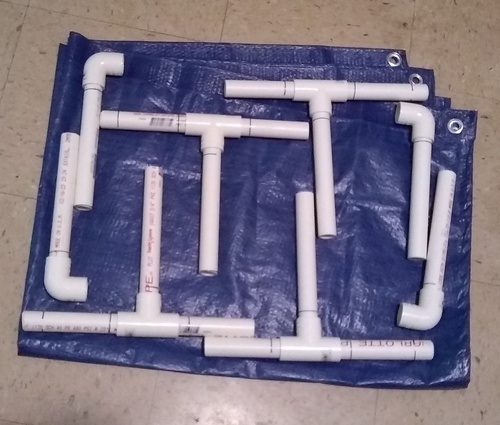
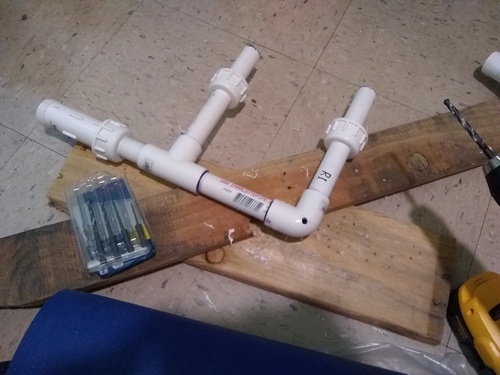
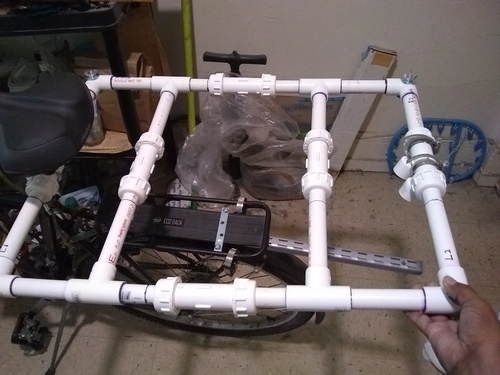
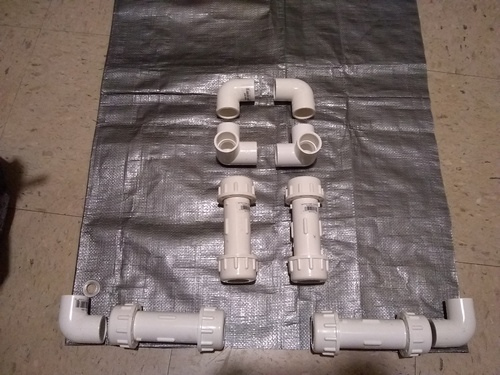
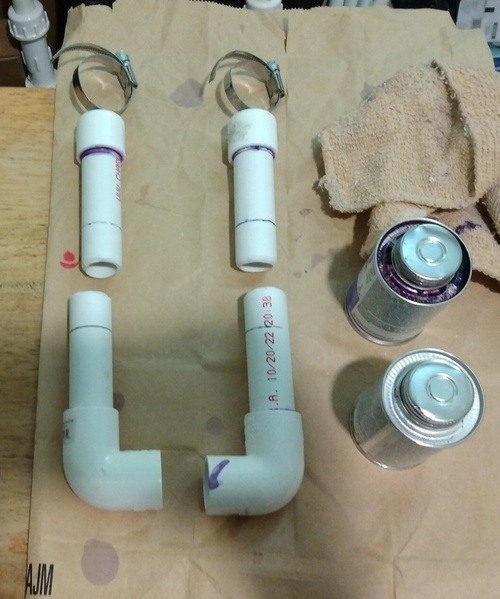
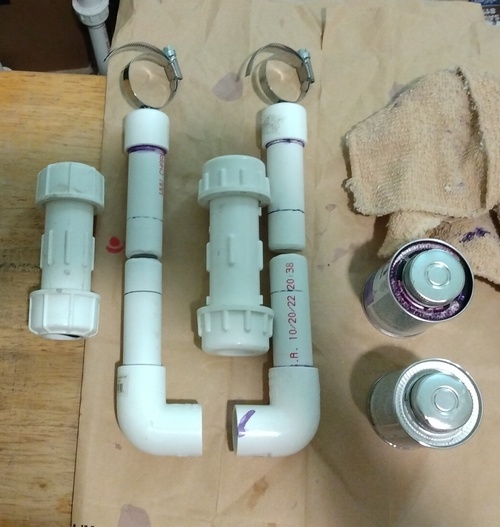
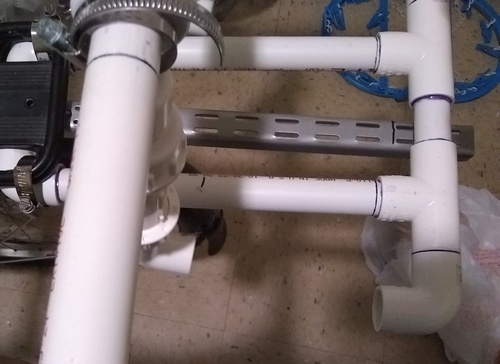
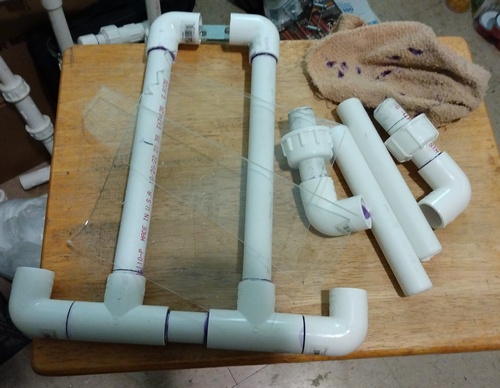
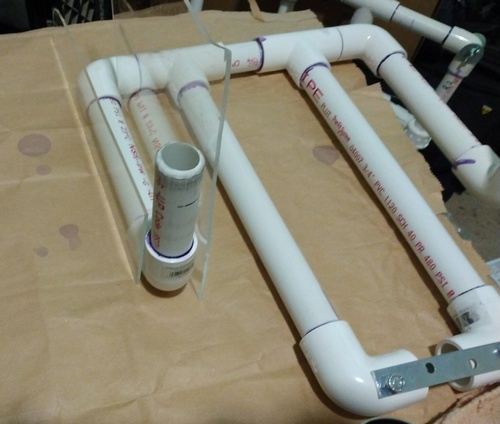
The frame will break down into three portable sections for the solar panel platform, and an attached base. Here's a rough layout of pvc fittings for the platform, with one configuration of compression couplings on the front end...
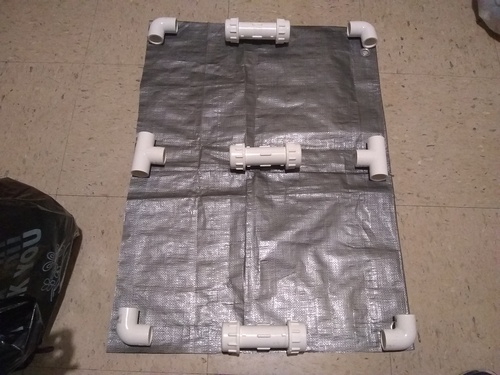
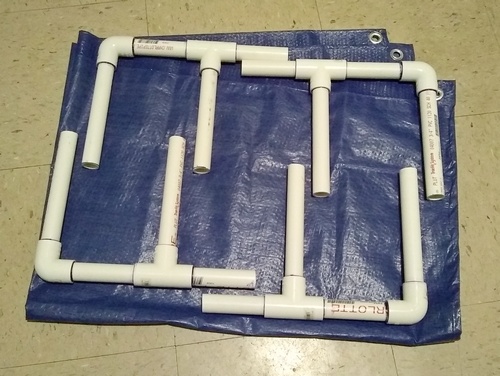
Here's the rough layout I'm going with, where the frame's platform sections match. If I know the solar panel will be deployed the next day, I could even leave the base attached...
The pipe-to-pipe clamp came in the same day I ordered the Renogy solar panel and the portfolio case...
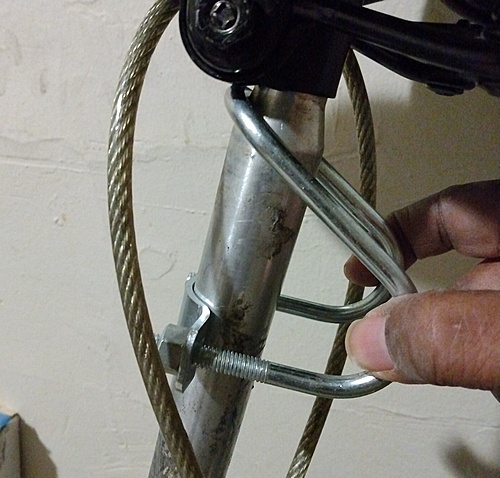
I readjusted the seat cable and mock fit the clamp to the post...
A single compression coupling fits the clamp perfectly on the front end of the frame...

The portfolio case came in a few days purchase. After a week I checked with Renogy and a few days later learned that UPS failed, so they're re-shipping my flexible panel. That's the latest update on the release day of the episode...
The case looks good...
(05/01/23)
Ok, we're in full-on Spring mode but I'm also in the middle of extended dental season undergoing a series of surgeries before I can even get to wearing the denture that will restore my grill. The medical term is alveoloplasty, but it means at least a month before I can chew solid food, and the podcast episodes will continue using a speech bot. This process will further interfere with my planned Scout rides, but not as severely as recovering from the cataract procedures, so I can still get in some bike riding as long as the weather cooperates.
Still, I feel stuck in limbo as I imagine additional worst case scenarios becoming a slippery slope of paralysis of analysis, obsessive over-preparation, even as I work on designing and building the portable solar panel frame for Tourpacking. Clearing the rest of the Tourpacking gear list will take longer now, because Medicare doesn't cover the dental surgery.
At least an extended Scout mode is helpful, giving me time to work out the problems of touring that present themselves as I get into the routine of biking between the city and Half Moon Bay.
And I desperately want to take some wildflower pics...
Meanwhile, back in the bike shop:
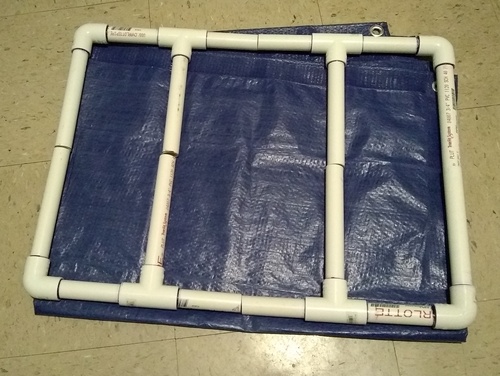
Once again, the layout for the solar frame's platform. A coupling for the center crossbar makes the frame that much stronger...
The layout for the base and the platform's back end, where vertical compression couplings lead to mounting clamps holding the horizontal central coupling of the platform's back end...
I removed the trailer hitch from the rear rack to swap in the solar panel base. This arrangement should do because the flexible panel and frame won't put undue weight on this junction...
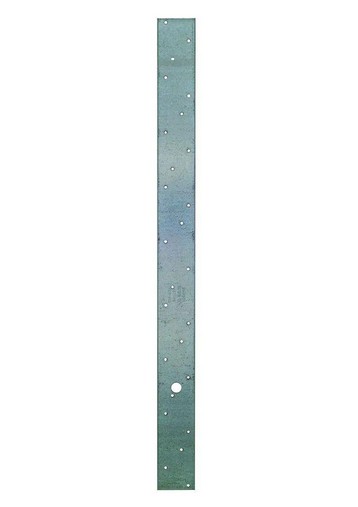
I thought of using a 24" or 26" long Simpson Strong-Tie metal strap tie to support the base, but there are no matching mounting holes...
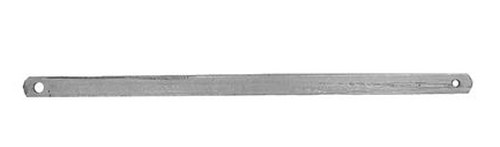
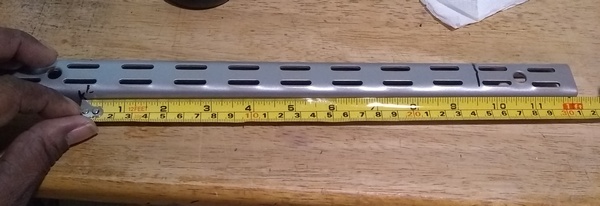
A better fit than a Simpson strap tie is this piece of electrical pole hardware, a 28" or 30" crossarm brace that has well placed mount holes at the ends and also looks more sturdy than a strap tie. The brace will accomodate a cable clamp at the back end of the base...
To clamp the middle of the brace to the rack I can use a pair of 4" mending plates just before the front end of the base...
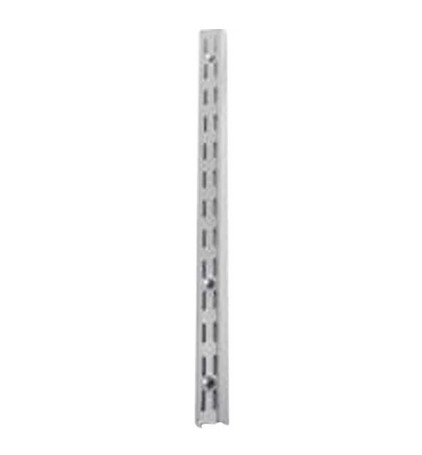
I'm having difficulty finding the crossarm brace locally (buying it online will cost almost $30), but this double slotted shelf standard with a 300 lb. capacity may be the best compromise to hold up the frame (less than $10)...
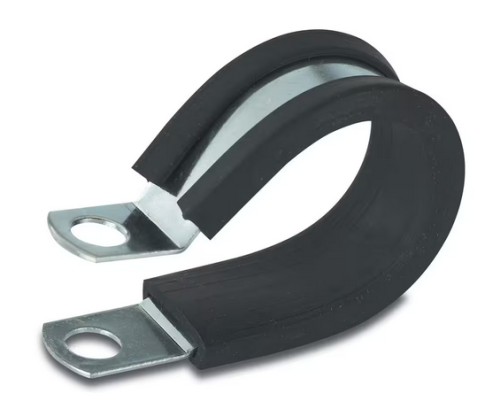
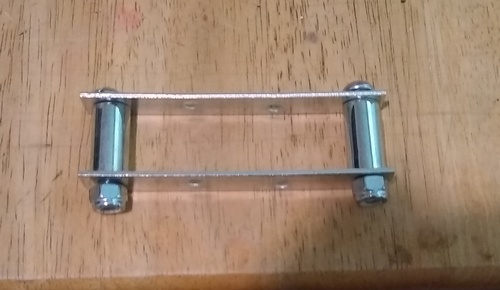
A 1" - 1.5" cable clamp...
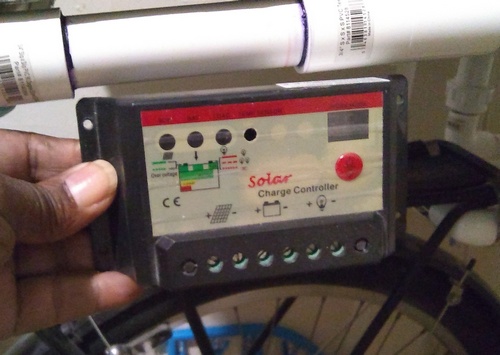
Mounting clamps like these for the platform's back end central coupling, not usually found in an average hardware store, kinda pricey, $30 plus shipping...
A different piece of hose clamp hardware - a single bolt strap bracket, used to attach signs to street poles. I found only one place selling these individually, for $6 each, plus shipping about $20 total...
Yet another piece of hardware - Spa Heater Tube Band Clamp Studs, $10 a pair, $15 plus shipping. I Looked for local pool and spa stores that might sell them, just found repair shops, so I ordered them...
Because the items are in Washington state, they arrived in a couple days. The studs look long enough to replace the nuts and washers with lock nuts to secure them to pvc end caps...
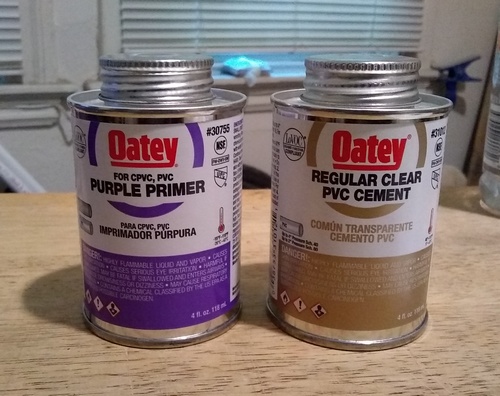
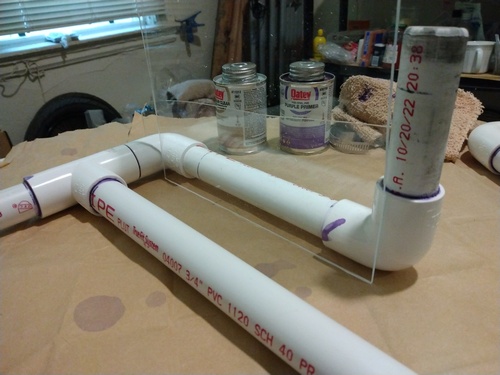
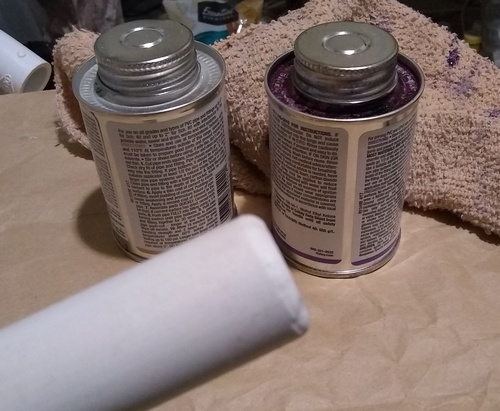
Primer and cement for the permanently bonded parts of the frame...
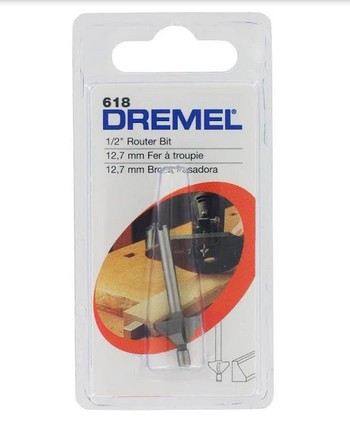
1/2" 45 Deg. Chamfer Router Bit 618. A Dremel tool to shave the outside corners off the pvc pipe ends before priming and cementing...
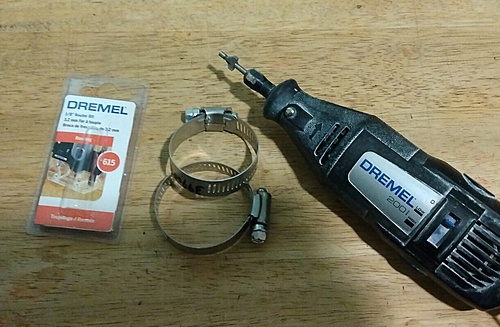
The home improvement store only had the no. 615 1/8" Chamfer Router Bit, but it still works. I also picked up an extra pair of 1-1/2" hose clamps for the platform's back end central coupling before I found the mounted clamps...
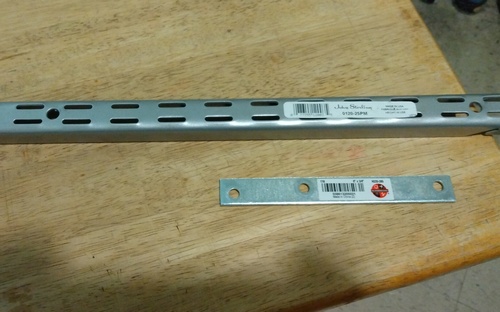
On Earth Day I went to the home improvement store for the 28 inch shelf standard, but they only had 24, 25, 39, and 48 inch pieces. The best compromise was the 25'er and a 6 inch mending plate extension. The standard being bigger gives even more weight support...
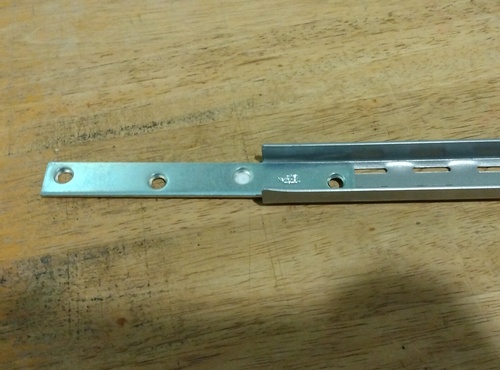
The bigger standard also fits the extension mending plate inside...
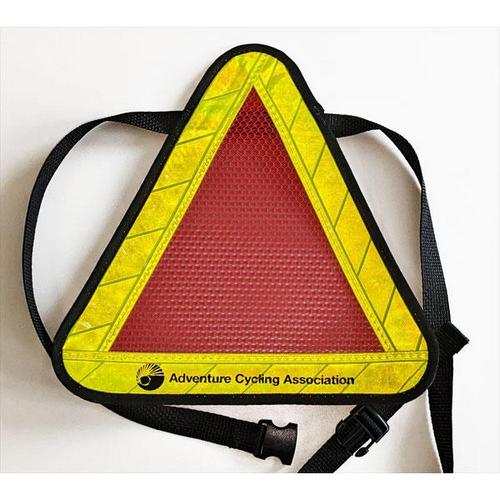
Because the solar panel frame will stick so far off the back, I now have a good excuse to get this ACA safety triangle to dangle from the frame. There's always another piece of gear to buy...
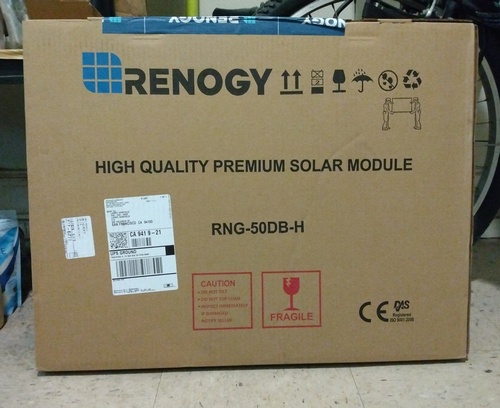
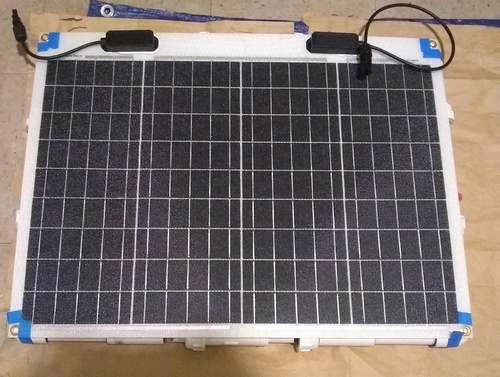
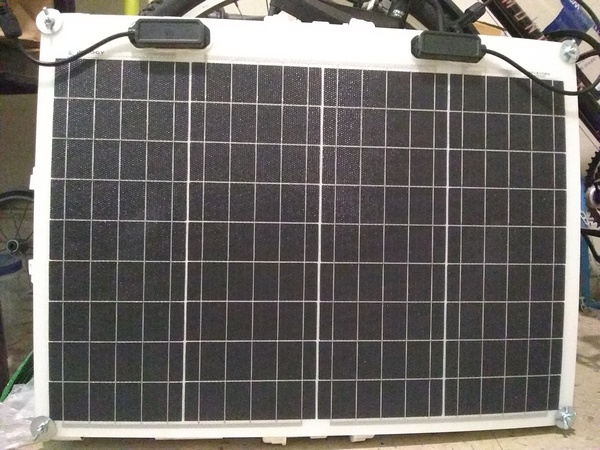
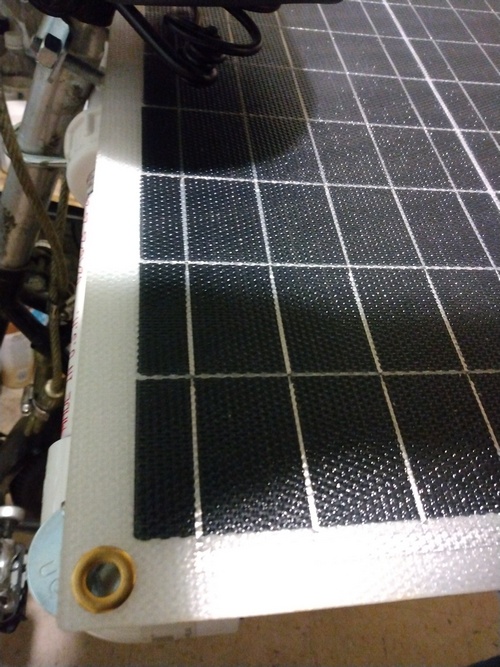
Finally, on the 28th the solar panel arrived. Time to unbox and check...

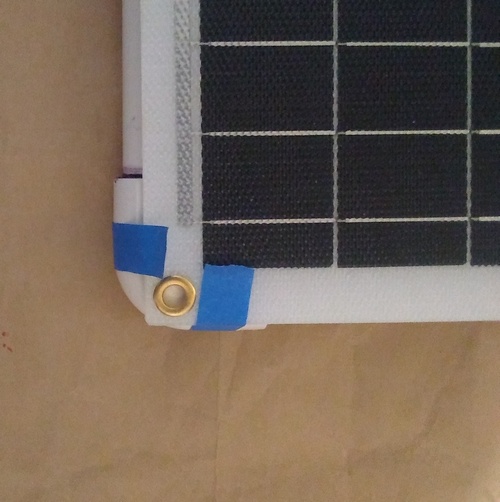
No obvious damage, even though it feels stiff. The corner mounts look just big enough to give 1/4" bolts some wiggle room...
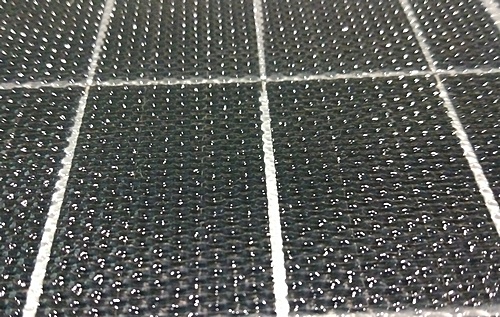
The panel surface looks and feels very durable...
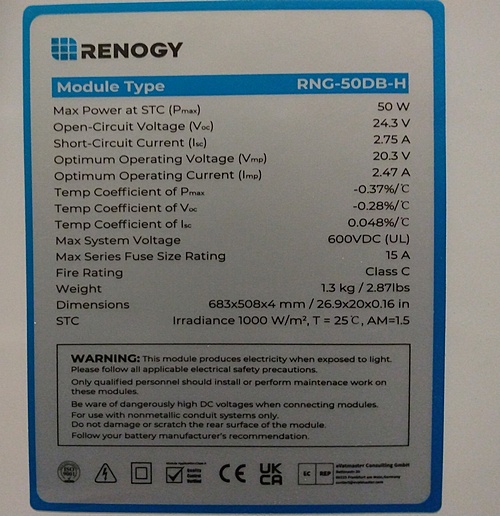
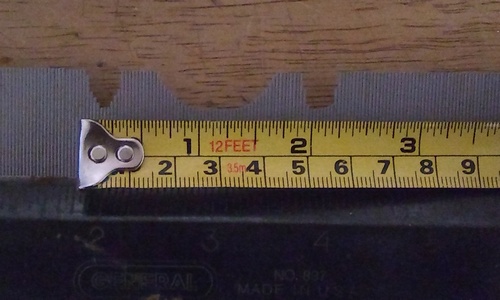
A file pic of the specs...
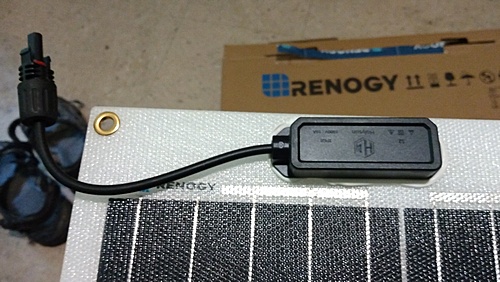
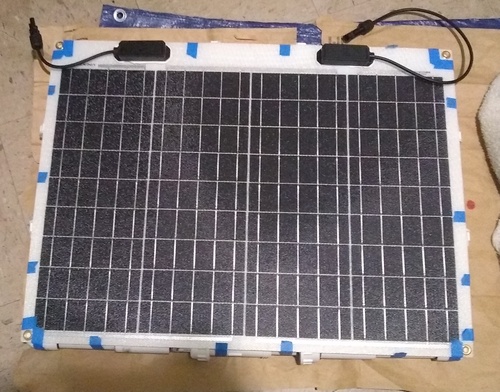
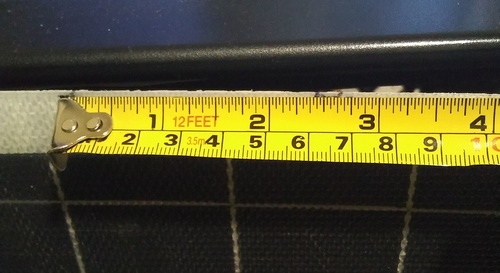
This module has the positive cable and MC4 connector...
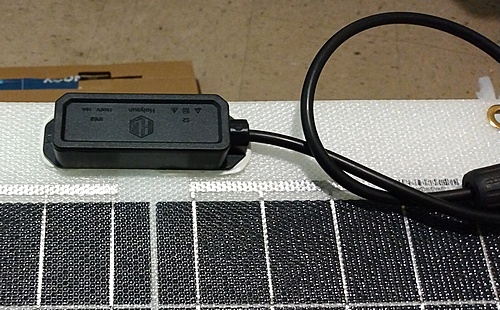
This module has the negative cable and connector. Definitely 10 AWG cable and corresponding connectors needed to do a run test on the panel, and I need to do it within 30 days to confirm it's ok...
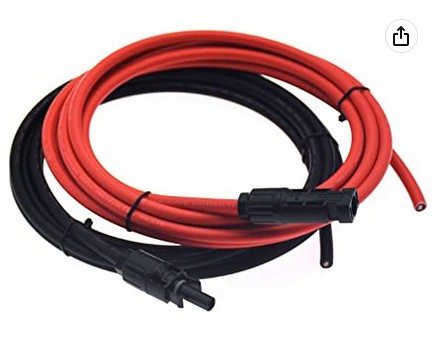
Shortly after checking the solar panel, I tried to find the 3 foot MC4 black + red solar cables on Amazon with no luck, so I ordered this pair of 10 foot cables with bare ends that costs the same ($24 plus tax and shipping). Whether or not the extra cable comes in handy when I get the 100W power inverter, I can still use it to connect the panel through a charge controller to a battery, to finish the run test...
(05/19/23)
Ok, this time out I'm preempting the Itinerary to focus on the mobile solar frame project, knowing it would be a marathon of baby steps, but I decided to finish it before putting out the episode, no matter how long a slog it was...
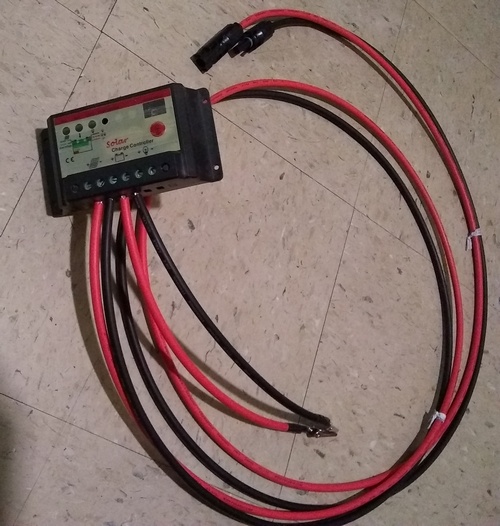
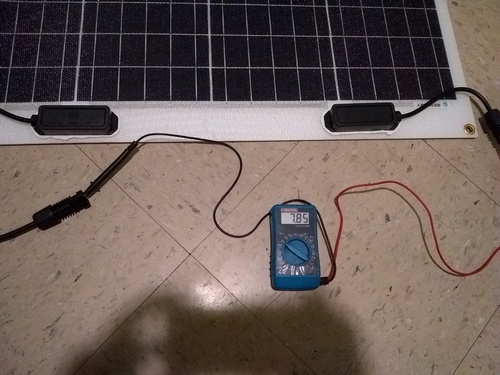
To test the flexible solar panel I first cut a pair of cables to run from the charge controller to a battery, them connected the MC4 cables to the solar input leads...
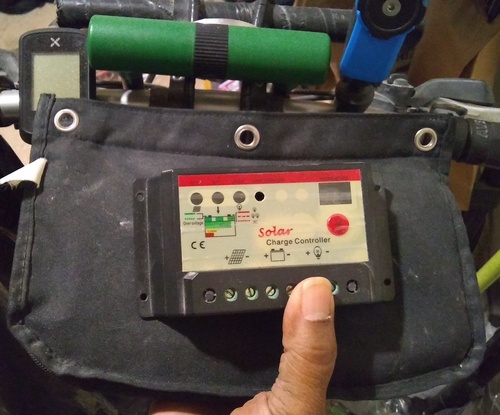
After connecting the battery, the controller turned on, then I connected the MC4 cables to the solar panel that had a bright LED light shining on it. This is the indoors ghetto method of testing a panel...
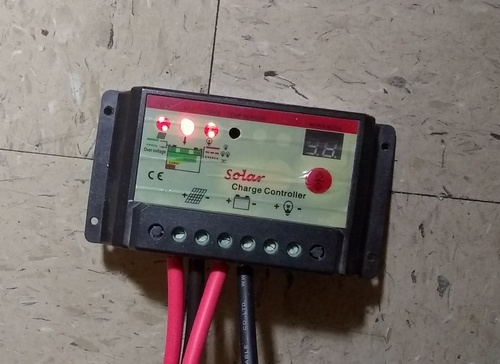
The charge controller is registering the battery status from the center indicator. The left indicator is blinking, registering input from the solar panel. The right indicator is showing an active tap for a small load if needed...
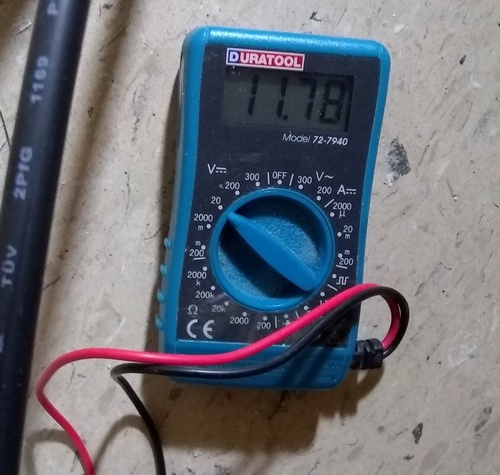
A multimeter reading the test battery shows that it's very dead, but is being charged, demonstrating that the flexible solar panel is working fine. Now I can start building the frame...
The next baby step turned out to be tweaking the design, because the flexible solar panel really only flexes on the 26 inch long side of the rectangle while I designed the frame to break on the 20 inch side. I added an extra crossbar with two more tee fittings, and three more compression couplings, so the front and back frame sections can sit on the left and right sides of the carry case...
The updated frame design that will guarantee a precise fit for mounting the solar panel. The extra compression couplings look like overkill, but I want a secure structure...
Before I started cutting the pvc pipe I ordered a few more pieces of Tourpacking gear...
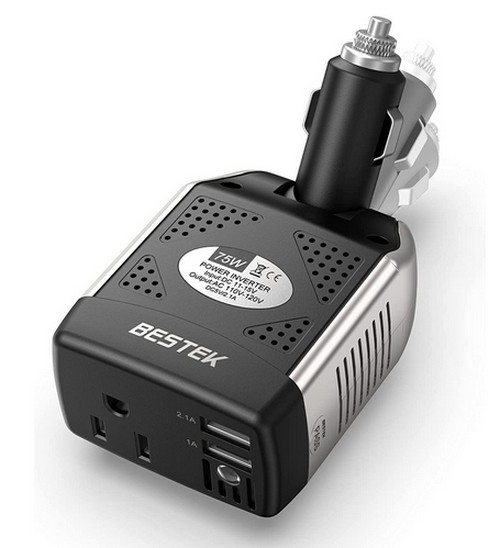
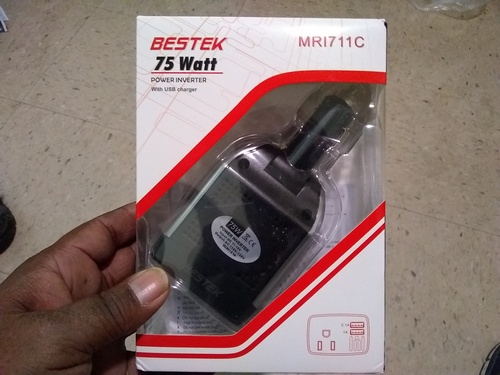
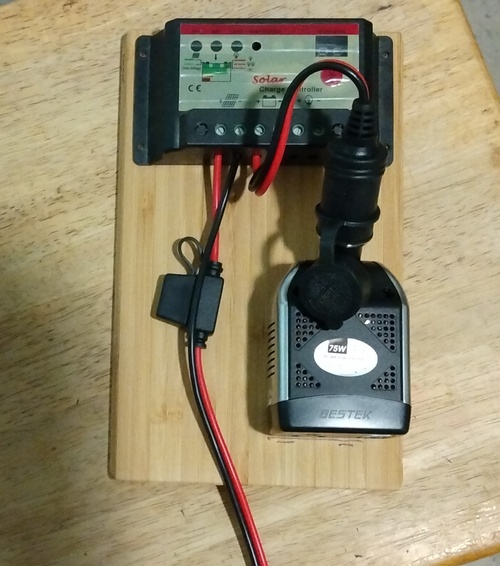
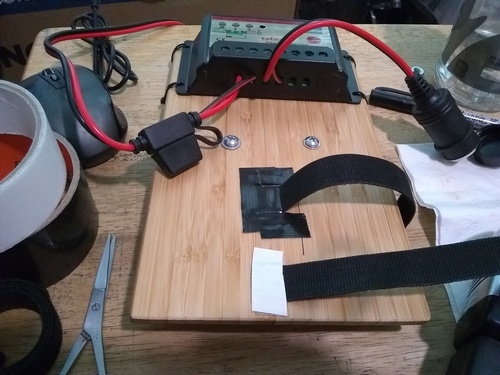
BESTEK 75W Power Inverter DC 12V to 110V AC...
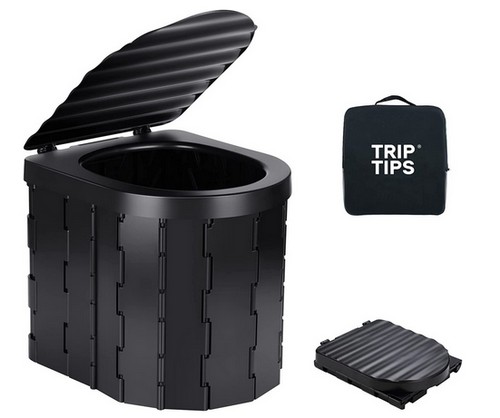
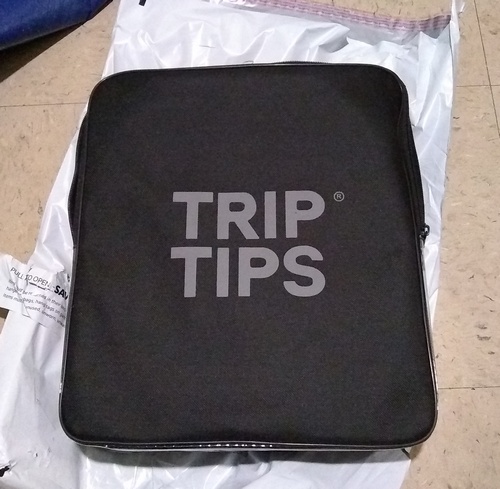
TRIPTIPS Portable Toilet for Camping...
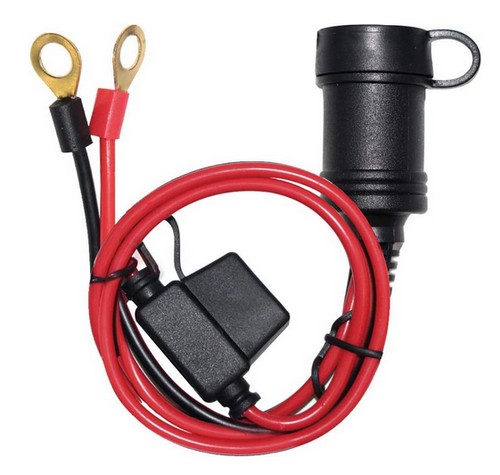
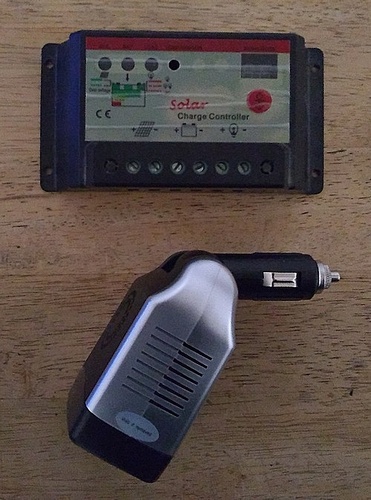
SPARKING 3FT Car Female Cigarette Lighter Plug Socket with 10A fuse. This part and the power inverter completes the mobile power system...
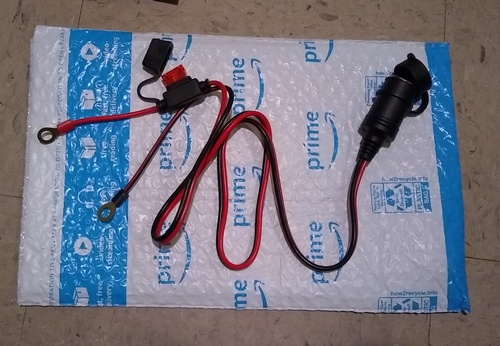
After I marked up the pipe ends for insertion into the fittings, the female DC socket arrived to wrap up the shop for the day. I should have kept picture 'F' in mind as a reference while cutting...
The next day my portable toilet arrived...
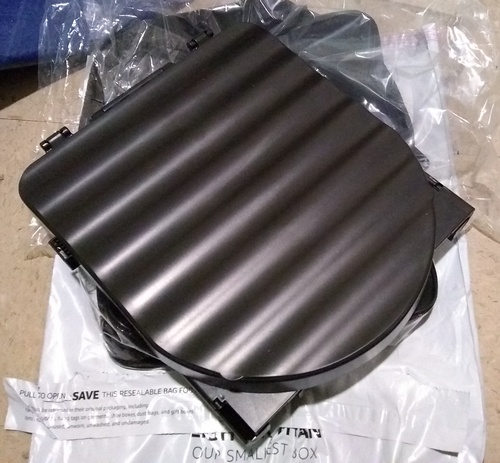
It looked fine after unboxing, felt kinda flimsy...
The sides unfold and the base comes down, nothing to clip into place...
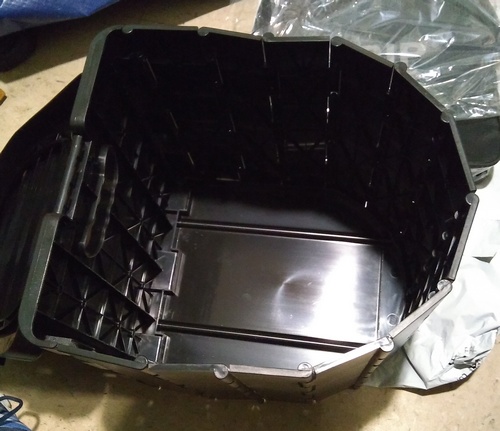
The seat makes the body firm up a bit...

With the lid down, it feels a lot more like a solid stool that's safe to sit on. Ok, a good Tourpacking seat...
A minor snag - the toilet itself just barely fits into the seat bag. To accomodate it's case, the mini butane stove, portage bag and solar power box, I'd have to make a bigger seat bag. In it's case, the toilet does fit in one of the pannier saddle bags with a little space remaining. A snag...
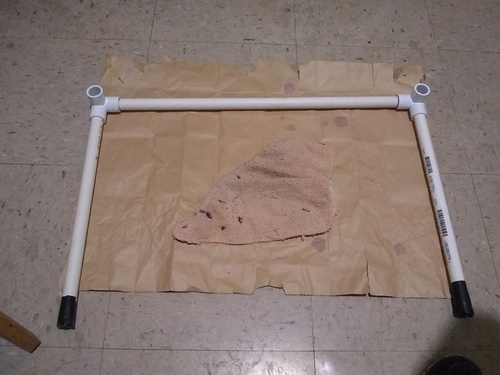
Anyway, I went through the whole process of setting up another mini Dexter room under a drop cloth, chamfering, sanding, priming and cementing the parts into sections and screwing the whole frame together, and it came out too big. I made the support pipes from the corner fittings to the tees too long and the center pipes too short. The four crossbars could be trimmed but not the center pipes. I did get the priming and cementing routine down, but the frame was a failed alpha version - major snag...
The power inverter came in the next morning while I considered the solar frame adjustment...
The next day I had two visits to the dentist, but in between I went back to the home improvement store for another 10-foot 3/4 inch pvc pipe, two more 90° fittings and two more tees, thinking I could salvage half, but that was a bust. I had to restart from scratch to design and build a beta frame, so back to the store for more fittings...
The next day, after the second round of cutting pipe with the hand tool, I got the same non-squared ends as before. I tried to use a metal file to chamfer the pipe ends, but it took too damn long, so I made another cloud of pvc dust under another Dexter-styled drop cloth with the dremel and router bit, then marked up the insertion points...
The sections dry fit, ready for primer and cement...
The cemented sections left to cure until the next day...
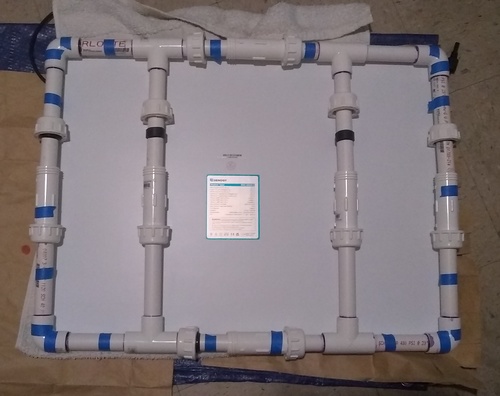
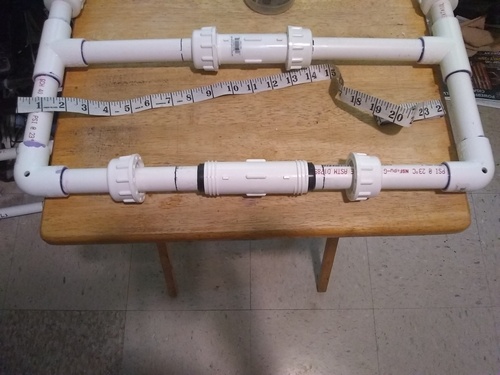
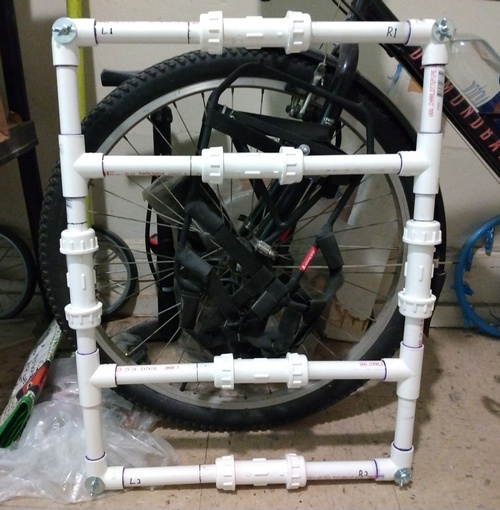
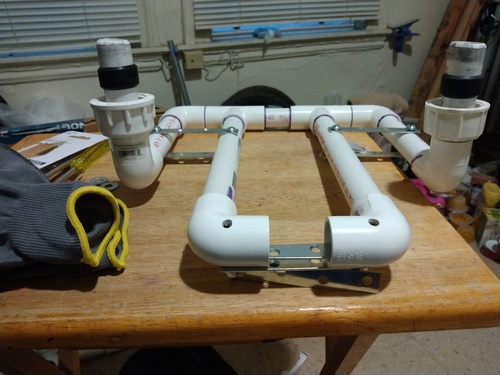
I took a rough measurement of the beta version frame and it came to about 25 x 18.5 inches - Nice...
The finished beta version solar frame looks great...
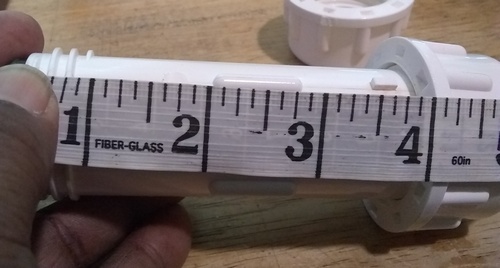
The next step is using the compression couplings to calibrate the frame to find the drill points for the solar panel mounting holes. To do that, I measured the halfway point for a coupling from a seated O-ring. It's a hair over 2-3/8, but I'm rounding up to 2-1/2 inches...
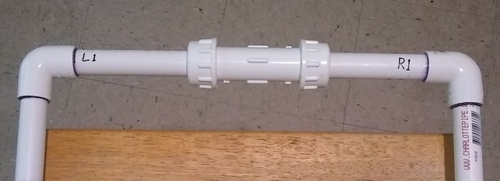
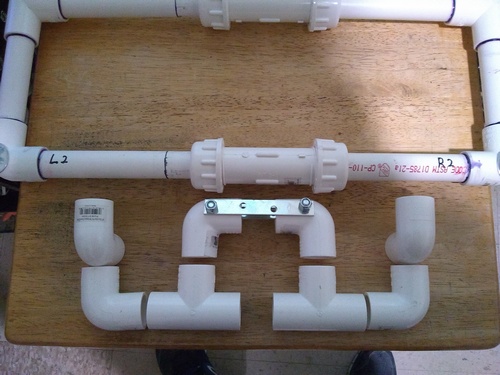
Orienting the frame. The top and bottom sections are L1-R1 and L2-R2; The sides are L1-L2 and R1-R2...
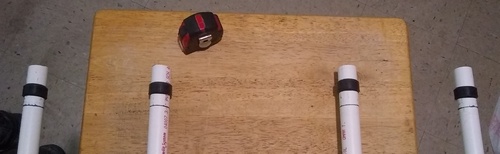
The crossbar baselines for L1-L2 have been set, the O-rings in place and the couplings screwed down...

The top section center pipe baselines have been set, the O-rings and couplings secured...

The panel is placed over the frame sections...

Trying to get the corners more or less matched...
Using painter's tape to avoid sticky residue...
Closeup...
More tape to hold things in place..
With a bath towel as cushion, I flipped it over to make another set of reference marks...

I flipped it back over and finally made drill marks...
Because these reference marks on the crossbars and center pipes are so close to the ends, I can now shift the baselines to compensate and balance out the gap inside the couplings...
The next day I spent forcing some charge into the old portable drill batteries, and only needed one battery to step up from 1/16 to 1/4 inch holes...
I shifted the baselines, then recalibrated the O-rings until the hole to hole measurements hit 26 x 19-1/8...
With the calibrations done, time for the final adjustment...
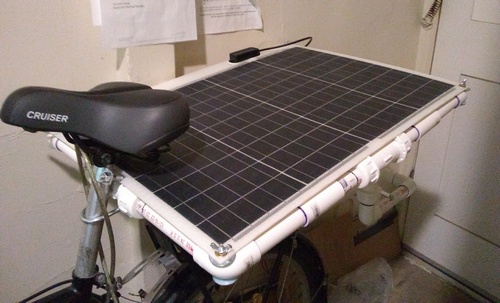
The solar panel was mounted with very minor tweaking on one corner, very minor flexing over the couplings. Nice...
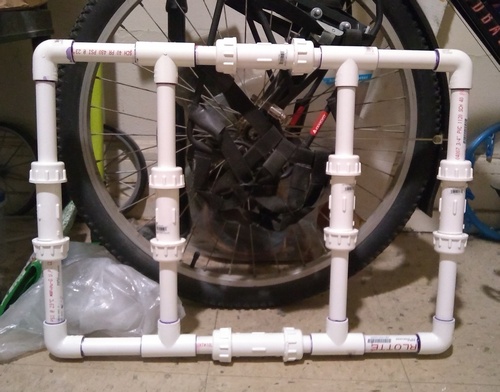
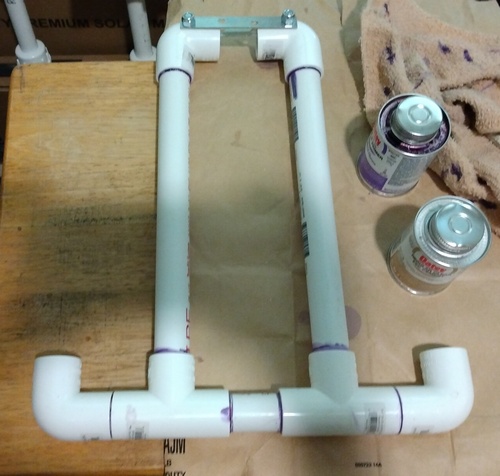
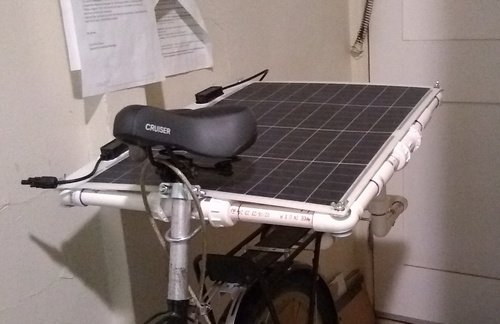
The finished solar frame is now ready for the next project - designing and installing the rear rack base mount...
(06/02/23)
Ok the Itinerary returns. This time out I'm concerned with the fact that the Pacific Coast Bike Trail is for the most part on Hwy. 1. Many parts have little to no paved shoulder to ride on, and I keep imagining some asshole trying to run me off the road when I'm riding South and there's nothing to my right but a skimpy guardrail and a steep drop to waves crashing on a rocky scrap of beach below.
There's another route that's largely off the highway and might be a better alternative, the California Coastal Trail. It's about 70% completed, but not a continuous bike route, more a series of walking, cycling and wheelchair-accessible paths closer to the ocean and beaches than the highway, along with a few local streets with bike lanes. One big section runs through the city, from the Golden Gate Bridge and the Presidio down through the Great Hwy along Ocean Beach. There's also a map that marks out which parts are bike-friendly, though most of the trail is multi-use.
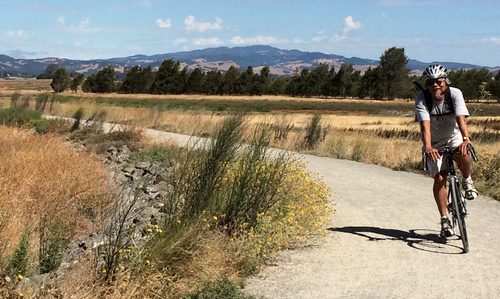
Image from the California Coastal Trail website. The site also has an interactive map and links to a number of short videos on the Trail from KCET...
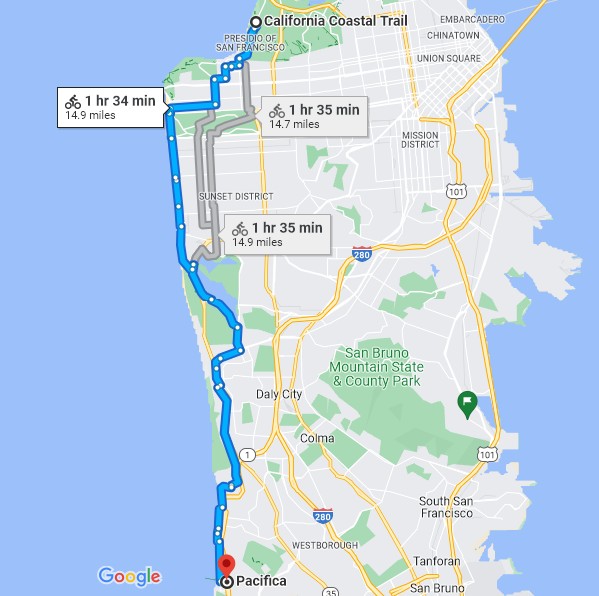
Google Map's bike paths from The Presidio to Pacifica where they intersect with the California Coastal Trail. I saved this path for navigating...
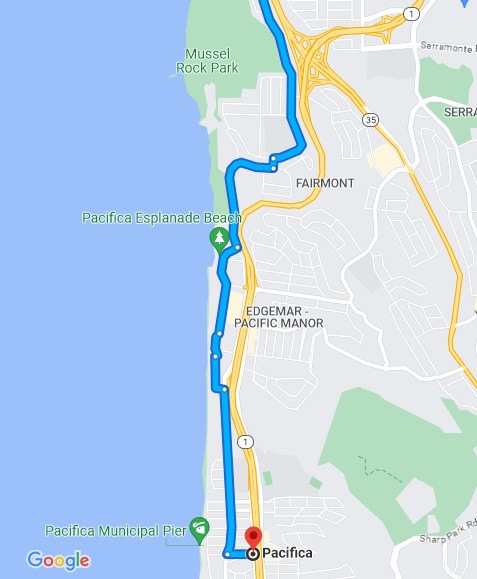
Detail of the bike path near Pacifica that's mostly the CCT, off Highway 1...
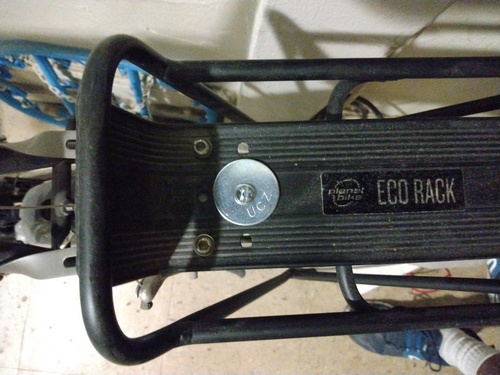
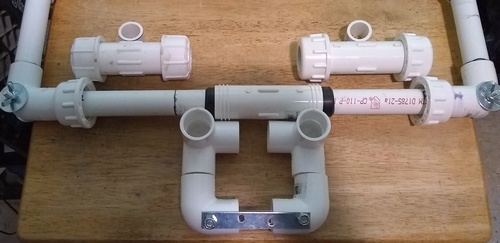
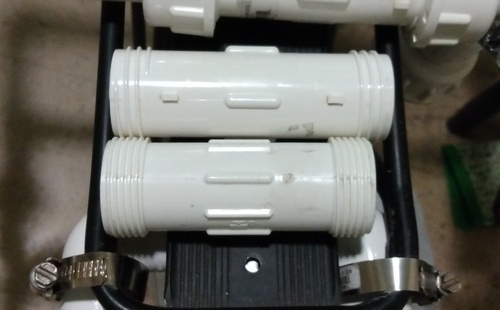
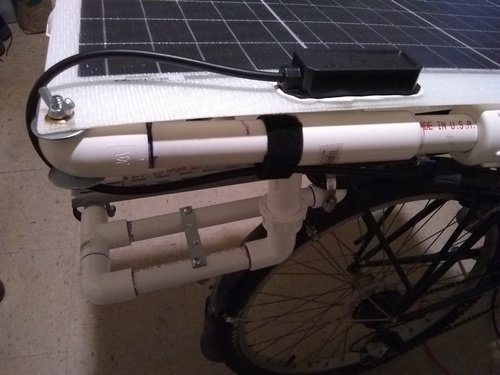
=============================================Meanwhile in the bike shop, I tackled the solar frame's rear rack base mount...

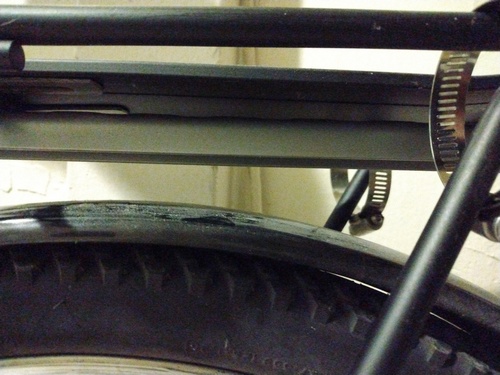
Picking up from episode 44, the design for the base starts with its front end - 90° fittings hose clamped underneath the rack's back end...
A rough measurement of the gap is around 1-1/8 inches, but I'm gonna round up to 1-1/4 to accomodate the shelf standard that will run through here...
I thought of using a connecting pipe, but didn't want to have to cut a divot out of the middle...
To cut down on the mess from using the dremel, I made a mini dust box out of two big ziploc bags. It wouldn't eliminate all the pvc dust, but it should be fine for the few remaining small jobs...
The other part of the base - the 28 inch steel shelf standard - is dry fit bolted to the front of the rack...
It runs underneath the rack about an inch deep...
A pair of 4 inch mending braces will hold the standard in place just before the pvc base front end. To keep the braces from bending, a pair of 1 inch spacers should do...
The mending braces came in a 4-pack, so I ditched the connecting pipe. This way the corner fittings won't interact at all with the shelf standard...

Once the solar frame was finished, I ordered an ACA safety triangle, which arrived a couple days later. The strap is long enough to tie it to the back end of the solar frame...
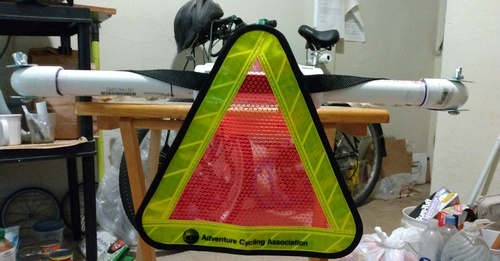
Once the belt is clipped together, a couple rubber bands could keep it in place...
Using a scrap piece to space the fittings at 1-1/4 inches, drill holes are marked. 3/4 inch long 1/4 inch bolts capped with lock nuts should do...
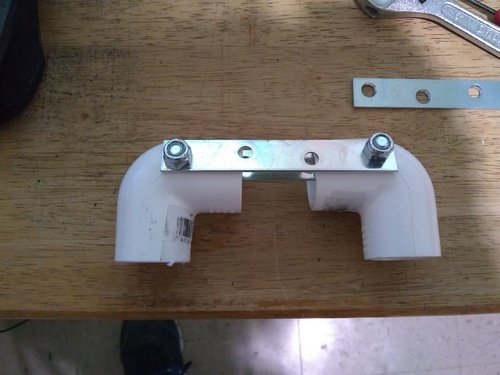
The front end of the base with braces bolted down...
The front end dry fit in place with the shelf standard running through the gap. The pvc and the steel separately bears the light load of the frame...
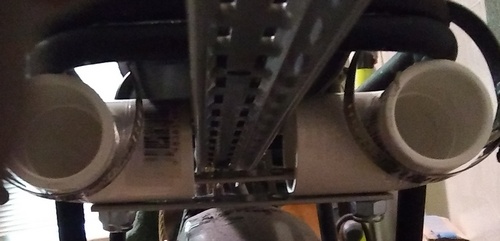
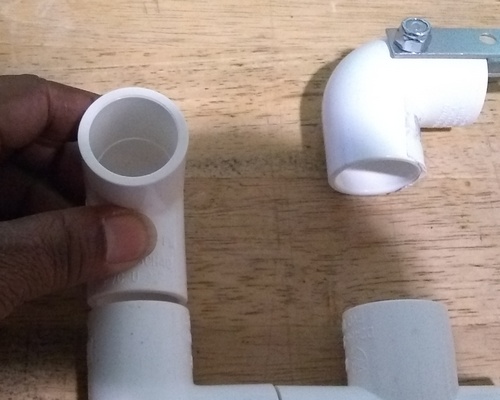
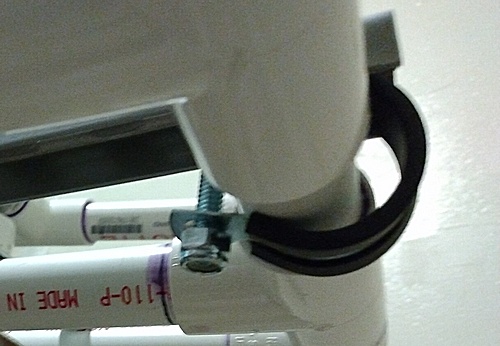
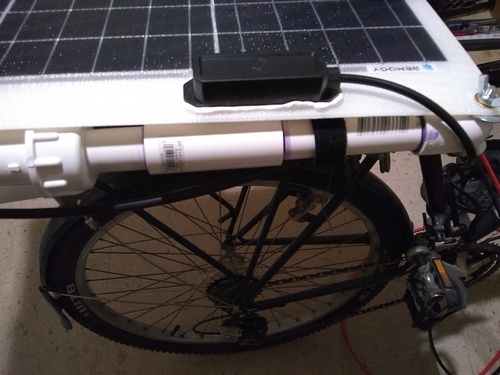
The next step is installing the 90° pipe-to-pipe clamp to the seat post with the top crossbar coupling...
The frame is then attached...

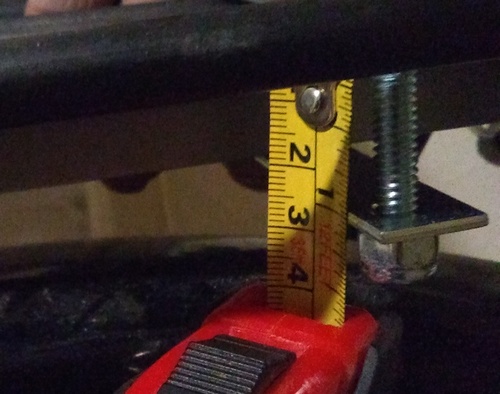
After lining up the frame and the standard three times, I got an approximate marking from underneath the rear coupling to the standard. The vertical gap is much closer to 6 inches...
The approximate measurement for the base support pipes is 9-1/2 inches from the edge of the corner fittings to the edge of the three-way fittings, making the actual length 11-3/8 inches (the three-way internal depth is 7/8 inches), but I'm rounding up to 11-1/2...
The Sunday after Mother's Day, I went back to the home improvement store for 1 inch cable clamps that ended up being too small. While there, I picked up a pair of 1 inch steel spacers for the shelf standard braces...
The fixed base front end lined up with the back end's three-way fittings. The 1-1/8 inch span of the connecting pipe is where a cable clamp is intended to be bolted to the shelf standard...
The back end clamps will sit on top of the uprights...
The alignment of the mounted clamps won't accomodate a central coupling at all, so I thought it would have to go...
This pic taken for episode 44 shows the back end crossbar design I previously discarded in favor of having just one compression coupling, but it still wouldn't fix the problem...
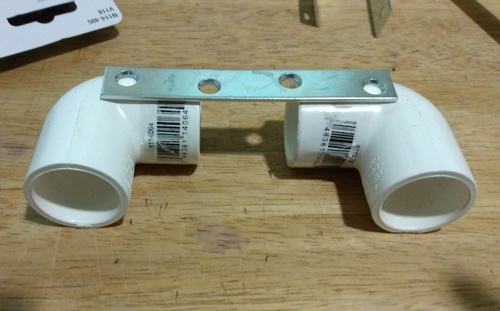
Even if the back half of the frame was rebuilt, no amount of fudging would accomodate two compression couplings and the back end clamps, so that design is once again discarded. The only solution that will work with the current back end crossbar is to spread out the uprights, so...
The final design replaces the three ways with tees, a 3-1/4 inch connecting pipe in between, with 2 inch connecting pipes to the 90° lateral corner fittings, and two unknown length connecting pipes to the upright corner fittings...
The uprights will now support the frame with a much wider stance, and I can even bolster the upright fittings with additional mending braces tying them to the base support pipes..
Whether the base support pipes (the gap on the right) need an adjustment so a cable clamp can bolt the base end to the shelf standard, the short piece of pipe connecting the lateral corner fittings to the uprights (the gap on the left) will line them up to the frame's back end crossbar...
The base pieces chamfered, primed and cemented...
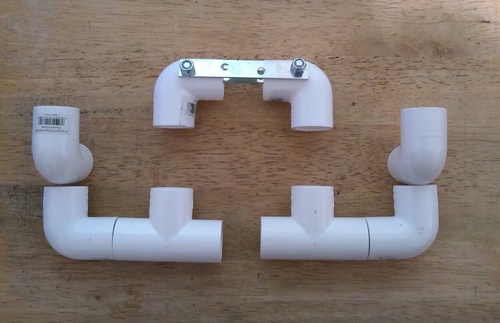
The base upright section...
The uprights with the final compression couplings. After the base cures for a day or so, the entire mobile solar rig can be mock installed to get the measurement for the final connecting pipes...
I reinstalled the frame and base, lined up the uprights, and crap. The frame and base back ends don't line up by 'that much,' not even enough to replace the lateral corners... I'm not rebuilding the base unit, so...
I moved the uprights to the next crossbar up and took another three measurements to mark the span between fittings...
It came to 5-1/8 inches, 7-1/8 including the insertion ends...
After my final session under the drop cloth, I prepped for fixing the uprights. Using leftover plastic from my Tesla Coil project, I'll hold the final pvc sections vertical...
The first section fixed at 90°. I couldn't get the base to sit properly flat with the front end braces at an angle, so I decided to flip it and reinstall the brace when the other two were done...
The other section done, with the flipped braces visible...
The finished base with vertical uprights and all braces installed. This over-designed Beta version may ultimately end up being more stable than having the uprights on the back crossbar, but this project is over budget and needs to be done...
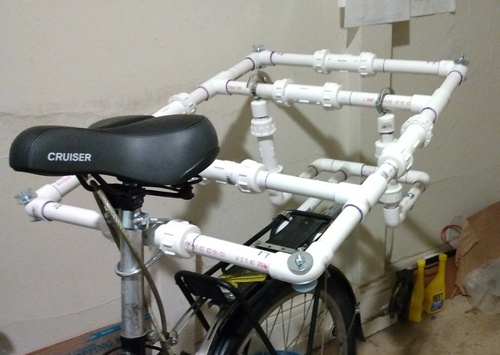
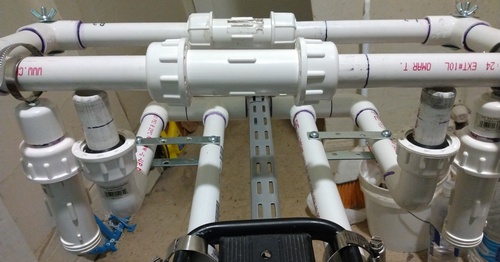
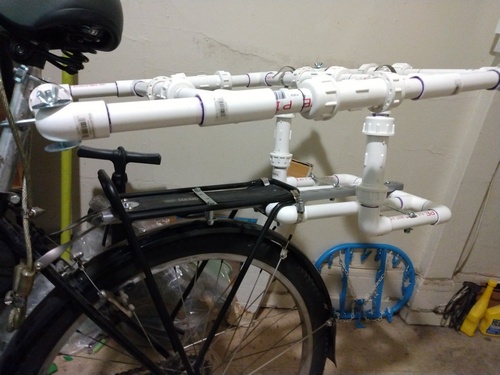
The mobile solar rig installed in mockup form, just to get a good look at it...
It has yet to be fine tuned to iron out the remaining kinks, or adjusted to the solar panel, but it feels solid...
The remaining kinks starts with swapping out the older coupling that came from a different store so the uprights match...
Moving the base end under the shelf standard, moving the standard front end to the first mount hole on the rack, and making the 1 inch cable clamp work regardless helps level the frame a bit more...
There's still too much excess pipe on the lower part of the upright, so I snipped off the useless insertion inch...
Now the frame is balanced with a barely noticeable tilt. The vertical space above the rack is 6 inches; at the back it's about 8...
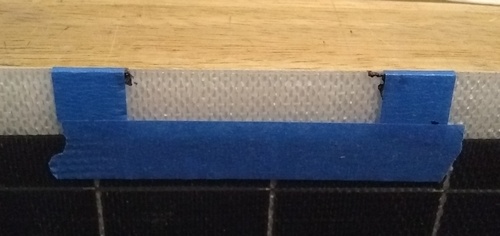
The final kink is the pipe to pipe clamp and the seat post blocking the solar panel from being installed by at least 1/4 inch. I'll have to cut a notch out of the solar panel border about half an inch...
Using a pin contour gauge, I determined that a notch half an inch deep and 2-1/4 inches long would work...
I lined up the solar panel and marked a span of 2-1/2 inches - better...
A pre-cut multimeter check of the solar panel...
Taping off the cut section...
Post-cut the laminate doesn't show any peeling or fraying...
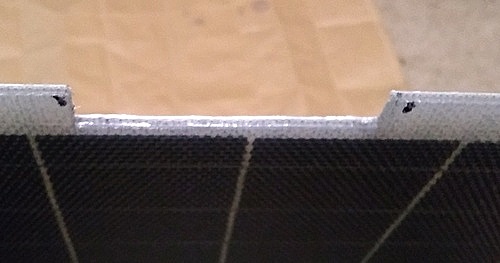
I might put tape on the sides...
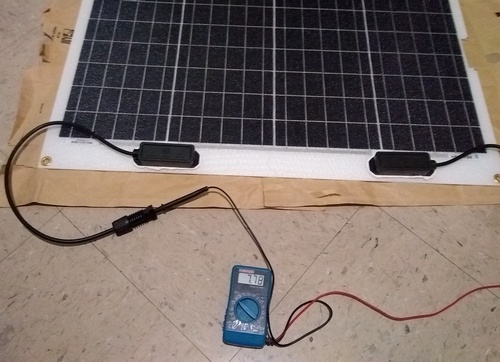
The post-cut multimeter check of the solar panel...
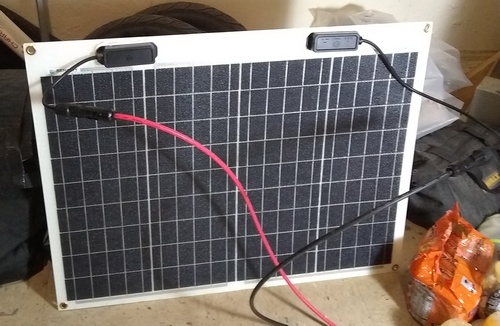
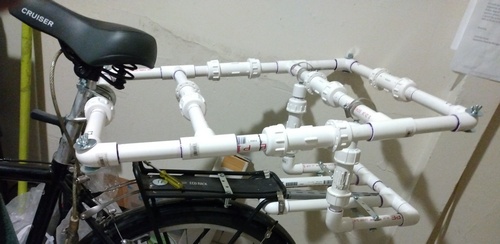
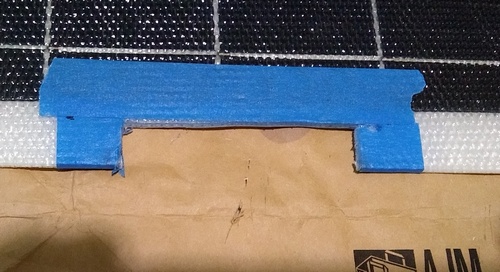
The solar panel was installed with minimal adjustment of the frame...
For now the mobile solar rig is done as a project, but I'll do a shakedown ride of the frame before I stash it with the rest of the Tourpacking gear...
(06/02/23)
Ok, in the Itinerary I took up planning tools to help keep the details of trips organized, a different function than reminiscing in the Log afterward.
Some itinerary templates and digital planners are available, but I decided to customize my own spreadsheet template. I'm starting with Scouting day rides to work out what details are important; when I update the template to Tourpacking mode, extra headings like lodging (stealth camp or hike & bike) and ongoing budget tracking can be added...
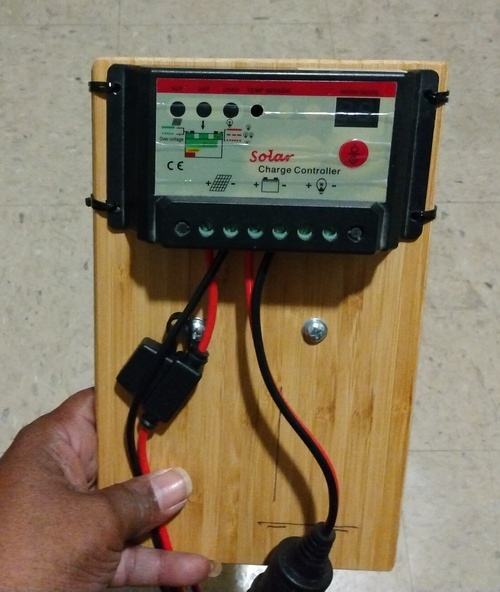
=============================================Meanwhile in the shop, the mobile solar project moves on to laying out the power system in Tourpacking mode...
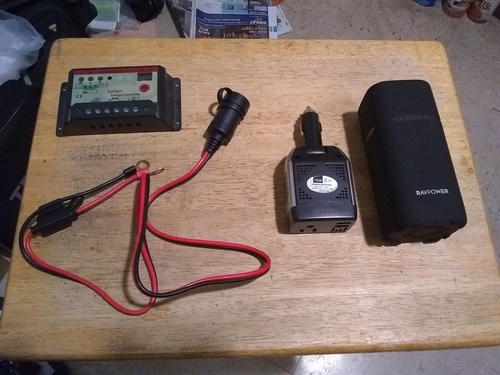
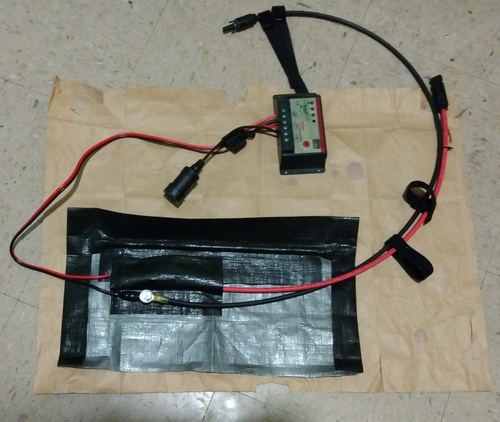
The components of the Tourpacking power system minus the solar panel and all the wiring...
The first idea of hanging the controller and power inverter off the frame was impractical and begging for Murphy's Law...
Using a binder pencil pouch as a control panel and hanging it off the somewhat crowded handlebars was also considered...
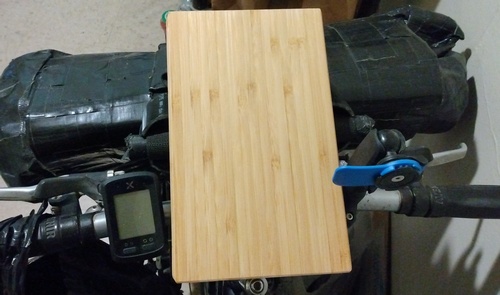
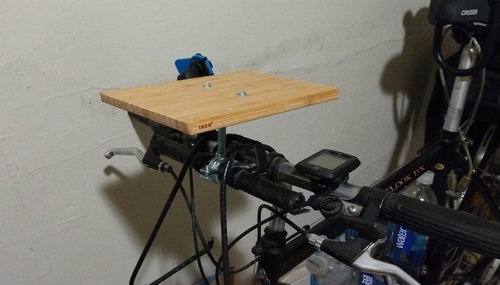
The best idea so far is a 6" x 9" cutting board clamped to the handlebar extender like a map holder, with the power inverter zip tied on end or laying flat on wood shims for ventilation. I really like this one...
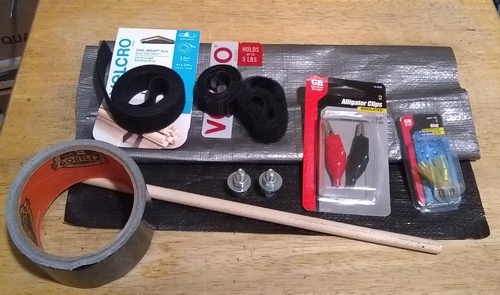
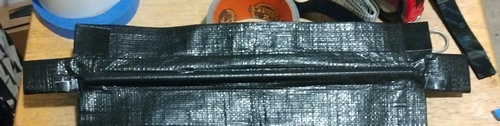
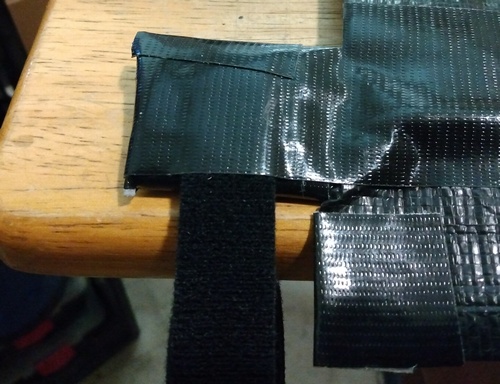
Items for the half frame tarp bag, which is essentially a conduit for the wiring - one piece velcro for strips; two piece velcro for the closure; galvanized nuts and bolts for the busbars; insulated alligator clips; ring terminals; 12" dowel rod to prevent sagging; tarp for the bag body...
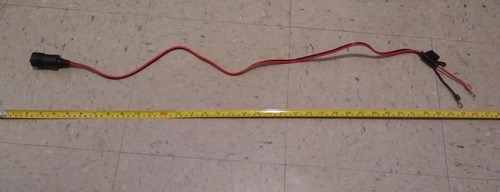
Instead of ordering a few feet of wire for the project, there's already 3 ft. of 16 gauge DC socket cable - 30" to connect the solar cable to the controller, including the inline fuse; 6" to connect the socket to the power inverter...
Starting the circuit path from the negative solar cable strapped to the frame...
The negative cable needed another separate frame strap...
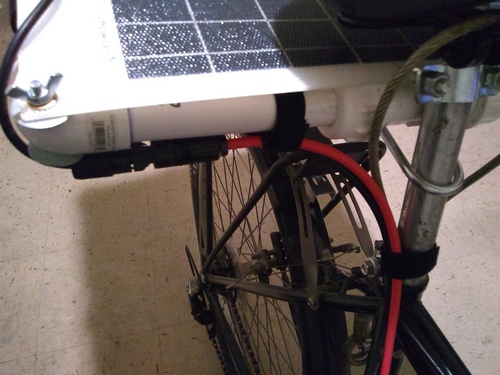
A third frame strap binds both cables, and one for the seat post, leaving room for the seat bag...

Now the solar cable can be trimmed to fit the top tube bag/conduit...
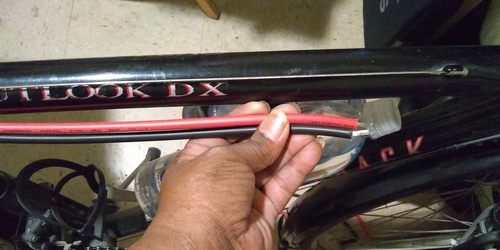
The cables cut and stripped for the ring terminals and busbars...

The solar panel to control panel wiring path - the solar cables with ring terminals installed; the controller cables clipped to the busbars connected to the solar input terminals; the DC cables running from the controller output terminals, with the power inverter plugged into the socket...
Ok, the frame bag/conduit began with cutting a piece of tarp roughly 18" x 15", then reducing the width to 16" and estimating the placement of the dowel rod spine. Calling it the frame bag/conduit is kinda clunky; better to call it the wiring harness. ...
A strip of carpet tape to hold it in place...
Another strip to lock it down, and a third to form the top section...
Next, I added a tarp flap for the positive solar cable insulator..
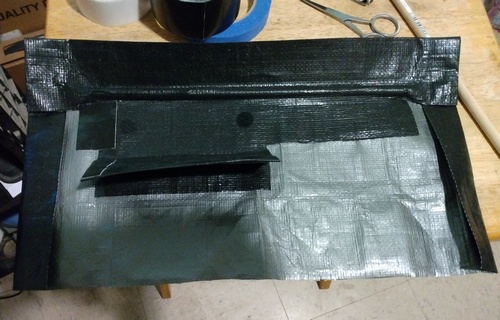
I trimmed the flap, formed and taped it down, and added a couple velcro dots...
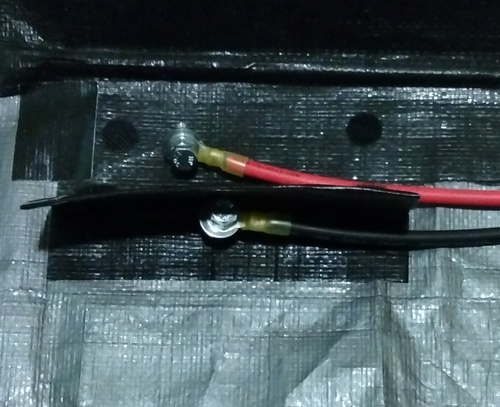
Before placing the dots, I made sure there was enough room for the cable and busbar...
I checked the insulator flap with the cable connectors in place...
Next I added and reinforced the velcro strap for the three cables, trimmed the body and sealed a few edges...
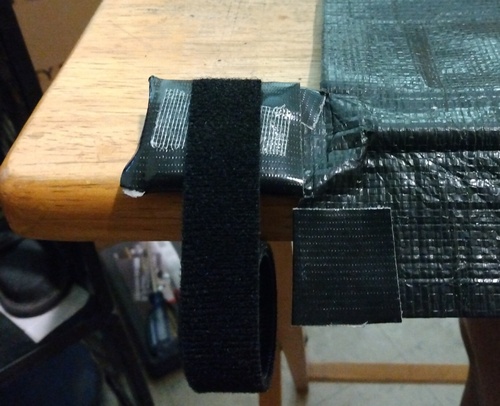
After checking the end tabs on the top tube, I reinforced them with Gorilla tape...
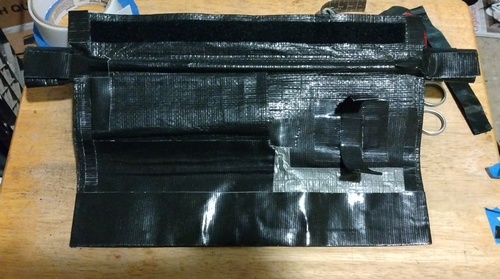
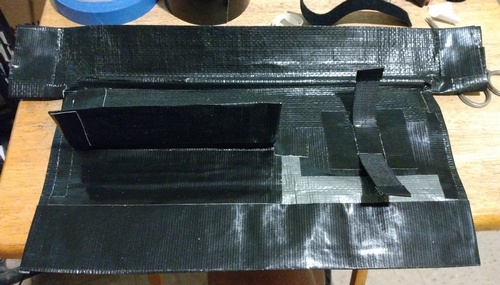
This is the finished wiring harness, minus the end tab velcro straps...
I'll wrap a bit more Gorilla tape on the end tabs to further reinforce them, then add about 12" of velcro strap to each...
The next day I picked up more one piece velcro and anchored the 12" strap to the end tabs with carpet tape...
A long piece of Gorilla tape further reinforced the spine and end tabs while securing the end straps...
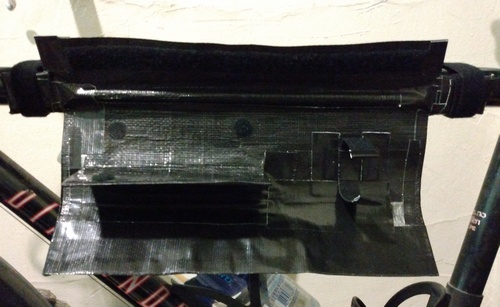
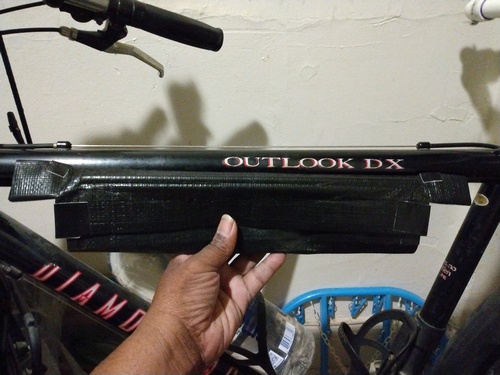
The wiring harness, open and tied to the top tube...
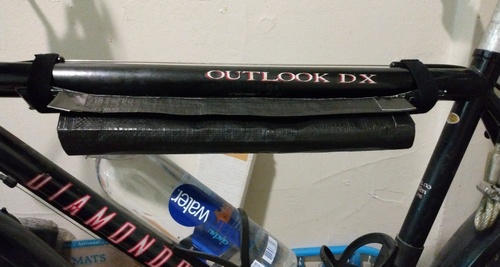
This part of the rig is complete, and can even be maneuvered between the 1 liter bottle and the top tube if needed...
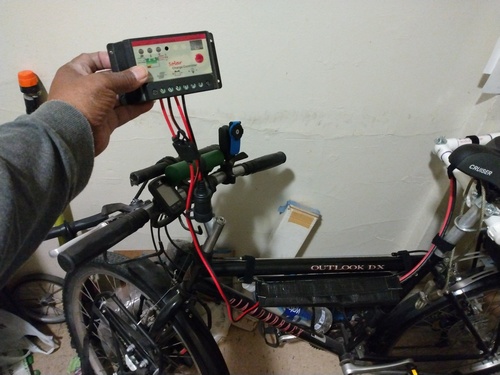
I strapped the wiring to the frame and ran it through the harness to check the length of the controller cable, and as expected, there's more than enough to trim once I collect the parts and install the control panel...
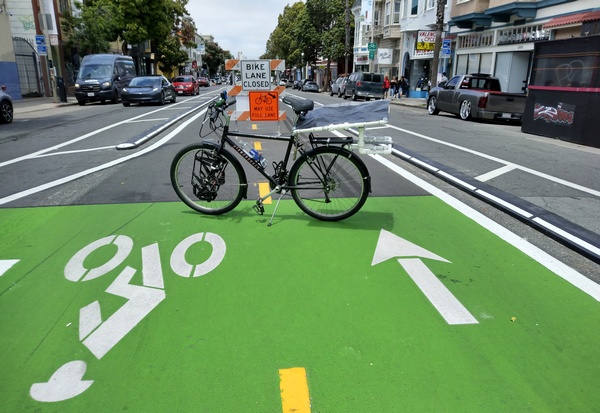
During the quick shakedown ride to test the mobile solar frame, I experienced the supremely dumb-ass center bike lane on Valencia St...
A couple days later I went to the Lowe's and picked up the 1/2" split ring pipe hanger and ceiling plate for the control panel. The pipe hanger is tight enough to not need a rubber shim to mount it onto the extended bar...
(07/11/23)
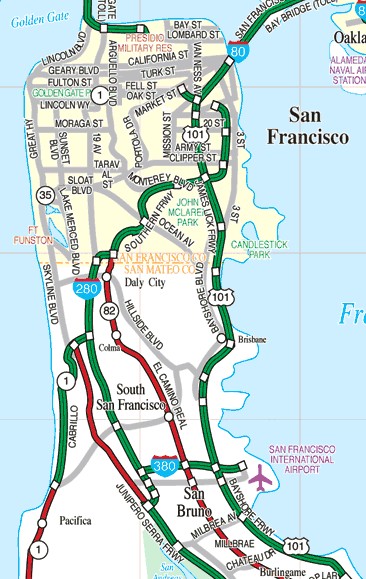
Detail from the TRIPinfo.com Bay Area Road Map...
Ok, in this Itinerary I cover one of the almost daily pre-ride routines of a bike trip - checking the weather and road conditions (if any), of the next few days and the next 30 to 50 miles ahead...
Sample from the CalTrans highway conditions webpage...
The weather I can pull from my phone, but for road conditions like repairs and detours the best resources are road maps to refer to, and the website CalTrans. It has a highway conditions webpage where you punch in the particular route (like Highway 1) and you get a quick summary of each region. My focus is on Central California, which includes the Bay Area. I took a look the day I put out the last episode, and the closest notice was in Marin County, where there was 1-way traffic due to construction about 6 miles north of Point Reyes, which is 60 miles north of the city...
=============================================Meanwhile, I got in a bit of tent practice at the park, and in the shop I'm working on the solar control panel...
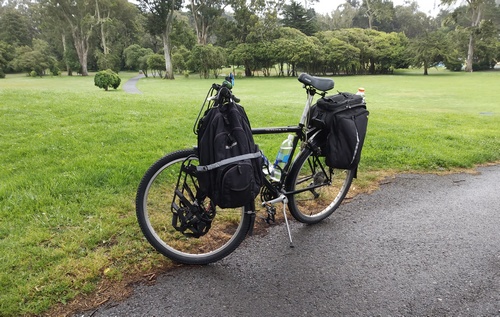
On a cloudy, misty morning I rode up to GG Park and stopped at the path behind the top of Hippy Hill to take in the view as I picked the area to the left of the 'little Janis Joplin tree' for tent practice. I'd prefer a dry sunny weekday with no special event going on...
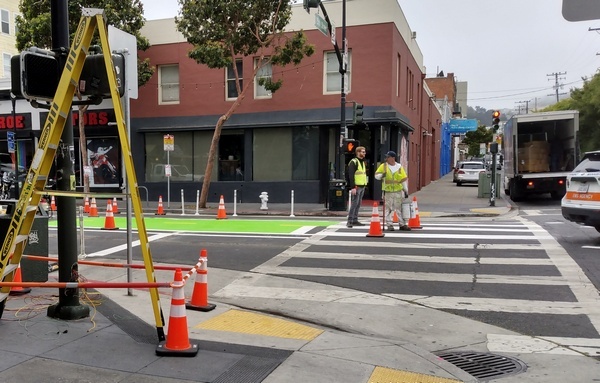
Meanwhile, the center bike lane idiocy finally arrived at my door...
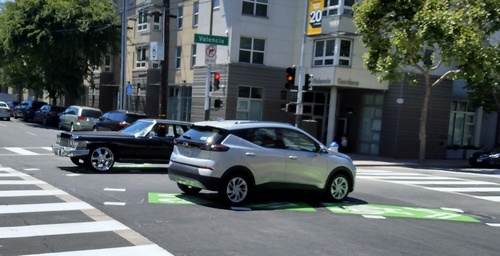
A perfect visual of the problem with a transitional bike lane that crosses active traffic...
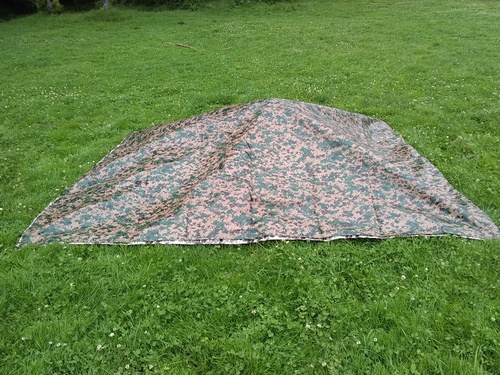
To prep for tent practice, I pulled out the tent bag to inventory the gear, then remembered that the bug bivy frame needed a tiny bit of work. The main pvc pipe with the 3-way fittings had to be chamfered, primed and cemented...
I kept the short legs in place so the fittings could be cemented level...
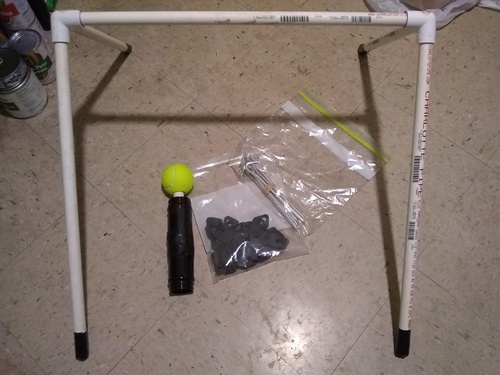
After a half hour, the fittings were solid - the bivy frame will always be even now during setup...
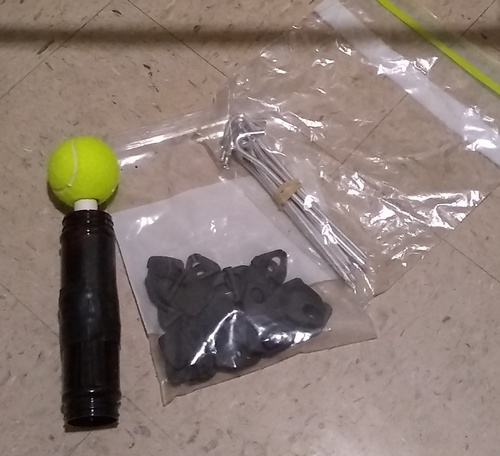
I finished the inventory for tent practice - handlebar tent 'pole', tarp clamps, and tent pegs...
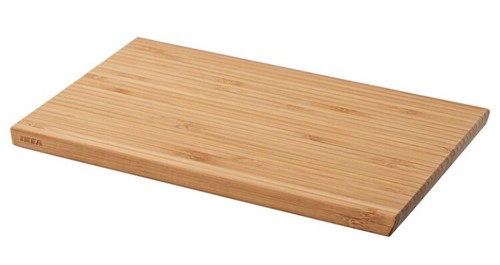
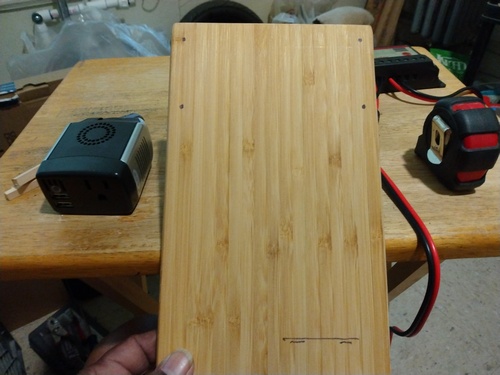
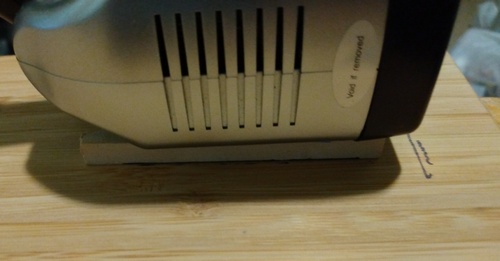
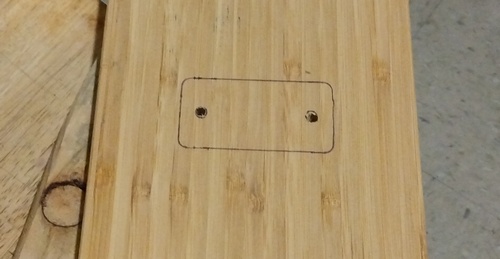
I went across the Bay to the huge Ikea store in Emeryville to get the best cutting board for my solar control panel - a 9.5 x 6 inch bamboo board...
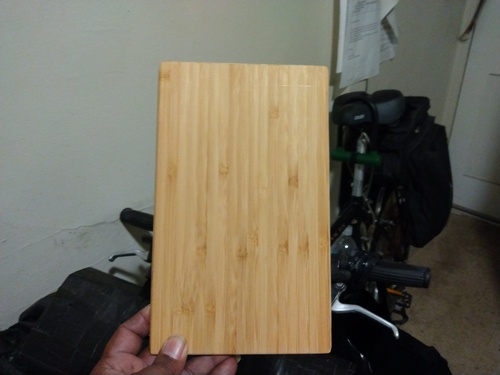
The board is plain, with no holes or weird shape, and no huge brand name stamped across the surface...
It also just fits within the dimensions of the gear mounted on the handlebars (so far). I'll get a better idea when the 3 inch threaded rod arrives...
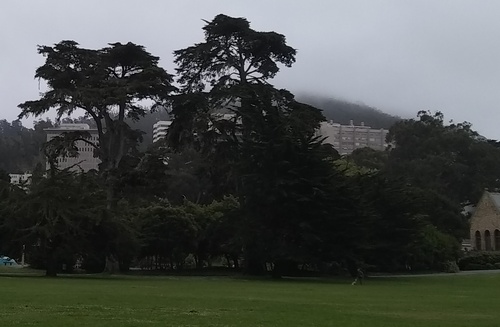
Wed. the 5th, the morning was cool and overcast, with little activity going on near Hippie Hill...
Tent practice began with checking the area for depressions, gopher (or snake) holes, no trees with heavy branches overhead, etc, before setting up...

First, lay out the ground tarp and fold the long side in half, making it 4 x 6 feet...
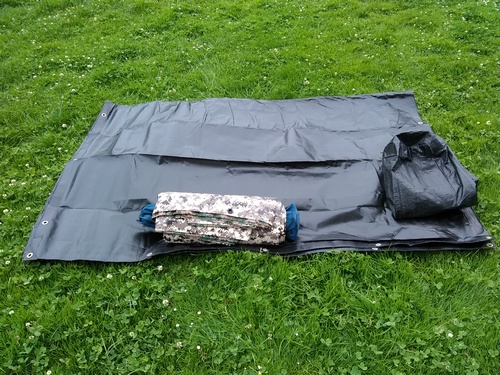
Next, open the tent bag...
Position the bike where you can pass between the handlebars and the tarp, then lay it left side down so the handlebars and seat are about 1 foot into the tarp...

Front view...
Place the 'tent pole' on the handlebar...

Since this is the first time setting up, I pegged down the corners just to keep the tarp tent in place against the light breeze...
Side view. This tarp tent is definitely low profile...
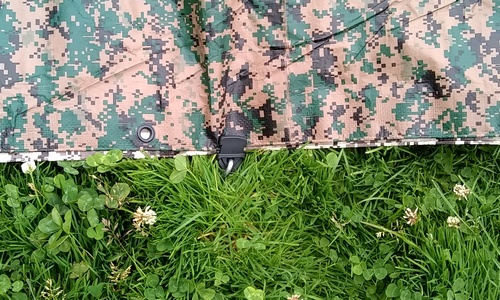
I put a tarp clamp near the middle of each side to further secure it...
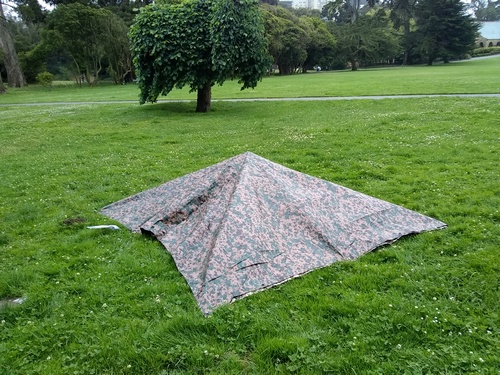
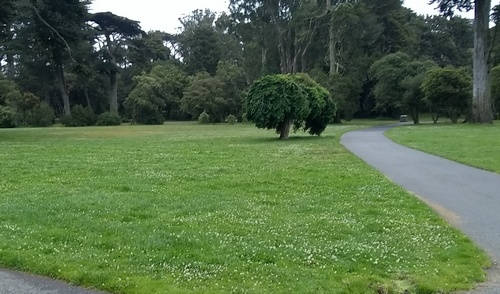
Initially staked down with the 'little Janis tree' in view...
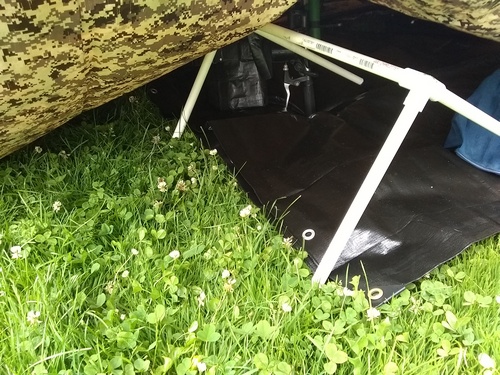
I set up the bivy frame and saw that it didn't really show when the side was pegged down again...
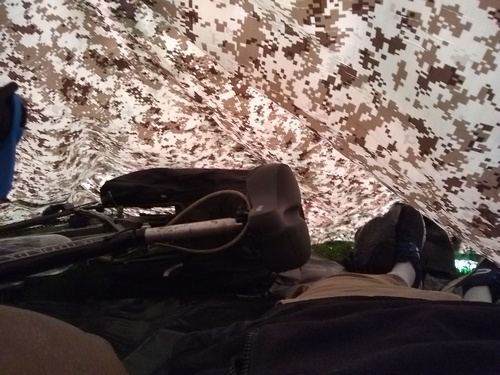
The acid test - I climbed in and stretched out. I had enough room to lie comfortably. The gentle breeze wasn't strong enough to flow under the edges, but I still got ventilation. Nice...
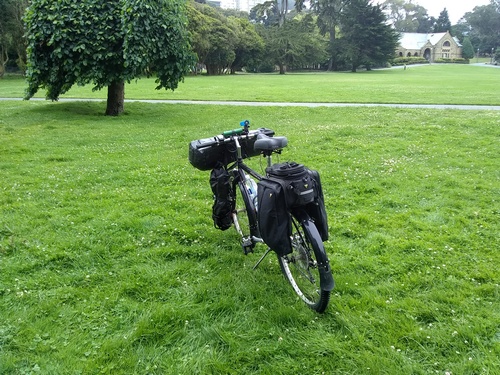
It took 15 leisurely minutes to pack everything back up, including the time spent wiping the dew off the tarps as I rolled them up. No park personnel came over to hassle me, even though a crew was working nearby. Very cool...
When I returned home, the 3 inch threaded rods had arrived, so the control panel can be worked on...
Positioning the charge controller and the power inverter for mounting...
Reference marks...
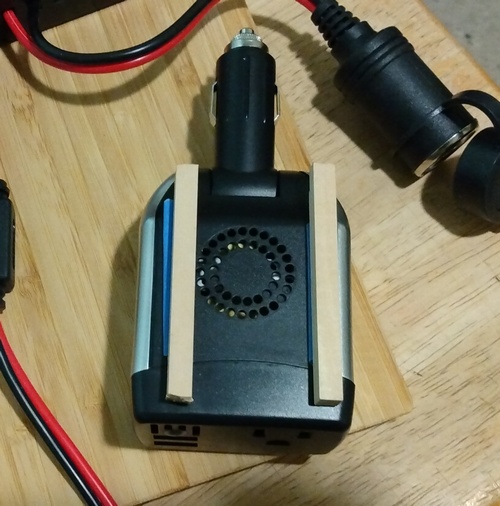
These shims will be glued to the board and the inverter, but a further tie down is still required...
A vertical reference mark to aid in mounting the inverter...
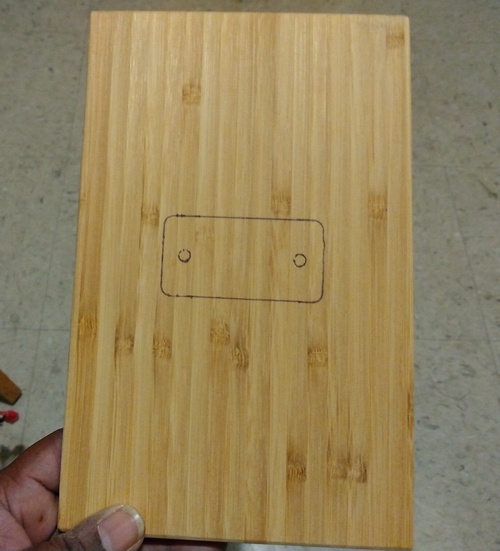
The best place to mount the bottom support plate so the bolts won't interfere with the components on top...
With the shims, the inverter is level with the AC charge plug for the power bank - good to know...
I drilled the center mounting holes and made pilot holes for mounting the charge controller, but when I tride to mount it, the brass wood screws all stripped and broke off. Crap...
The center mount will be slighly off center...
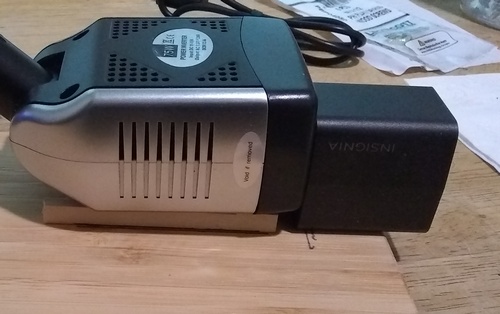
A mockup mount of the control panel...
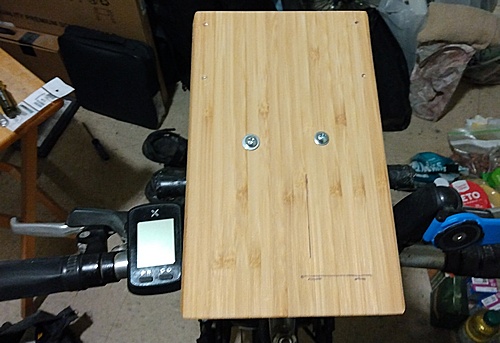
Riders view of the panel...
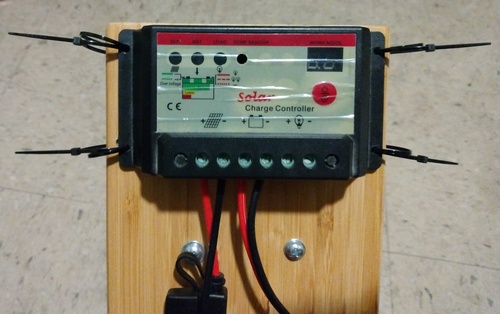
Instead of getting more wood screws, I drilled holes in the hard bamboo and mounted the controller with zip ties...
The control panel is 40% done...

The superglue worked on the inverter, but not on the hard bamboo, so I taped over the still sticky bottoms and debated whether to drill more holes for a bigger zip tie or use the velcro...
I went with velcro and used the carpet tape and gorilla tape to anchor the velcro one piece strips...
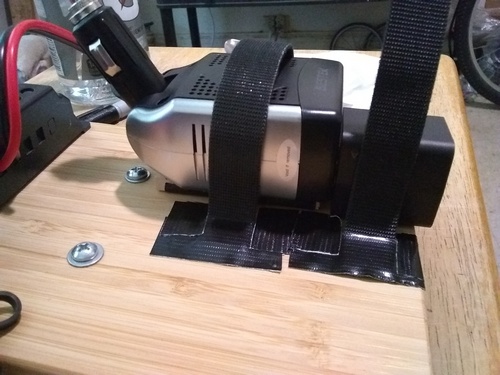
I secured the left side first...

...then the right side...
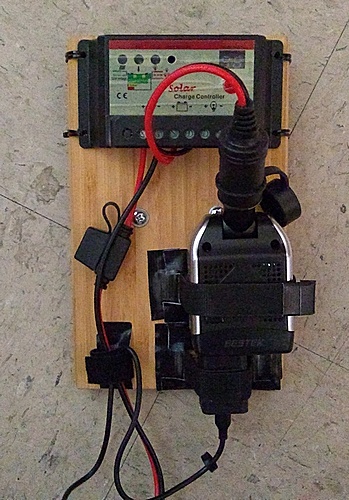
One more velcro strip added to hold the input and output power cables in place, and the solar control panel is done...
(07/21/23)
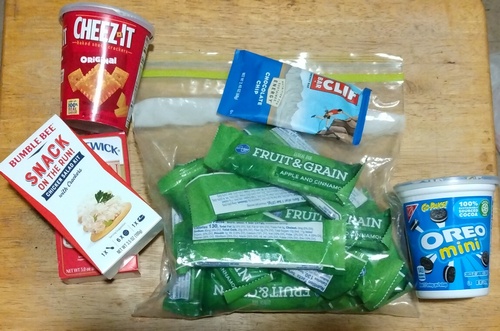
A few relatively low carb bike lunch and high carb road snack items...
Ok, in this Itinerary I go over the aftermath of my latest checkup which I forgot about last year. I had a few crazy numbers come back due to my overindulging in comfort food (in particular my recent Cherry Coke binge), so the doctor put me back on Metformin, the horse-pill size, and I went back to the semi-keto diet I used to fix my Type-II last time, which was eight years ago...
But this time I'm focused on bike touring, and I'm still in the extra innings of dental season (with a plate that doesn't fit), requiring a readjustment of what I can, and can't eat...
So, from a big list of keto-friendly items, I had to choose easier to chew foods, then select what items require the least prep and cleanup for lunch or dinner during a day ride, then make up a separate list of quick energy road snacks to eat while riding...
While doing that, I found the diet and exercise app I used before to track my progress and resigned myself to spending the rest of the year working to get my numbers down...
During a trip to the grocery store, I took note of a few bike lunch items:

One item I won't be carrying is avocados; to me the prep is kinda messy. I prefer guacamole or hummus...

Instead of salad, I prefer pico de gallo with olives and mushrooms...

Instead of sandwich bread or tortillas for lunch, 5 Ritz crackers have 10g of carbs, great for dipping in hummus or eating with pepperoni and cheese cubes. They don't stick to the teeth or dislodge the plate...
=============================================Meanwhile, I had an easier time picking a few sweet, high carb foods (mostly from my existing Tourpacking food list) suitable for road snacks that had to also be denture friendly. I already have cereal bars, Mounds mini bars, etc. listed that I've been stashing in my trunk bag, but while grocery shopping a few others came to mind...
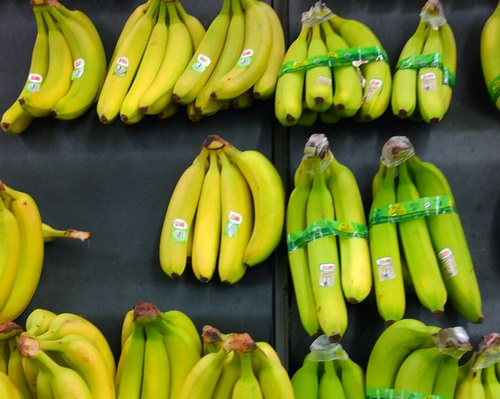
Bananas are the number one road snack on almost everybody's list for convenience, nutritional balance and quick energy. They're a little bulky, but I could easily carry 2 or 3 for a day ride...

These mini donuts are about 10g of carbs each; half a dozen in a little ziploc baggie would work. To keep the fingers clean, I guess I could use a fork...
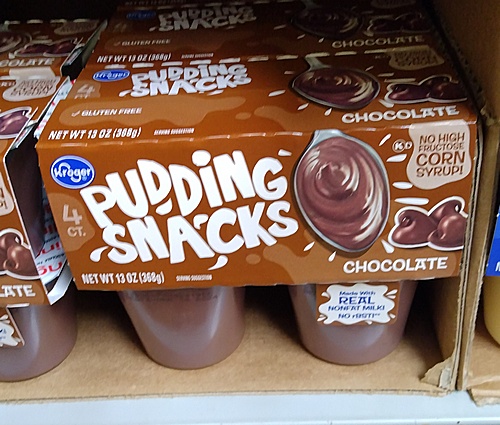
I didn't think of these until I went down the cereal aisle - a single pudding cup has 19g of carbs...
I'm not so obsessed with mileage that I need to pop a Clif bar with one hand and eat while riding; I'd rather pull off the road for a couple minutes, catch my breath and take in the view while eating. It's also important to combine carbs with either protein or fat so you don't get sugar spikes...
Anyway, this takes care of meals on the road for now, with the exception of breakfast, which is important enough to cover in another episode...
(08/07/23)
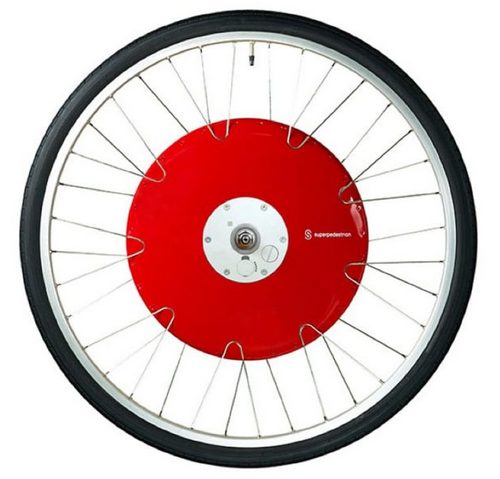
Last October I looked at all-in-one pedal assist hubmotor kits that incorporate a battery within the hub, the only type of e-bike gear I was interested in, for going up hills with a gradient of 10% or more, which includes a lot of the central Calif. coast. Aside from these things being mostly sold in Europe, there were quite a few that never made it to market or didn't last very long. I took another look to see if there any developments...
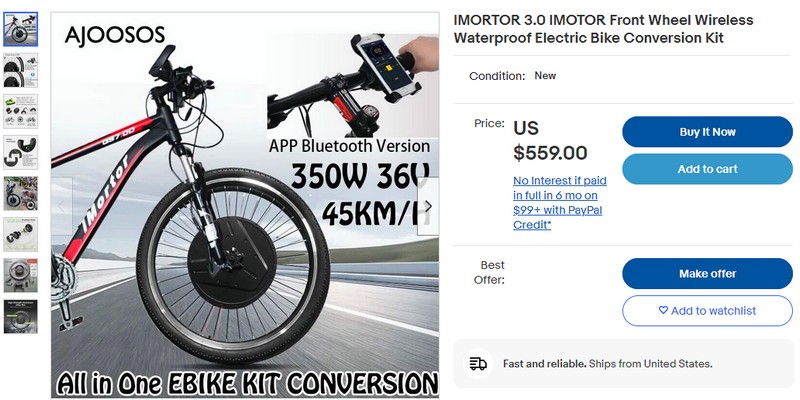
The iMortor 3.0 E-Bike Conversion Kit, one of the few all-in-one wheels I'd consider for my trailer mode setup, but only with extra batteries...
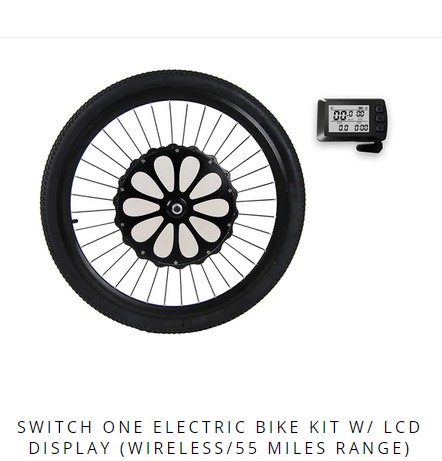
The Switch One by E-Switchy, a wireless wheel and system I'd consider for biking without the trailer, but only because I have a 50W solar panel...
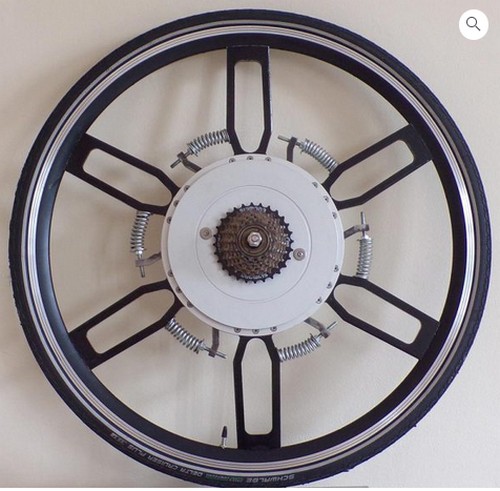
The SuperWheel, a different self-powered wheel, using a spring and drive system from a new tech startup, but it's out of stock...
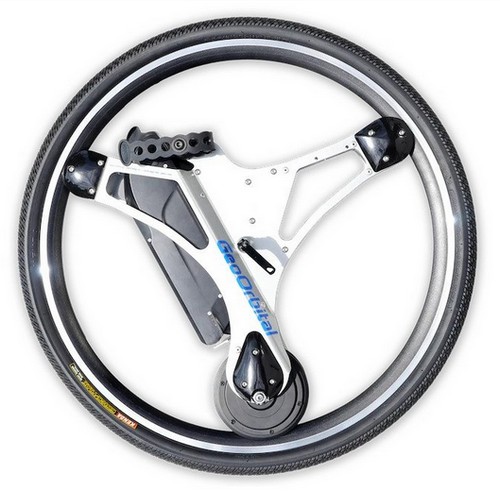
The GeoOrbital, self-powered wheel that was featured in 'Shark Tank' and got outside investment money, but is no longer available...
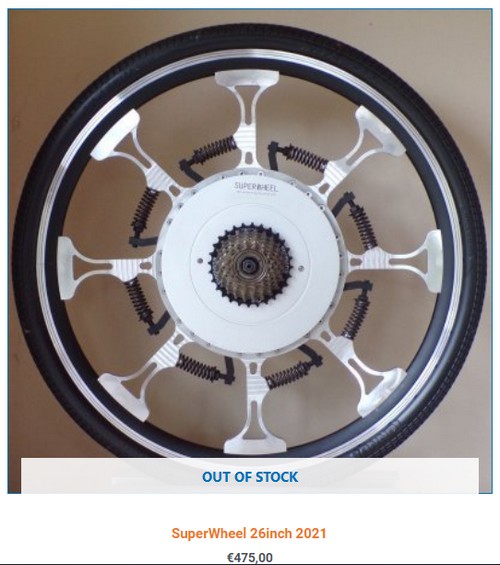
Another SuperWheel, the Comet, that is available for 26 inch wheel bikes, but the whole spring-powered tech apparently needs more testing, even though many people are buying these...
The Copenhagen all-in-one wheel, developed at MIT, now discontinued...
With such a limited selection, and with the additional issue of needing a lot more solar power and extra batteries to make these wheels a practical solution, I think I'm done with ebikes in general for my needs; I'd be better off getting a gas moped or motorized bike to haul my trailer. I think that's worth looking into...
=============================================Meanwhile, I'm continuing the food quest, this time for breakfast items before going riding, whether it's a short day ride or a multi-day tour. I discovered that my assumption right off the bat of a bacon and eggs breakfast was a bad idea; such a heavy high-fat meal would make my body switch focus from my legs to my stomach. The same would apply to a high-fiber bowl of slow cooked oatmeal or a similiarly high-protein plate of steak and eggs. The research suggested a 200-300 calorie breakfast that will digest quickly, which translates to treating the first meal of the day like another road snacks pit stop...
The items that work for me are a couple bananas on the road or instant oatmeal at home, as well as a cup of low-fiber cereal and a half pint of shelf stable milk, or even pop tarts and a bottle of orange juice...

Examples of Ready To Drink coffee. This could work if I didn't want to deal with a cup of hot brew from a gas station Quik-E-Mart, but these things are $3 and up each, a little pricey for everyday. Image: idw.global...

Lunchables, a well balanced and excellent pick for a morning pit stop. My favorite is ham and swiss, but instead I'm going DIY with Ritz crackers, pepperoni slices and cheese cubes, cause the other crackers are much harder to chew...
Youtube channel for Bike Shop and Travel Vids 